Woodworker's Journal 101-Projects-for-Woodworkers, страница 225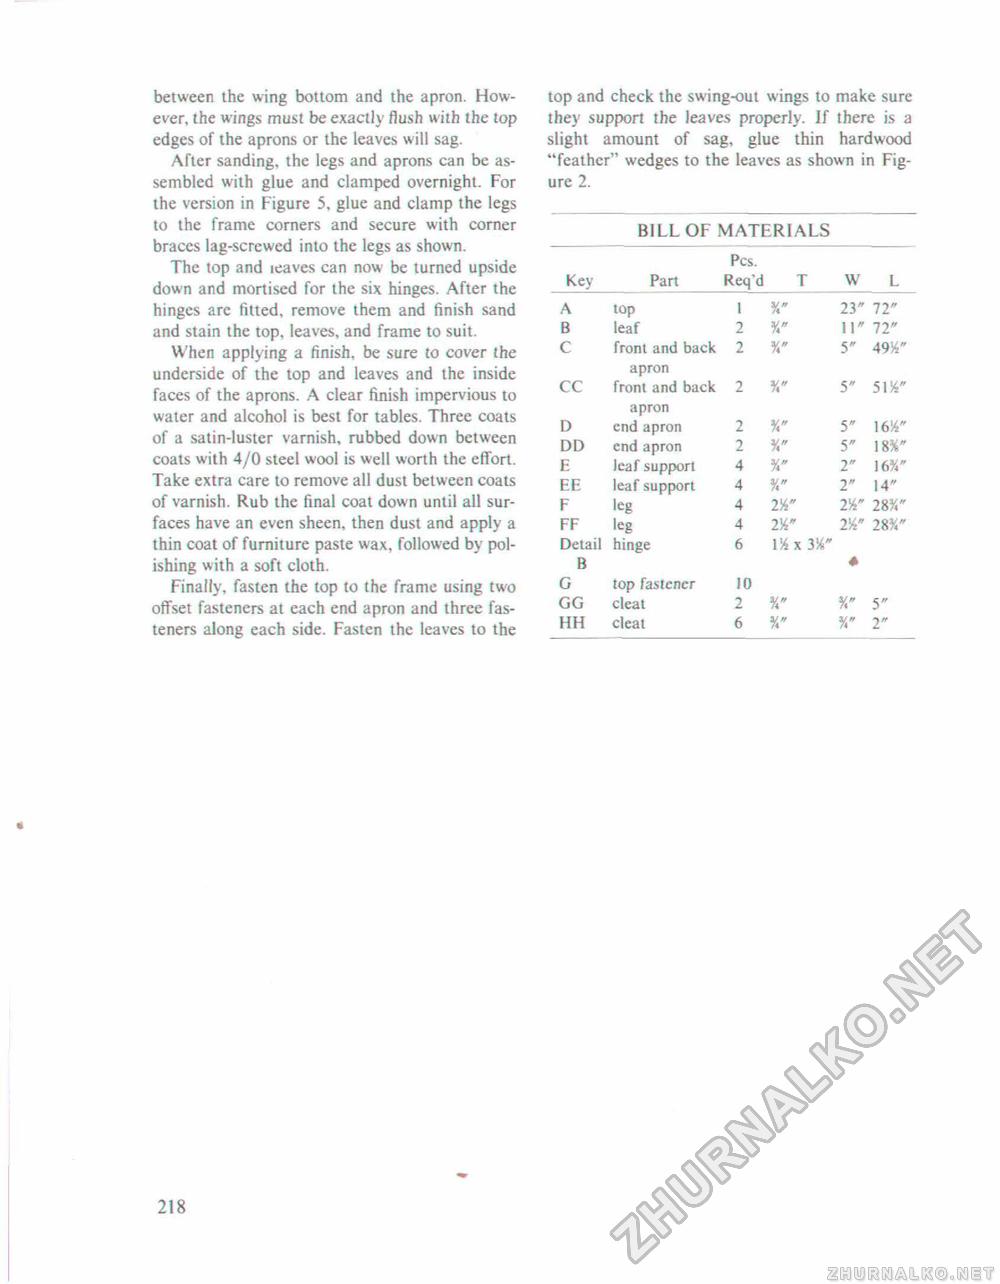
between the wing bottom and the apron. However, the wings must be exactly flush with the top edges of the aprons or the leaves will sag. After sanding, the legs and aprons can be assembled with glue and clamped overnight. For the version in Figure 5. glue and clamp the legs to the frame corners and secure with corner braces lag-screwed into the legs as shown. The top and leaves can now be turned upside down and mortised for the six hinges. After the hinges are fitted, remove them and finish sand and stain the top, leaves, and frame to suit. When applying a finish, be sure to cover the underside of the top and leaves and the inside faces of the aprons. A clear finish impervious to water and alcohol is best for tables. Three coats of a satin-luster varnish, rubbed down between coats with 4/0 steel wool is well worth the effort. Take extra care to remove all dust between coats of varnish. Rub the final coat down until all surfaces have an even sheen, then dust and apply a thin coat of furniture paste wax. followed by polishing with a soft cloth. Finally, fasten the top to the frame using two offset fasteners at each end apron and three fasteners along each side. Fasten the leaves to the top and check the swing-out wings to make sure they support the leaves properly. If there is a slight amount of sag, glue thin hardwood "feather" wedges to the leaves as shown in Figure 2. BILL OF MATERIALS Pes. BILL OF MATERIALS Pes.
218 |


