Woodworker's Journal 101-Projects-for-Woodworkers, страница 23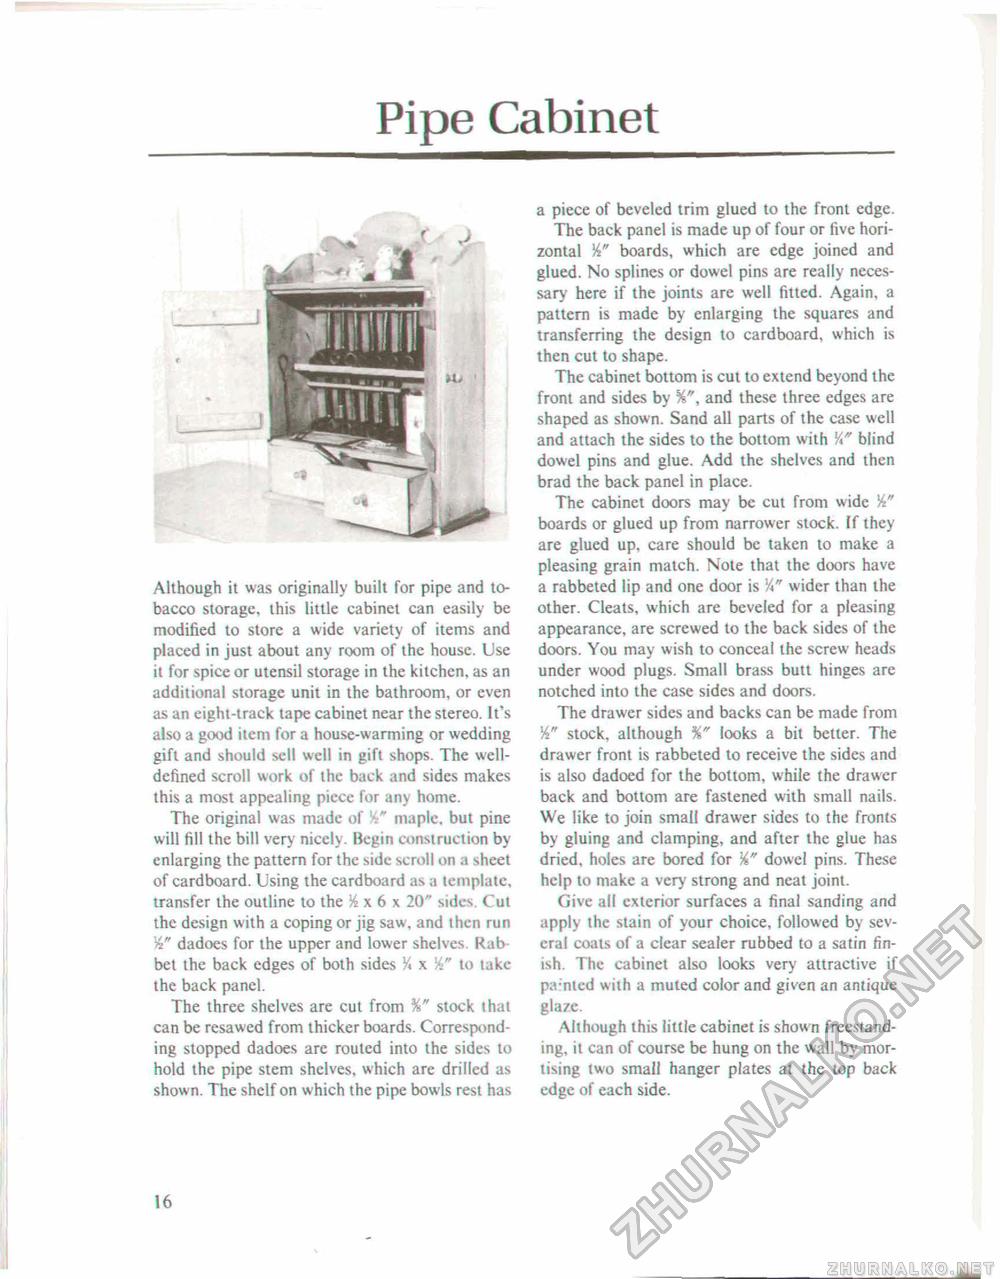
Pipe CabinetAlthough it was originally built for pipe and tobacco storage, this little cabinet can easily be modified to store a wide variety of items and placed in just about any room of the house. Use it for spice or utensil storage in the kitchen, as an additional storage unit in the bathroom, or even as an eight-track tape cabinet near the stereo. It's also a good item for a house-warming or wedding gift and should sell well in gift shops. The well-defined scroll work of the back and sides makes this a most appealing piece for any home. The original was made of maple, but pine will fill the bill very nicely. Begin construction by enlarging the pattern for the side scroll on a sheet of cardboard. Using the cardboard as a template, transfer the outline to the % x 6 x 20" sides. Cut the design with a coping or jig saw, and then run dadoes for the upper and lower shelves. Rab bet the back edges of both sides % x W to take the back panel. The three shelves are cut from %" stock t hat can be resawed from thicker boards. Corresponding stopped dadoes are routed into the sides to hold the pipe stem shelves, which are drilled as shown. The shelf on which the pipe bowls rest has a piece of beveled trim glued to the front edge. The back panel is made up of four or five horizontal Hi" boards, which are edge joined and glued. No splines or dowel pins are really necessary here if the joints are well fitted. Again, a pattern is made by enlarging the squares and transferring the design to cardboard, which is then cut to shape. The cabinet bottom is cut to extend beyond the front and sides by W, and these three edges are shaped as shown. Sand all parts of the case well and attach the sides to the bottom with YS blind dowel pins and glue. Add the shelves and then brad the back panel in place. The cabinet doors may be cut from wide boards or glued up from narrower stock. If they are glued up, care should be taken to make a pleasing grain match. Note that the doors have a rabbeted lip and one door is Y*" wider than the other. Cleats, which are beveled for a pleasing appearance, are screwed to the back sides of the doors. You may wish to conceal the screw heads under wood plugs. Small brass butt hinges are notched into the case sides and doors. The drawer sides and backs can be made from stock, although %" looks a bit better. The drawer front is rabbeted to receive the sides and is also dadoed for the bottom, while the drawer back and bottom are fastened with small nails. We like to join small drawer sides to the fronts by gluing and clamping, and after the glue has dried, holes are bored for dowel pins. These help to make a very strong and neat joint. Give ail exterior surfaces a final sanding and apply the stain of your choice, followed by several coats of a clear sealer rubbed to a satin finish. The cabinet also looks very attractive if pa-nted with a muted color and given an antique glaze. Although this little cabinet is shown freestanding, it can of course be hung on the wall by mortising two small hanger plates at the top back edge of each side. 16 |


