Woodworker's Journal 101-Projects-for-Woodworkers, страница 99
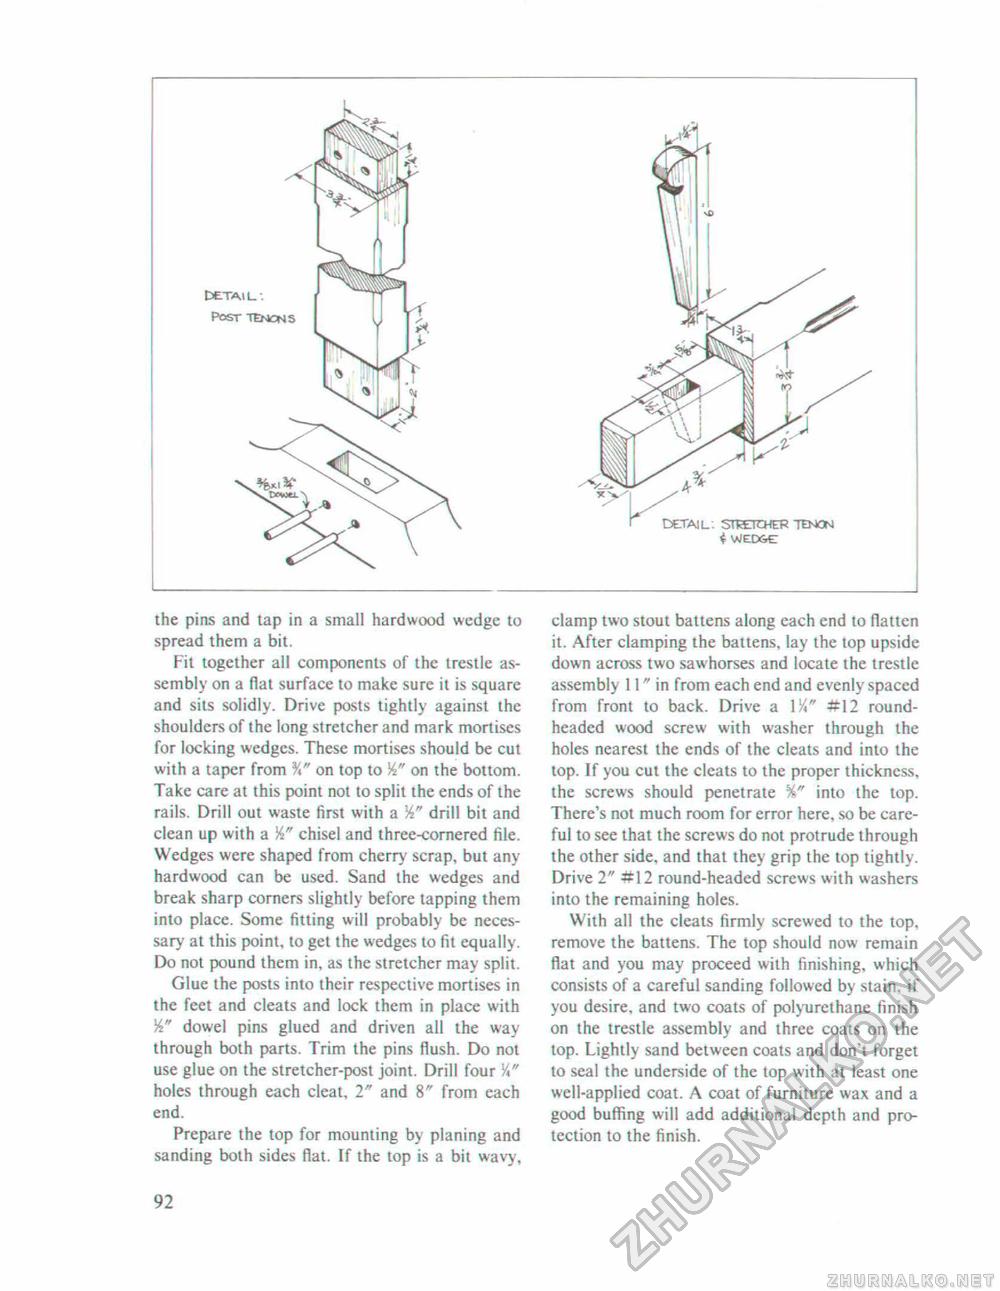
the pins and tap in a small hardwood wedge to spread them a bit. Fit together all components of the trestle assembly on a flat surface to make sure it is square and sits solidly. Drive posts tightly against the shoulders of the long stretcher and mark mortises for locking wedges. These mortises should be cut with a taper from on top to W on the bottom. Take care at this point not to split the ends of the rails. Drill out waste first with a W drill bit and clean up with a W chisel and three-cornered file. Wedges were shaped from cherry scrap, but any hardwood can be used. Sand the wedges and break sharp corners slightly before lapping them into place. Some fitting will probably be necessary at this point, to get the wedges to fit equally. Do not pound them in, as the stretcher may split. Glue the posts into their respective mortises in the feet and cleats and lock them in place with dowel pins glued and driven all the way through both parts. Trim ihe pins flush. Do not use glue on the stretcher-post joint. Drill four X" holes through each cleat, T and 8" from each end. Prepare the top for mounting by planing and sanding both sides flat. If the top is a bit wavy. clamp two stout battens along each end to flatten it. After clamping the battens, lay the top upside down across two saw horses and locate the trestle assembly 11" in from each end and evenly spaced from front to back. Drive a #12 round-headed wood screw with washer through the holes nearest the ends of the cleats and into the top. If you cut the cleats to the proper thickness, the screws should penetrate %" into the top. There's not much room for error here, so be careful to see that the screws do not protrude through the other side, and that they grip the top tightly. Drive 2" #12 round-headed screws with washers into the remaining holes. With all the cleats firmly screwed to the top. remove the battens. The top should now remain flat and you may proceed with finishing, which consists of a careful sanding followed by stain, if you desire, and two coats of polyurethane finish on the trestle assembly and three coats on the lop. Lightly sand between coats and don't forget to seal the underside of the top with at least one well-applied coat. A coat of furniture wax and a good buffing will add additional depth and protection to the finish. 92 |


