Woodworker's Journal 1981-5-6, страница 29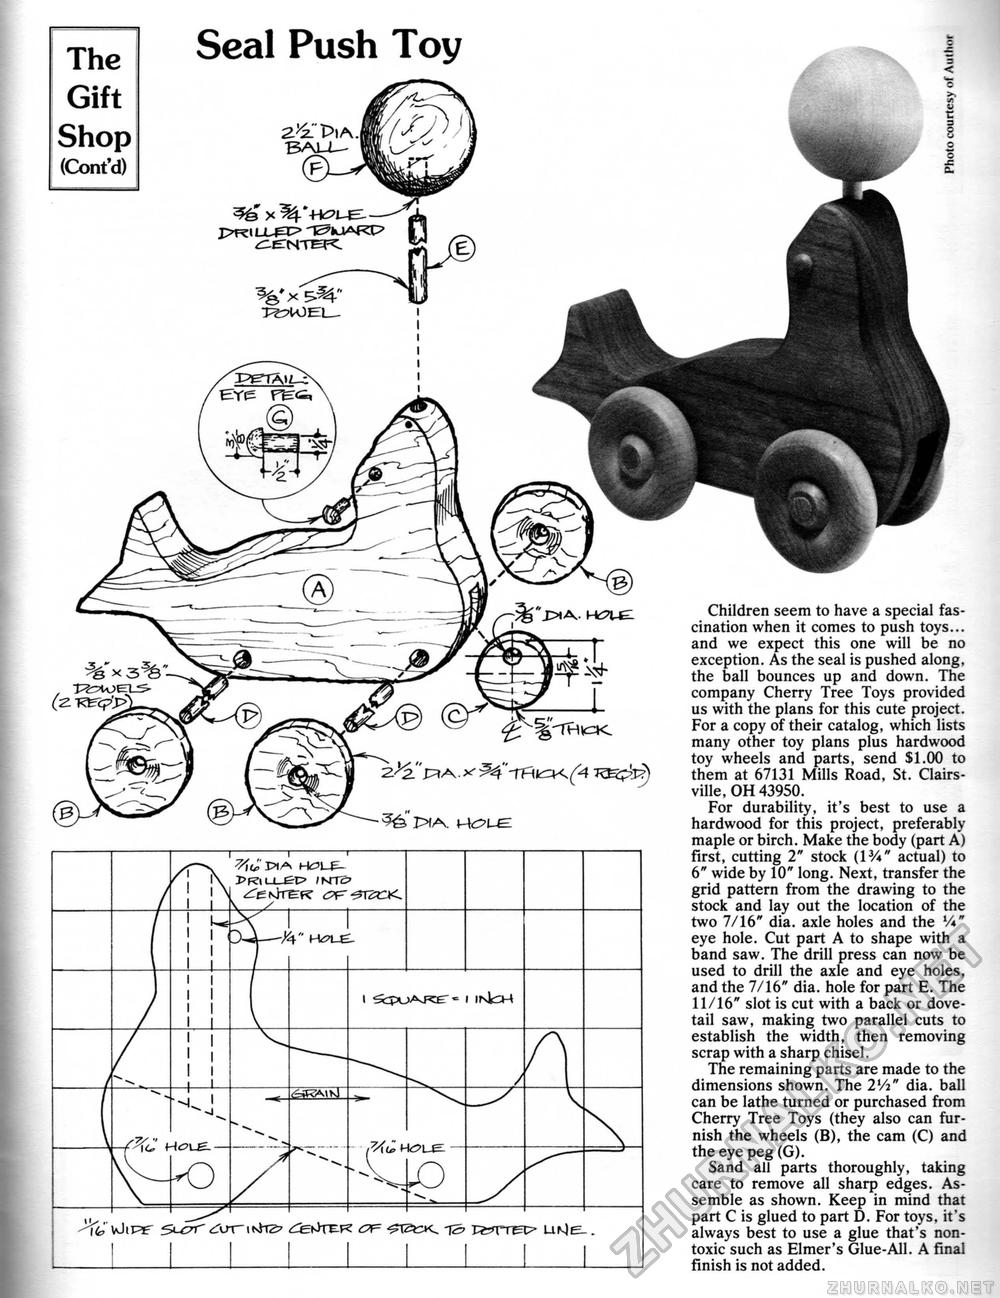
The Gift Shop (Cont'd) Children seem to have a special fascination when it comes to push toys... and we expect this one will be no exception. As the seal is pushed along, the ball bounces up and down. The company Cherry Tree Toys provided us with the plans for this cute project. For a copy of their catalog, which lists many other toy plans plus hardwood toy wheels and parts, send $1.00 to them at 67131 Mills Road, St. Clairs-ville, OH 43950. For durability, it's best to use a hardwood for this project, preferably maple or birch. Make the body (part A) first, cutting 2" stock (13/i " actual) to 6" wide by 10" long. Next, transfer the grid pattern from the drawing to the stock and lay out the location of the two 7/16" dia. axle holes and the Vi" eye hole. Cut part A to shape with a band saw. The drill press can now be used to drill the axle and eye holes, and the 7/16" dia. hole for part E. The 11/16" slot is cut with a back or dovetail saw, making two parallel cuts to establish the width, then removing scrap with a sharp chisel. The remaining parts are made to the dimensions shown. The 2Vi" dia. ball can be lathe turned or purchased from Cherry Tree Toys (they also can furnish the wheels (B), the cam (C) and the eye peg (G). Sand all parts thoroughly, taking care to remove all sharp edges. Assemble as shown. Keep in mind that part C is glued to part D. For toys, it's always best to use a glue that's nontoxic such as Elmer's Glue-All. A final finish is not added. THICK. Seal Push Toy |


