Woodworker's Journal 1983-7-1, страница 48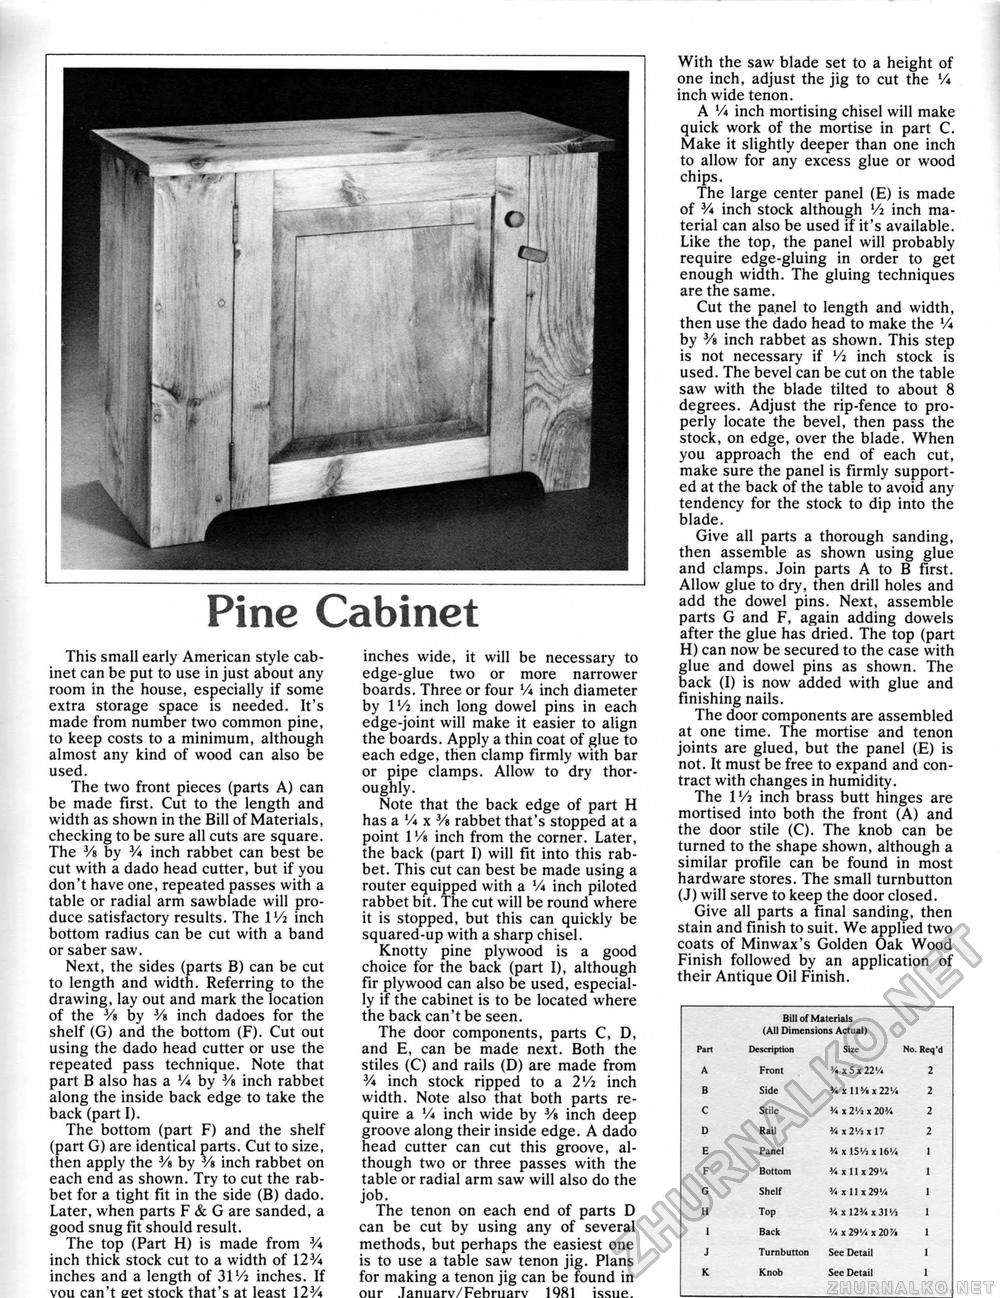
Pine Cabinet This small early American style cabinet can be put to use in just about any room in the house, especially if some extra storage space is needed. It's made from number two common pine, to keep costs to a minimum, although almost any kind of wood can also be used. The two front pieces (parts A) can be made first. Cut to the length and width as shown in the Bill of Materials, checking to be sure all cuts are square. The Vs by V* inch rabbet can best be cut with a dado head cutter, but if you don't have one, repeated passes with a table or radial arm sawblade will produce satisfactory results. The IV2 inch bottom radius can be cut with a band or saber saw. Next, the sides (parts B) can be cut to length and width. Referring to the drawing, lay out and mark the location of the Vs by Vs inch dadoes for the shelf (G) and the bottom (F). Cut out using the dado head cutter or use the repeated pass technique. Note that part B also has a V« by Vs inch rabbet along the inside back edge to take the back (part I). The bottom (part F) and the shelf (part G) are identical parts. Cut to size, then apply the Vs by Vs inch rabbet on each end as shown. Try to cut the rabbet for a tight fit in the side (B) dado. Later, when parts F & G are sanded, a good snug fit should result. The top (Part H) is made from V* inch thick stock cut to a width of 12V« inches and a length of 31 Vi inches. If vou can't set stock that's at least 12V* inches wide, it will be necessary to edge-glue two or more narrower boards. Three or four Vi inch diameter by IV2 inch long dowel pins in each edge-joint will make it easier to align the boards. Apply a thin coat of glue to each edge, then clamp firmly with bar or pipe clamps. Allow to dry thoroughly. Note that the back edge of part H has a Vi x Vs rabbet that's stopped at a point lVs inch from the corner. Later, the back (part I) will fit into this rabbet. This cut can best be made using a router equipped with a Vi inch piloted rabbet bit. The cut will be round where it is stopped, but this can quickly be squared-up with a sharp chisel. Knotty pine plywood is a good choice for the back (part I), although fir plywood can also be used, especially if the cabinet is to be located where the back can't be seen. The door components, parts C, D, and E, can be made next. Both the stiles (C) and rails (D) are made from V* inch stock ripped to a 2Vi inch width. Note also that both parts require a V* inch wide by Vs inch deep groove along their inside edge. A dado head cutter can cut this groove, although two or three passes with the table or radial arm saw will also do the job. The tenon on each end of parts D can be cut by using any of several methods, but perhaps the easiest one is to use a table saw tenon jig. Plans for making a tenon jig can be found in our Januarv/Februarv 1981 issue. With the saw blade set to a height of one inch, adjust the jig to cut the V* inch wide tenon. A Vi inch mortising chisel will make quick work of the mortise in part C. Make it slightly deeper than one inch to allow for any excess glue or wood chips. The large center panel (E) is made of V* inch stock although Vi inch material can also be used if it's available. Like the top, the panel will probably require edge-gluing in order to get enough width. The gluing techniques are the same. Cut the panel to length and width, then use the dado head to make the Vi by Vs inch rabbet as shown. This step is not necessary if Vi inch stock is used. The bevel can be cut on the table saw with the blade tilted to about 8 degrees. Adjust the rip-fence to properly locate the bevel, then pass the stock, on edge, over the blade. When you approach the end of each cut, make sure the panel is firmly supported at the back of the table to avoid any tendency for the stock to dip into the blade. Give all parts a thorough sanding, then assemble as shown using glue and clamps. Join parts A to B first. Allow glue to dry, then drill holes and add the dowel pins. Next, assemble parts G and F, again adding dowels after the glue has dried. The top (part H) can now be secured to the case with glue and dowel pins as shown. The back (I) is now added with glue and finishing nails. The door components are assembled at one time. The mortise and tenon joints are glued, but the panel (E) is not. It must be free to expand and contract with changes in humidity. The l'/j inch brass butt hinges are mortised into both the front (A) and the door stile (C). The knob can be turned to the shape shown, although a similar profile can be found in most hardware stores. The small turnbutton (J) will serve to keep the door closed. Give all parts a final sanding, then stain and finish to suit. We applied two coats of Minwax's Golden Oak Wood Finish followed by an application of their Antique Oil Finish. Bill of Materials (All Dimensions Actual) Bill of Materials (All Dimensions Actual)
|


