Woodworker's Journal 1983-7-5, страница 28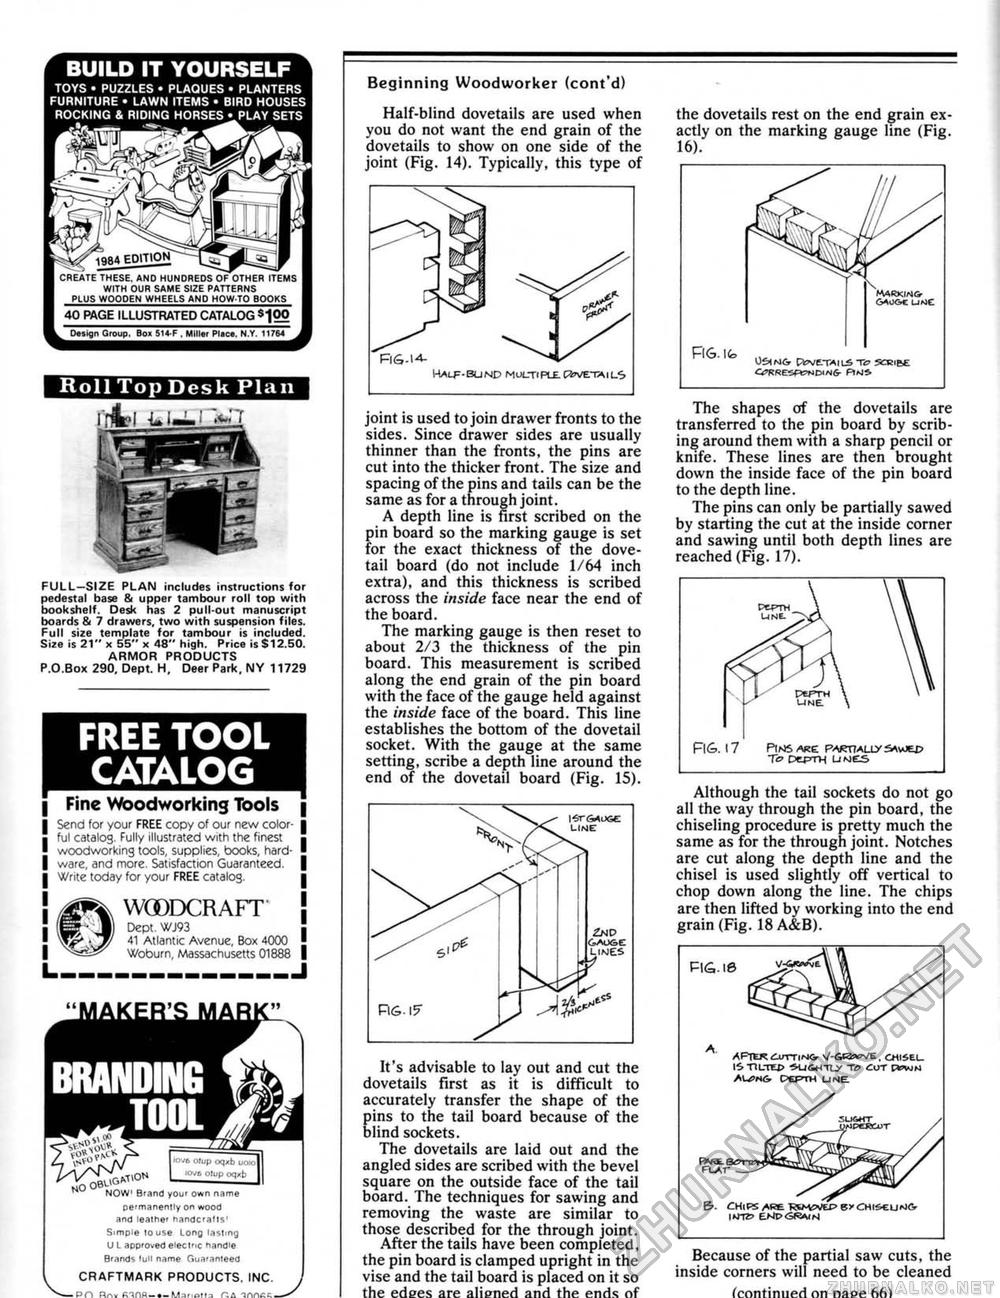
sX^ 1984 EDITION BUILD IT YOURSELF TOYS ■ PUZZLES • PLAQUES * PLANTERS FURNITURE • LAWN ITEMS • BIRD HOUSES ROCKING & RIDING HORSES • PLAY SETS | CREATE THESE. AND HUNDREDS OF OTHER ITEMS | WITH OUR SAME SIZE PATTERNS PLUS WOODEN WHEELS AND HOW-TO BOOKS 40 PAGE ILLUSTRATED CATALOG «-)00 Des.gn Group. Bo» 5H F. Miller Place. N.Y. I >764 Roll Top Desk Plan FULL—SIZE PLAN includes instructions for pedestal base & upper tambour roll top with bookshelf. Desk has 2 pull-out manuscript boards & 7 drawers, two with suspension files. Full size template for tambour is included. Size is 21" x 55" * 48" high. Price is S 12,50. ARMOR PRODUCTS P.O.Box 290, Dept. H, Deer Park, NY 11729 FREE TOOL CATALOG Fine Woodworking Tools Send for your FREE copy of our new colorful catalog. Fully illustrated with the finest woodworking tools, supplies, books, hardware, and more. Satisfaction Guaranteed. Write today for your FREE catalog. WOODCRAFT Dept- WJ93 41 Atlantic Avenue, Box 4000 Woburn, Massachusetts 01888 NOW' B^and you* Own name permanently on wood and leather handcratls' Simple to use Long lasting U L approved eieclnc handle Brands full name Guaranteed CRAFTMARK PRODUCTS, INC. -PO Rrw fiinfl-*-M ir firua lAfkA \J Beginning Woodworker (cont'd) Half-blind dovetails are used when you do not want the end grain of the dovetails to show on one side of the joint (Fig. 14). Typically, this type of joint is used to join drawer fronts to the sides. Since drawer sides are usually thinner than the fronts, the pins are cut into the thicker front. The size and spacing of the pins and tails can be the same as for a through joint. A depth line is first scribed on the pin board so the marking gauge is set for the exact thickness of the dovetail board (do not include 1/64 inch extra), and this thickness is scribed across the inside face near the end of the board. The marking gauge is then reset to about 2/3 the thickness of the pin board. This measurement is scribed along the end grain of the pin board with the face of the gauge held against the inside face of the board. This line establishes the bottom of the dovetail socket. With the gauge at the same setting, scribe a depth line around the end of the dovetail board (Fig. 15). It's advisable to lay out and cut the dovetails first as it is difficult to accurately transfer the shape of the pins to the tail board because of the blind sockets. The dovetails are laid out and the angled sides are scribed with the bevel square on the outside face of the tail board. The techniques for sawing and removing the waste are similar to those described for the through joint. After the tails have been completed, the pin board is clamped upright in the vise and the tail board is placed on it so the edees are aliened and the ends of the dovetails rest on the end grain exactly on the marking gauge line (Fig. 16). RG. lt» (J^u&c LjMC 0SHN& pevtTAILS TO SCBlCE CtftRE-SnTTJtPIM* The shapes of the dovetails are transferred to the pin board by scribing around them with a sharp pencil or knife. These lines are then brought down the inside face of the pin board to the depth line. The pins can only be partially sawed by starting the cut at the inside corner and sawing until both depth lines are reached (Fig. 17). FI6.17 PlI^ARE PARTIALLY SAV^D Tb Deprr>| LINES Although the tail sockets do not go all the way through the pin board, the chiseling procedure is pretty much the same as for the through joint. Notches are cut along the depth line and the chisel is used slightly off vertical to chop down along the line. The chips are then lifted by working into the end grain (Fig. 18 A&B). Because of the partial saw cuts, the inside corners will need to be cleaned (continued on nape 66t R6.I4- Malf-bu nd multiple. FIG. 18 AFTER iiTTiMG- \f-scawe, CHISEL TtL"TO> ^OITLy TO CUT IWUN CEPTM UrvtE. & CHIPS ARE Rl^WEP 8>'CHI&EUM& IMTtJ EMP<3R*IN |


