Woodworker's Journal 1985-9-4, страница 37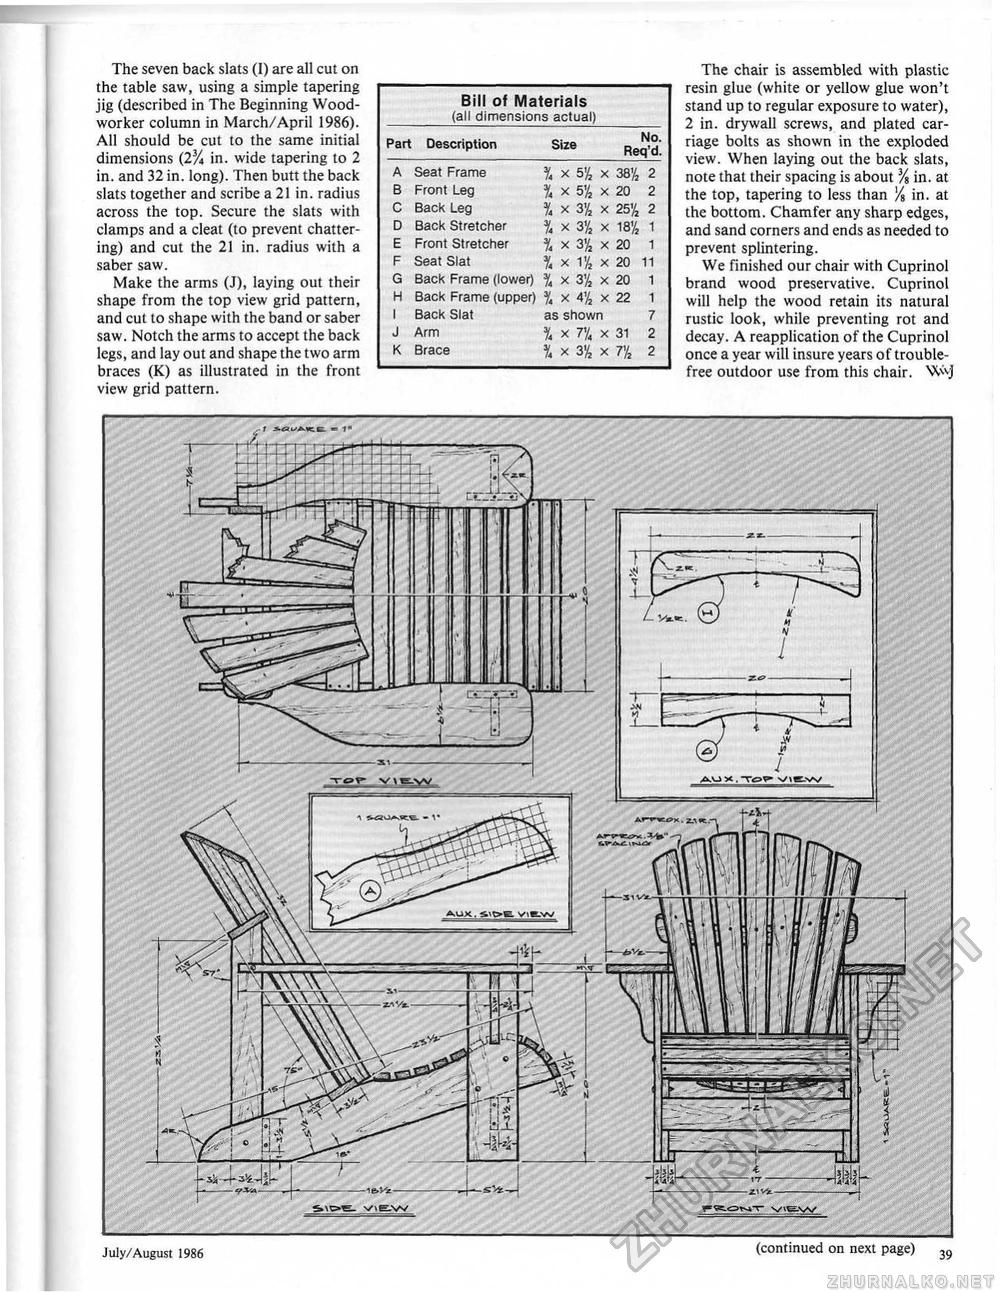
The seven back slats (I) are all cut on the table saw, using a simple tapering jig (described in The Beginning Woodworker column in March/April 1986). All should be cut to the same initial dimensions (2% in. wide tapering to 2 in. and 32 in. long). Then butt the back slats together and scribe a 21 in. radius across the top. Secure the slats with clamps and a cleat (to prevent chattering) and cut the 21 in. radius with a saber saw. Make the arms (J), laying out their shape from the top view grid pattern, and cut to shape with the band or saber saw. Notch the arms to accept the back legs, and lay out and shape the two arm braces (K) as illustrated in the front view grid pattern. Bit! of Materials (all dimensions actual) Part Description Size Part Description Size
The chair is assembled with plastic resin glue (white or yellow glue won't stand up to regular exposure to water), 2 in. drywall screws, and plated carriage bolts as shown in the exploded view. When laying out the back slats, note that their spacing is about % in. at the top, tapering to less than % in. at the bottom. Chamfer any sharp edges, and sand corners and ends as needed to prevent splintering. We finished our chair with Cuprinol brand wood preservative. Cuprinol will help the wood retain its natural rustic look, while preventing rot and decay. A reapplication of the Cuprinol once a year will insure years of trouble-free outdoor use from this chair. W-j - — Sl. - .......- ^IPt. VVE.W rg.onT vre-w V July/August 1986 (continued on next page) |
||||||||||||||||||||||||||||||||||||||||||||


