Woodworker's Journal 1993-17-1, страница 20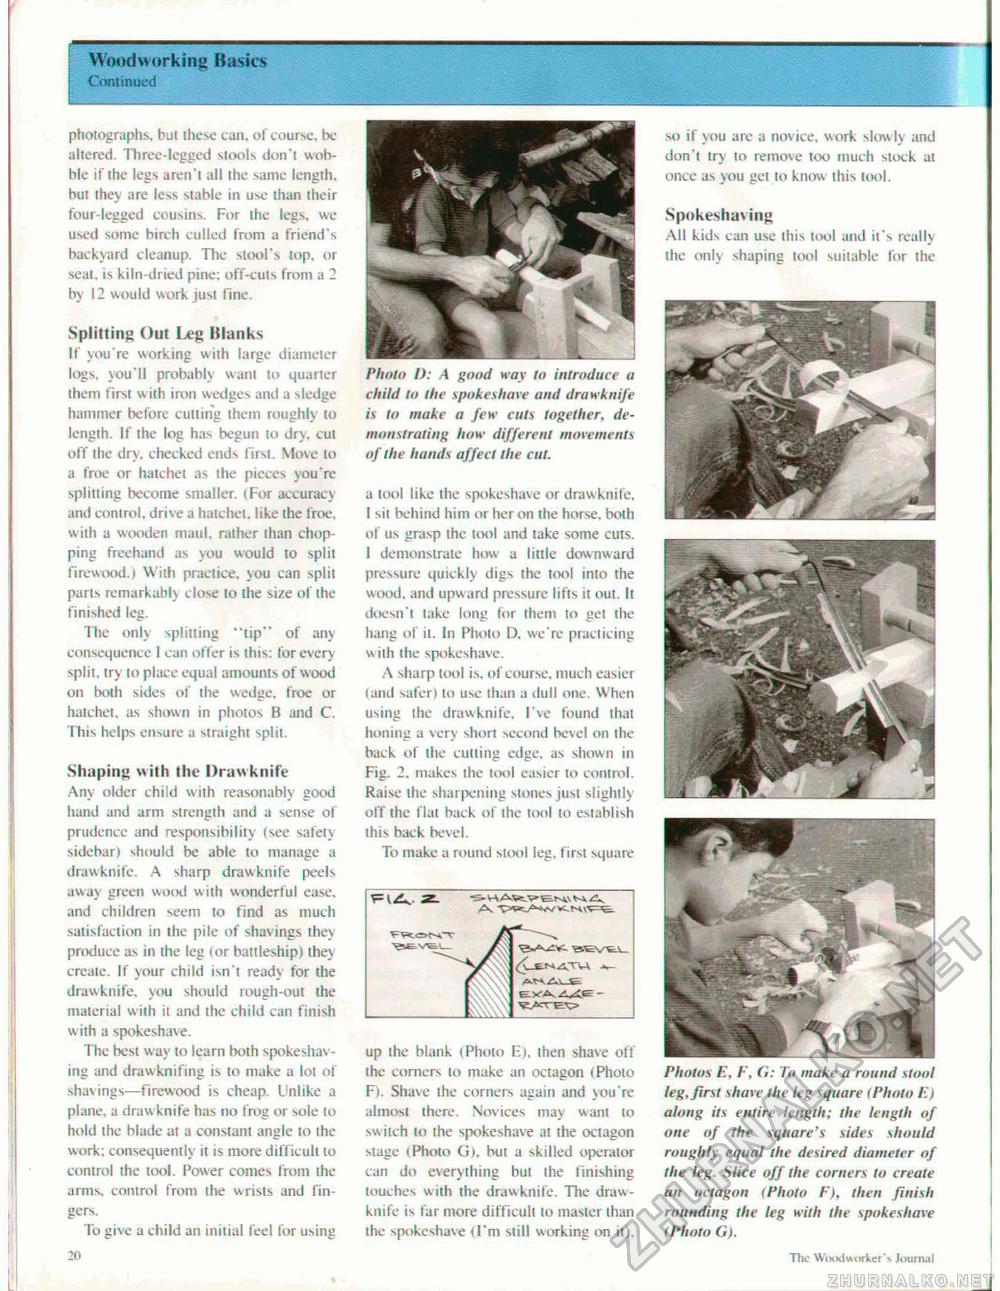
Woodworking Basics Continued photographs, but these can. of course, be altered. Three-legged sioois don't wobble if the legs aren't all the same length, hut they are less stable in use than their four-legged cousins. For the legs, we used some birch culled from a friend's backyard cleanup. The stool's top, or seat, is kiln-dried pine: off-cuts from a 2 by 12 would work just fine. Splitting Out Leg Blanks If you're working with large diameter logs, you'll probably want to quarter them first w ith iron wedges and a fledge hammer before cutting them roughly lo length. If the log has begun to dry. cut off ihe dry. checked ends lirsl. Move lo a free or hatchet as the pieces you re splitting become smaller. (For accuracy and control, drive a hatchet, like the froe, w ith a wooden maui, rather lhan chopping freehand as you would to split firewood.) With practice, you can split parts remarkably close to the size of the finished leg. The only splitting "tip" of any consequence 1 can offer is this: for every split, try lit place equal amounts of wood on both sides of the wedge, froe or haichet, as shown in photos B and C. This helps ensure a straight split. Shaping with the Drawknife Any older child with reasonably good hand and arm strength and a sense of prudence and responsibility (see safety sidebar) should be able to manage a drawknife. A sharp drawknife peels awav green wood with wonderful ease, and children seem to find as much satisfaction in the pile of shavings they produce as in the leg (or battleship) they create. If your child isn't ready tor the drawknife. you should rough-out the material with it and the child can finish w ith a spokeshave. The best way to learn both spoke shaving and drawknifing is to make a lot of shavings—firewood is cheap. Unlike a plane, a draw knife has no frog or sole lo hold the blade at a constant angle to ihe work: consequently il is more difficult to control the tool. Power conies from the arms, control from the wrisis and fingers. To give a child an initial feel for using 20 Photo I): ,4 goad way to introduce a child In the spokeshave and drawknife is to make a few cuts together, demonstrating how different movements of the hands affect the cut. a tool like the spokeshave or drawknife, I sii behind him or her on ihe horse, both of us grasp the tool and take some curs. I demonstrate how a little downward pressure quickly digs the tool into the wood, and upw ard pressure lifts it out. It doesn'i take long for them to gel the hang of il. In Photo D. we're practicing with the spokeshave. A sharp lool is, of course, much easier land safer) to use than a dull one. When using ihe drawknife, I've found that honing a very short second bevel on the back of the cutting edge, as shown in Fig. 2. makes the tool easier to control. Raise the sharpening stones just slightly off the flat back of ihe tool to establish this back bevel. To make around stool leg. first square
up the blank (Photo E). then shave off ihe corners to make an octagon (Photo F). Shave ihe corners again and you're almost there. Novices may want to switch to ihe spokeshave at the octagon stage (Photo G), but a skilled operator can do everything bul ihe finishing touches with the drawknife. The drawknife is far more difficult to master lhan the spokeshave (I'm still working on it). so if you are a novice, work slow ly and don't try to remove too much slock al oncc as you gel to know this tool. Spokeshav ing All kids can use this tool and it's really the only shaping tool suitable for the Photos E, /•', G: Tr> make a round stool leg, first shave the leg square (Photo E) along its entire length; the length of one of the square's sides should roughly equal the desired diameter of the leg. Slice off the corners lo create an octagon (Photo F), then finish rounding the leg with the spokeshave (Photo G). The Woodworker's Journal |
|||||||||||||||||||||||


