Woodworker's Journal 1993-17-1, страница 41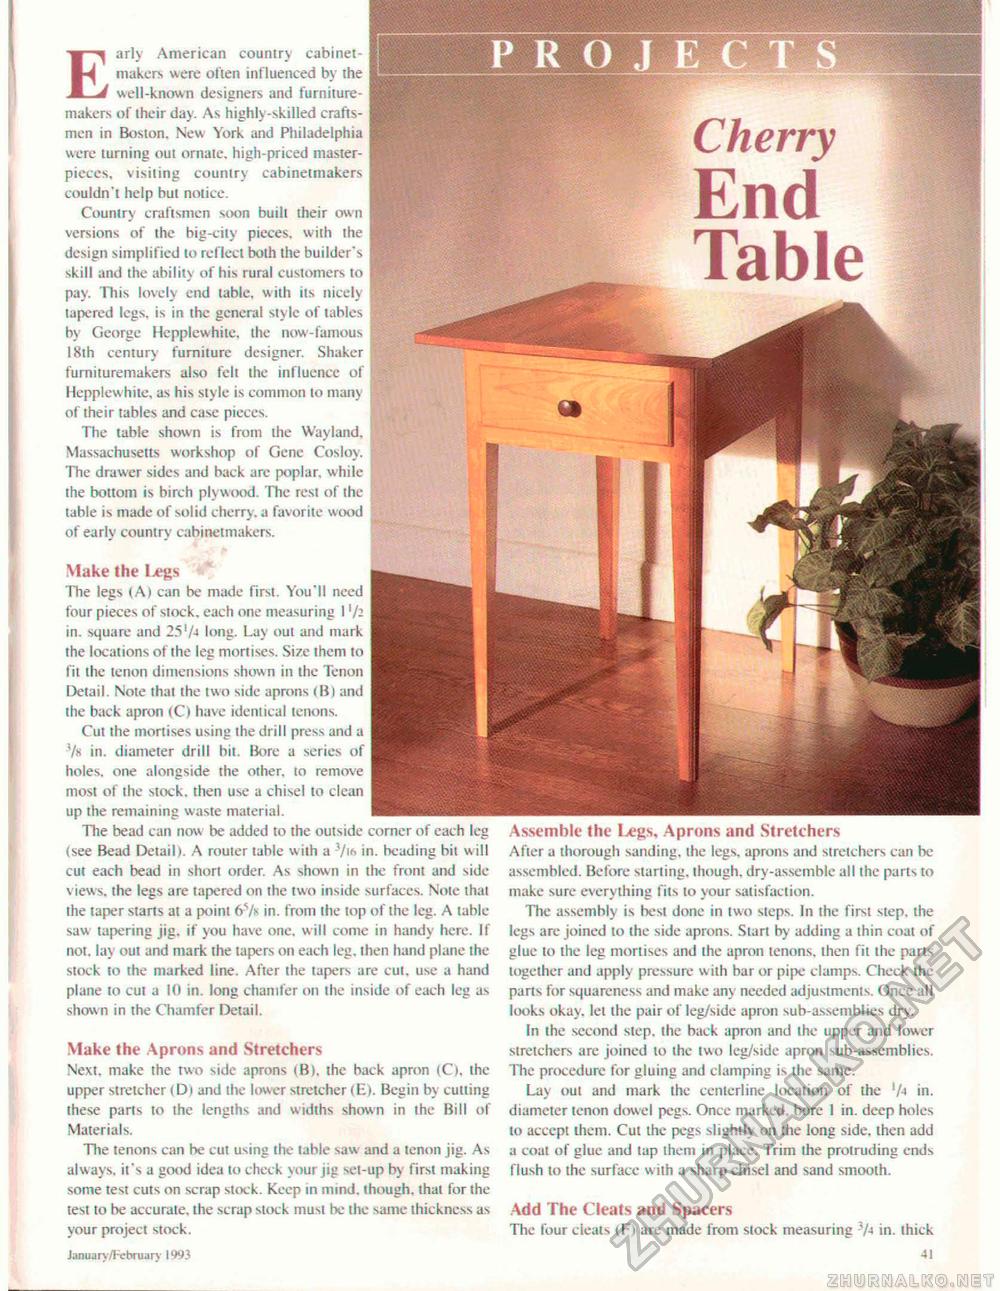
Early American country cabinetmakers were often influenced by the well-known designers and furniture-makers of their day. As highly-skilled craftsmen in Boston. New York and Philadelphia were turning out ornate, high-priced masterpieces, visiting country cabinetmakers couldn't help bul notice. Country craftsmen soon built their own versions of the big-city pieces, with the design simplified lo reflect both the builder's skill and the ability of his rural customers to pay. This lovely end table, with its nicely tapered legs, is in the general style of tables by George Hepplewhite. the now-lamous 18th century furniture designer. Shaker furniture makers also fell the influence of Hepplewhite, as his style is common to many of their tables and ease pieces. The table shown is from the Way land. Massachusetts workshop of Gene Cosloy. The drawer sides and back are poplar, while ihe bottom is birch plywood. The resl of the table is made of solid cherry, a favorite wood of early country cabinetmakers. Assemble the Legs, Aprons and Stretchers After a thorough sanding, the legs, aprons and stretchers can be assembled. Before starting, though, dry-assemhle all the parts to make sure everything fits to your satisfaction. The assembly is best done in two steps. In the first step, the legs are joined lo the side aprons. Start by adding a thin coat of glue to the leg mortises and (he apron tenons, then fit the parts together and apply pressure with bar or pipe clamps. Check the parts for squareness and make am needed adjustments. Once all looks okay, let the pair of leg/side apron sub-assemblies dry. In the second slep. the back apron and the upper and lower stretchers are joined 10 ihe two leg/side apron sub-assemblies. The procedure for gluing and damping is the same. Lay out and mark ihe centerline location of the 'A in. diameter lenon dowel pegs. Once marked, bore 1 in. deep holes to accept them. Cut the pegs slightly on ihe long side, then add a coat of glue and tap them in place. Trim the protruding ends flush to ihe surface with a sharp chisel and sand smooth. Add The Cleats and Spacers The four cleats (F) are made from stock measuring in. thick Make the l^gs The legs (A) can be made first. You'll need four pieces of slock, each one measuring I in. square and 25'A long. Lay out and mark ihe locations of ihe leg mortises. Size them to fit ihe lenon dimensions shown in ihe Tenon Detail. Note that the two side aprons (B) and ihe back apron <C) have identical tenons. Cut the mortises using the drill press and a 7k in, diameter drill bit. Bore a series of holes, one alongside the other, to remove most of the stock, then use a chisel to clean up the remaining waste material. The bead can now be added to the outside comer of each leg (see Bead Detail). A router table with a -'/is in. beading bit \\ ill cut each bead in short order. As shown in the front and side views, the legs are tapered on the two inside surfaces. Note that the taper starts at a point 6Vs in. from the top of the leg. A table saw tapering jig. if you have one. will come in handy here. If not. lay out and mark the tapers on each leg. then hand plane the stock to the marked line. After the tapers are cut. use a hand plane to cut a 10 in. long chamfer on the inside of each leg as shown in the Chamfer Detail. Make the Aprons and Stretchers Next, make the two side aprons iBl. the back apron |C), the upper stretcher (Di and ihe lower stretcher (E). Begin by cutting these parts to the lengths and widths shown in the Bill of Materials. The tenons can be cut using the table saw and a tenon jig. As always, it's a good idea lo check your jig sel-up by first making some test cuts on scrap stock. Keep in mind, ihough. that for the test to be accurate, the scrap stock must be the same thickness as your project stock. Jattuarv/Febniurv 1993 41 |


