Woodworker's Journal 1993-17-3, страница 43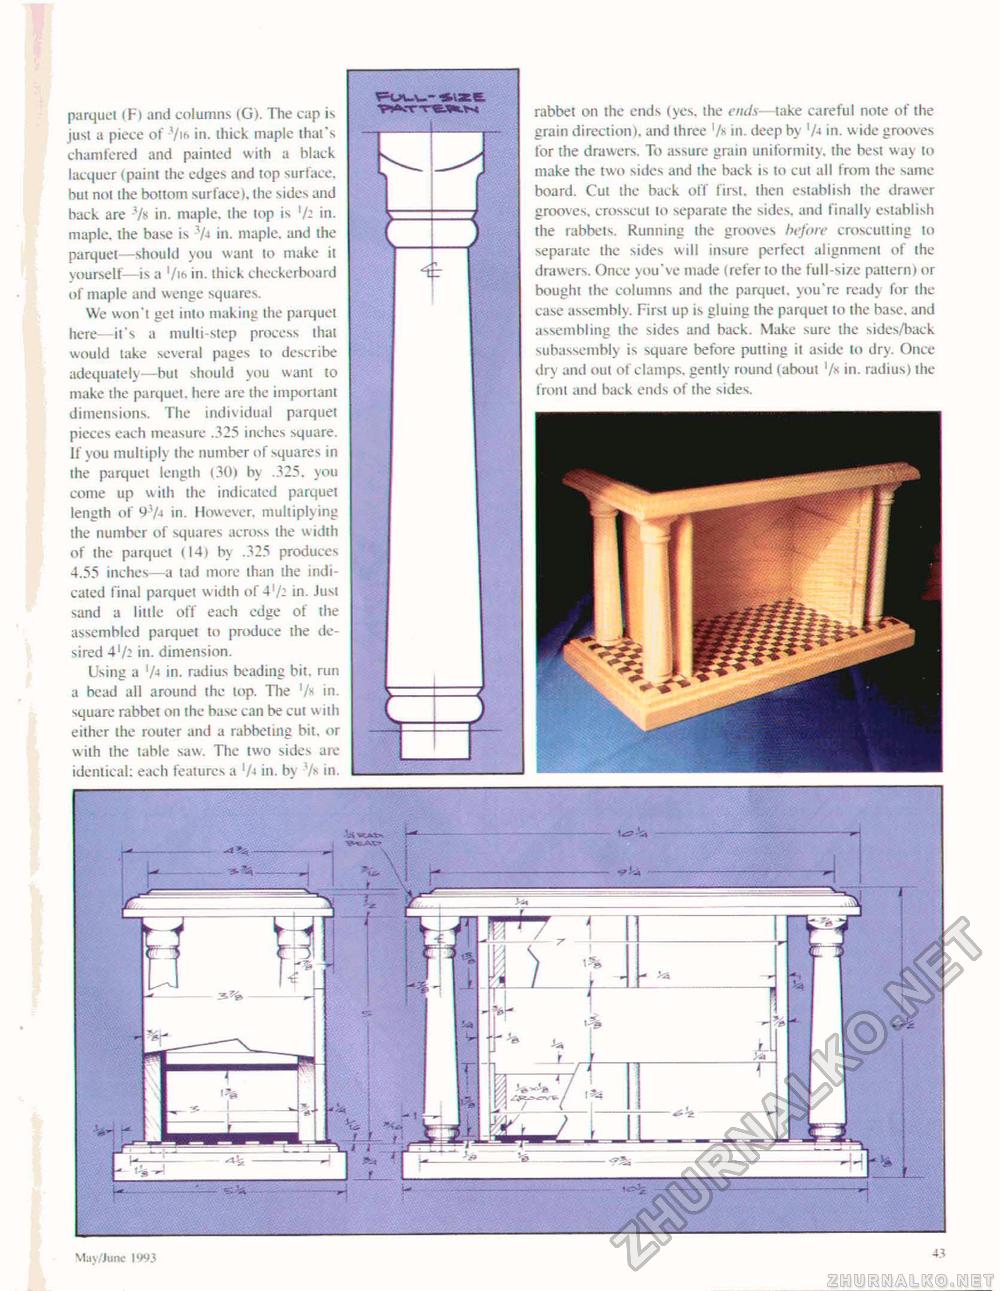
parquel (F) and columns (G). The cap is jusi a piece of 7if> in- thick maple that's chamfered and painted with a black lacquer (paint the edges and top surface, but not the bottom surface I. the sides and back are -7s in. maple, the top is 7- in. maple, the base is V» in. maple, and the parquet—should you want lo make it yourself- is a '/i<i in. thick checkerboard of maple and wenge squares. We won't get into making the parquel here—it's a multi-step process that would take several pages to describe adequately—but should you want to make the parquet, here are the important dimensions. The individual parquet pieces each measure .325 inches square. If you multiply the number of squares in the parquet length (30) by .325. you come up with the indicated parquel length of y'yj in. However, multiplying the number of squares across the w idth of the parquet (14) by .325 produces I 4.55 inches—a lad more than the indicated final parquet width of 472 in. Just sand a little off each edge of the assembled parquet to produce ihe desired 472 in. dimension. Using a 74 in. radius beading bit. run a bead all around the lop. The '/« in. square rabbet on the base can be cut with either the router and a rabbeting bit. or wilh the table saw. The two sides are identical: each features a 7-t in. by 7* in. P^TTChN J rabbet on the ends (yes. the ends—take careful note of the grain direction), and three '/« in. deep by 'A in. wide grooves for the drawers. To assure grain uniformity, ihe best way to make the two sides and ihe back is lo cut all from the same board. Cut the back off first, then establish the drawer grooves, crosscut to separate the sides, and finally establish the rabbets. Running the grooves before croscutting to separate the sides will insure perfect alignment of the drawers. Once you've made (referto the full-size pattern) or bought ihe columns and the parquet, you're ready for the case assembly. First up is gluing the parquel to the base, and assembling the sides and back. Make sure the sides/back subassembly is square before putting it aside to dry. Once dry and out of clamps, gently round (about 7» in. radius) the front and back ends of the sides. May/June 1993 43 |


