Woodworker's Journal 1993-17-4, страница 30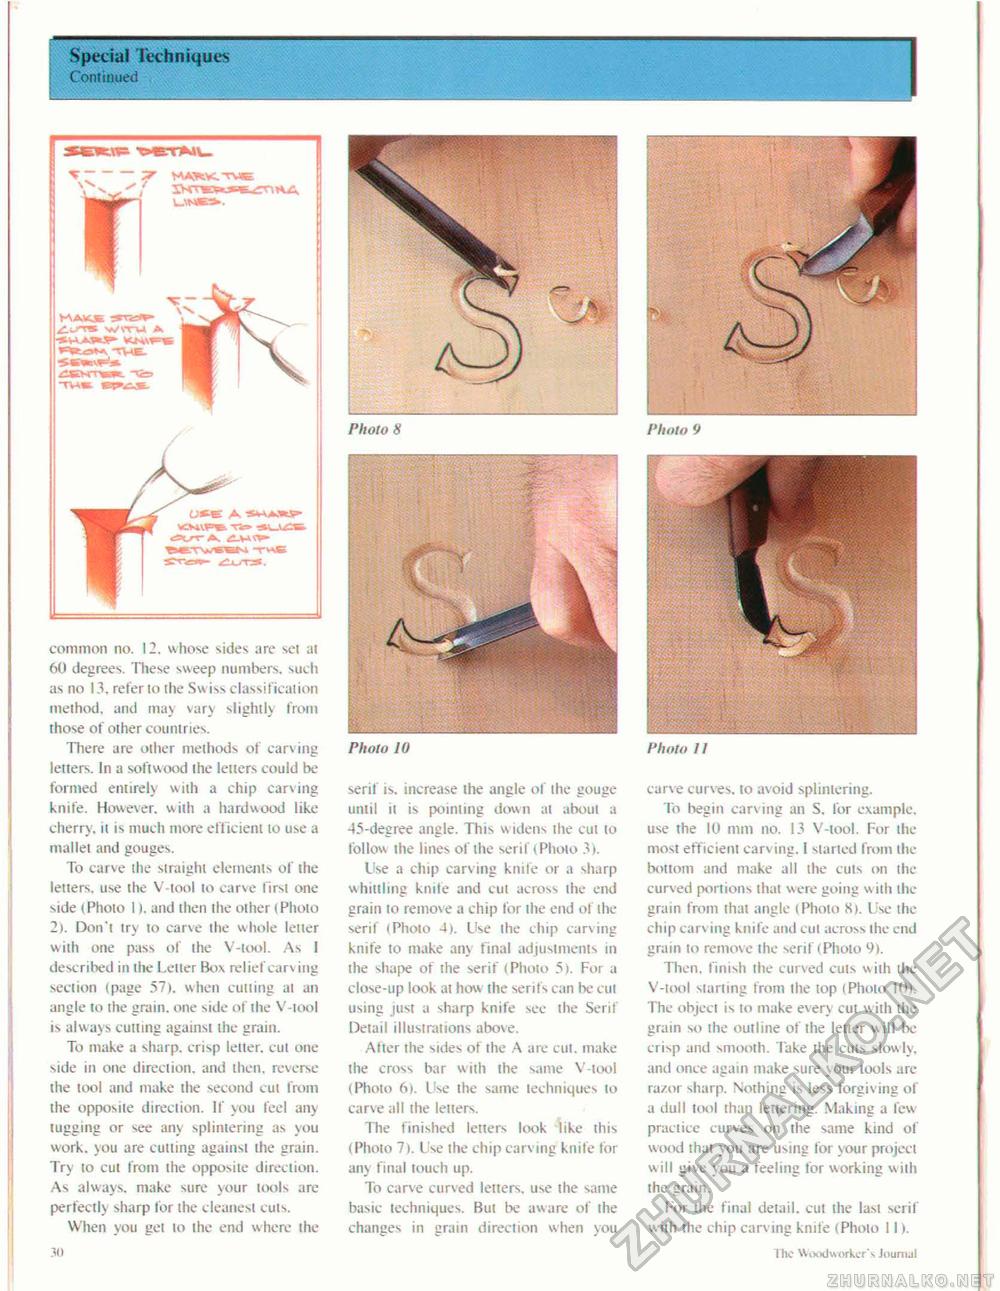
Special Techniques Continued T — ^ MAWttTWlE V" v ' / jiuTS v/VTTJ A the- "VUI •SOT A, WKTWBBM -Twje Photo 9 common no. ! 2. whose sides are set at 6U degrees. These sweep numbers, such as no 13, refer lo the Sw iss classification method, and may vary slightly from those of other countries. There are other methods of carving letters. In a softwood the letters could be formed entirely with a chip carving knife. However, with a hardwood like cherry, it is much more efficient to use a mallet and gouges. To carve the straight elements of the letters, use the V-tool to carve first one side (Photo 1). and then the other (Photo 2). Don't try to carve the whole letter with one pass of the V-tool. As 1 described in the Letter Bo\ relief carv ing section (page 57). when cutting at an angle to the grain, one side of the V-tool is always cutting against the grain. To make a sharp, crisp letter, cut one side in one direction, and then, reverse the tool and make the second cut from the opposite direction. If you feel any tugging or see any splintering as you work, you are cutting against the grain. Try to cut from the opposite direction. As always, make sure your tools are perfectly sharp for the cleanest cuts. When you get to the end where the t(l Photo 10 serif is. increase the angle of the gouge until it is pointing down at about a 45-degree angle. This widens the cut to follow the lines of the serif (Photo 3>. Use a chip carving knife or a sharp whittling knife and cut across the end grain to remove a chip for the end of the serif (Photo 4). Use the chip carving knife to make any final adjustments in the shape of the serif (Photo 5). For a close-up look at how the serifs can be cut using just a sharp knife see (he Serif Detail illustrations above. After the sides of the A are cut. make the cross bar with the same V-tool (Photo 6). Use the same techniques to carve all the letters. The finished letters look like this (Photo 7). Use the chip carv ing knife for any final touch up. To carve curved letters, use the same basic techniques. But be aware of the changes in grain direction when you Photo 11 carve curves, to avoid splintering. To begin carv ing an S. for example, use the 10 mm no. 13 V-tool. For the most efficient carving. I started from the bottom and make all the cuts on ihe curved portions that were going with the grain from that angle I Photo Si. Use the chip carving knife and col across the end grain lo remove the serif (Phoio 9). Then, finish the curved cuts with the V-tool starting from the top (Photo 10). The object is to make every cut with the grain so the outline of the letter w ill be crisp and smooth. Take the cuts slowly, and once again make sure your tools arc razor sharp. Nothing is less forgiving of a dull tool than lettering. Making a few practice carves on the same kind of wood that you are using for your project will give you a feeling for working with the grain. For the final detail, cut the last serif with the chip carving knife (Photo 11). The Woodworker's Journal |


