Woodworker's Journal 1994-18-2, страница 40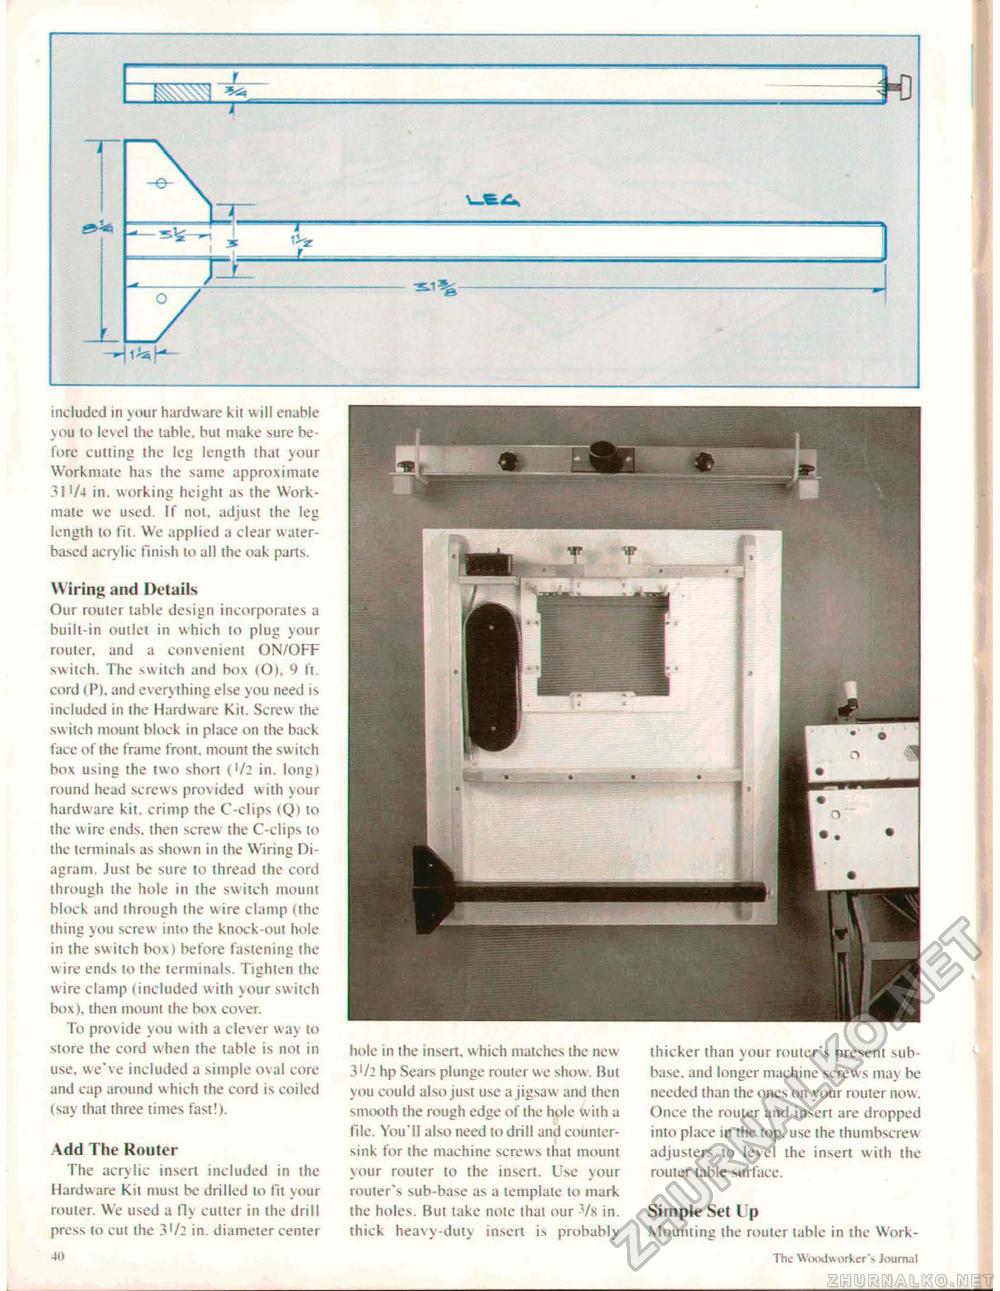
included in your hardware kil will enable you to level the tabic, but make sure before culling the leg length that your Workmate has the same approximate 311/4 in. working height as the Workmate we used. If not. adjust the leg length lo fit. We applied a clear water-ba-scd acrylic finish lo all the oak parts. Wiring and Details Our router table design incorporates a built-in ouilet in which 10 plug your router, and a convenient ON/OFF switch. The switch and box (O), 9 ft. cord (P), and everything else you need is included in the Hardware Kit, Screw the switch mount block in place on the back face of the frame front, mount the switch box using the two short ('/2 in. long) round head screws pro\ ided with your hardware kit. crimp the C-clips (Q) to the wire ends, then screw the C-clips lo the terminals as shown in the Wiring Diagram. Just be sure to thread the cord through the hole in the sw itch mount block and through the wire clamp (ihe thing you screw into the knock-out hole in the switch box) before fastening ihe wire ends to the terminals. Tighten the wire clamp (included with your switch box), then mount the box cover. To provide you with a clever way to More ihe cord when the table is not in use. we've included a simple oval core and cap around which the cord is coiled (say that three times fast!). Add The Router The acrylic insert included in the Hardware Kit must be drilled to fit your rouler. We used a fly cutter in the drill press to cut the 3'/: in. diameter center hole in the insert, w hich matches the new 3'/: hp Sears plunge rouler we show. But you could also just use a jigsaw and then smooth the rough edge of the hole w ith a file. You'll also need to drill and countersink for the machine screws that mount your router to the insert. Use your router's sub-base as a template to mark the holes. But take nolc that our Vx in. thick heavy-duty insert is probably thicker than your router's present sub-base. and longer machine screws may be needed than the ones on your router now. Once the router and insert are dropped into place in the lop. use the thumbscrew adjusters to level the insert with the router table surface. Simple Set Up Mounting the router table in the Work-Thi! Wixtdu orker'v Journal |


