Woodworker's Journal 1994-18-3, страница 31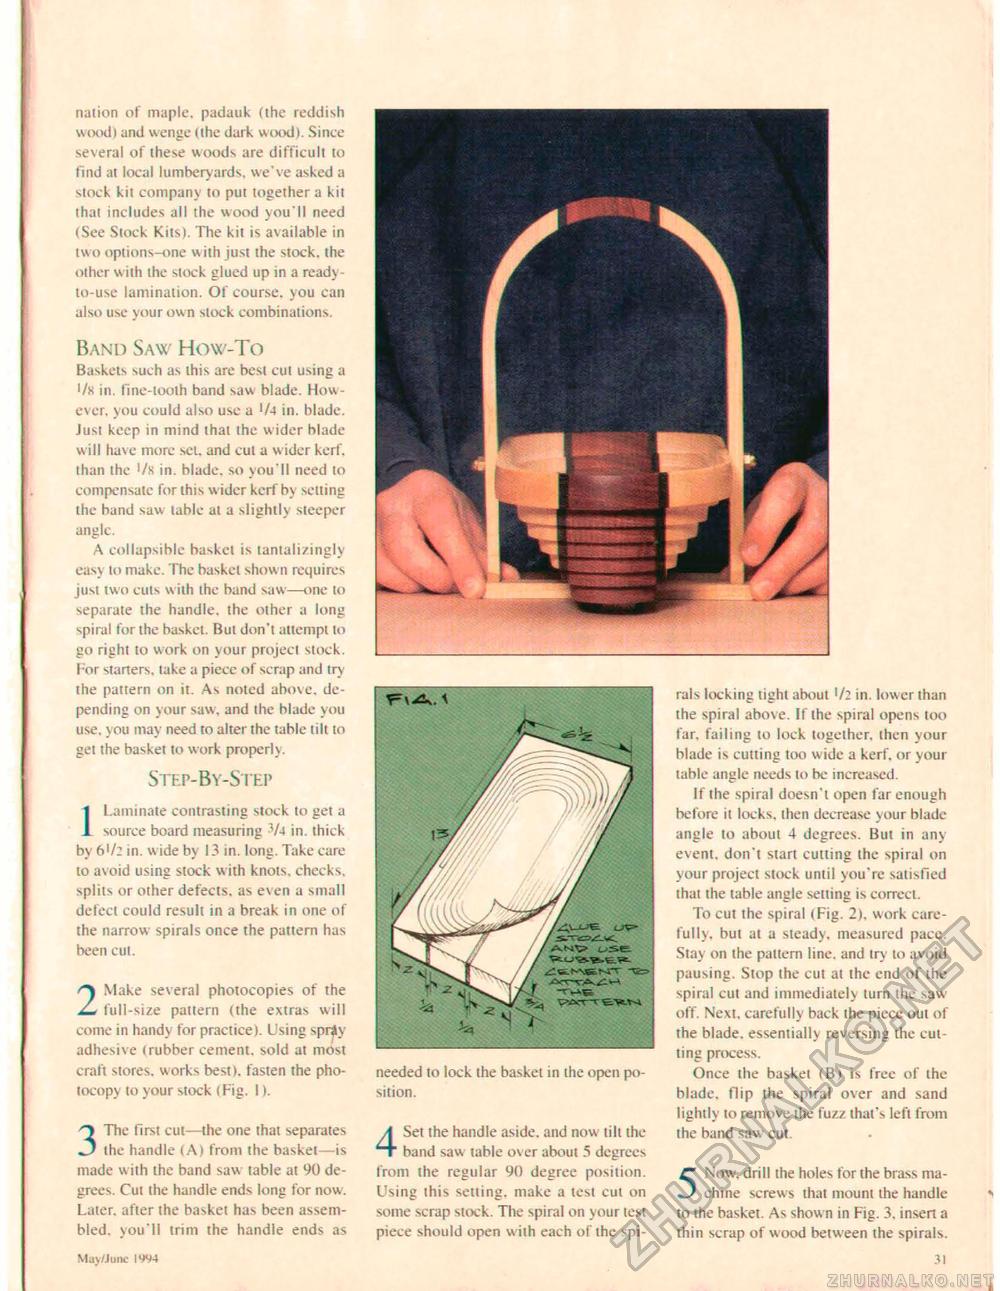
nation of maple, padauk (the reddish wood) and wenge (the dark wood). Since several of these woods are difficult to find at local lumberyards, we've asked a stock ki! company 10 put together a kit that includes all the wood you'll need (See Slock Kits). The kit is available in two options-one w iih just the stock, the other w ith the slock glued up in a ready-to-use lamination. Of course, you can also use your own stock combinations. Band Saw How-To Baskets such as this are best cut using a '/k in. fine-tooth band saw blade. However, you could also use a '/4 in. blade. Just keep in mind that the wider blade will have more set. and cut a wider kerf, than the '/s in. blade, so you'll need to compensate for this wider kerf by setting the band saw table at a slightly steeper angle. A collapsible baskel is lantali/ingly eas\ to make. The basket shown requires just two cuts w ith the band saw—<me to separate the handle, the other a long spiral for the basket. But don't attempt to go right to work on your project stock, l or starters, lake a piece of scrap and try the pattern on it. As noted above, depending on your saw, and the blade you use, you may need to alter the table tilt to gel the basket to work properly. Step-By-Step 1 Laminate contrasting stock lo get a . source board measuring -V» in, thick by 6[/2 in. w ide by 13 in. long. Take care to avoid using stock with knots, checks, splits or other defects, as ev en a small defect could result in a break in one of the narrow spirals once the pattern has been cut. 2 Make several photocopies of the full-size pattern (the extras will come in handy for practice). Using spriy adhesive (rubber cement, sold at most craft stores, works best), fasten the photocopy to your stock (Fig. 1). 3 The firs! cut—the one that separates the handle (A) from the basket—is made with the band saw table at 90 degrees. Cut the handle ends long for now. Later, after the basket has been assembled. you'll trim the handle ends as May/June IW4
rals locking tight about '/: in. lower than the spiral above. II the spiral opens too far. failing to lock together, then your blade is cutting loo wide a kerf, or your table angle needs to be increased. If the spiral doesn't open far enough before it locks, then decrease your blade angle to about 4 degrees. But in any event, don't start cutting the spiral on your project stock until you're satisfied that the table angle setting is correct. To cut the spiral ( Fig. 2). work carefully. but at a steady, measured pace. Stay on the pattern line, and try to avoid pausing. Stop the cut at the end of the spiral cut and immediately lurn the saw off. Next, carefully back the piece out of the blade, essentially reversing the cutting process. Once the basket (B) is free of the blade, flip the spiral over and sand lightly to remove the fuzz that's left from the band saw cut. 5 Now, drill the holes for the brass machine screw s that mount ihe handle to the basket. As show n in Fig. 3, insert a thin scrap of wood between the spirals. 3) needed to lock the basket in the open position. 4 Set the handle aside, and now till the band saw table over about 5 degrees from the regular 90 degree position. Using ihis selling, make a lesi cut on some scrap stock. The spiral on your test piece should open with each of the spi |
||||||||||||||||||


