Woodworker's Journal 1994-18-3, страница 33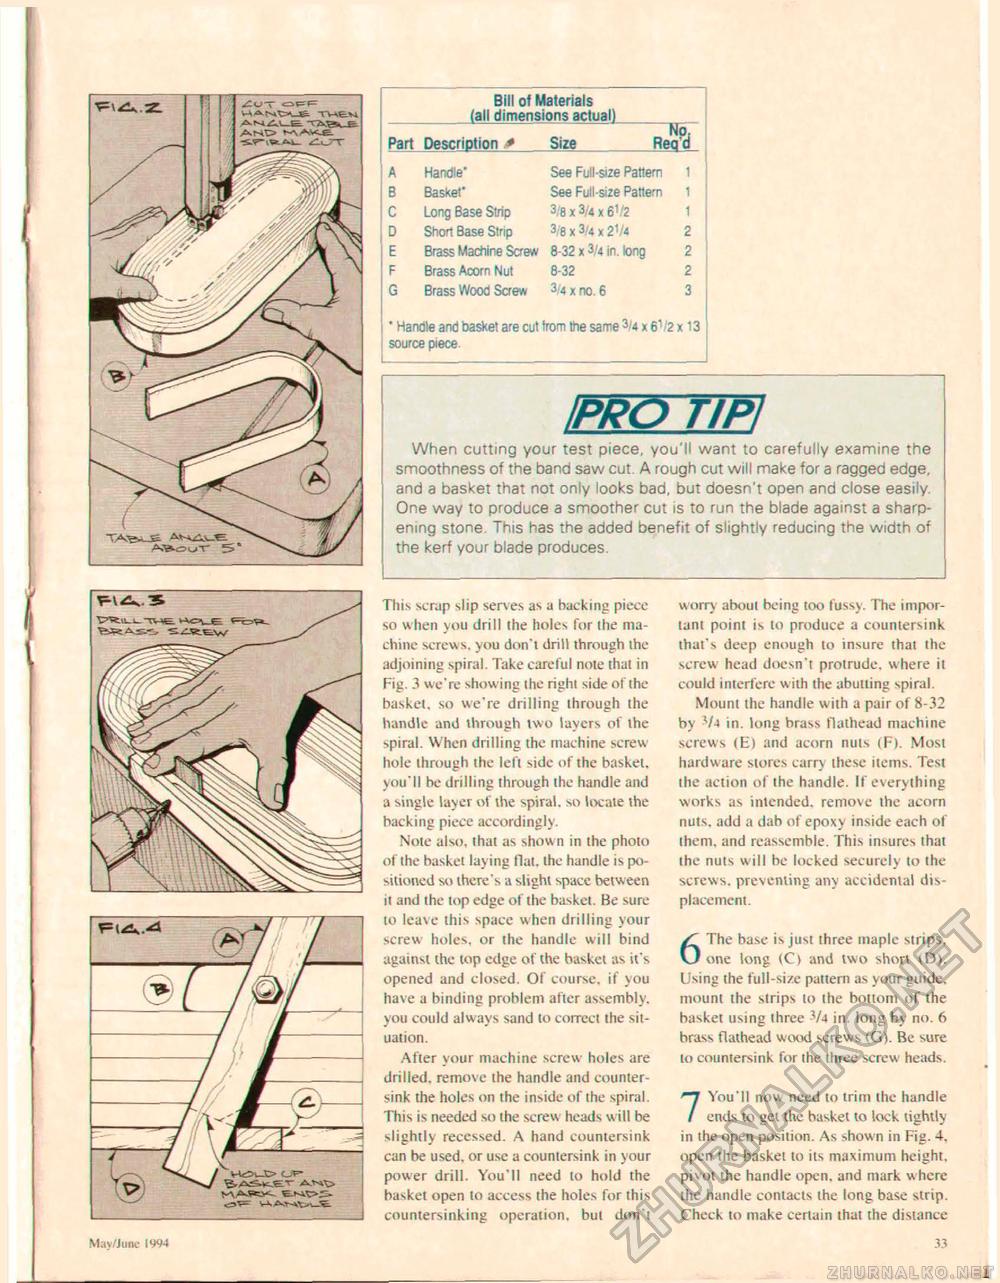
Bill of Materials (all dimensions actual) No,
1 1 1 2 2 2 3 * Handle and baskel are cut Irom the same 3'4 x 61/2 x 13 source piece. IPRD UP] When cutting your test piece, you'll want to carefully examine the smoothness of the band saw cut. A rough cut will make for a ragged edge, and a basket that not only looks bad, but doesn't open and close easily One way to produce a smoother cut is to run the blade against a sharpening stone. This has the added benefit of slightly reducing the width of the kerf your blade produces. This scrap slip serves as a backing piece so when you drill the holes for (he machine screws, you don't drill through the adjoining spiral. Take careful note that in Fig. 3 we're showing ihe righl side of the baskel, so we're drilling through the handle and through two layers of the spiral. When drilling the machine screw hole through the left side of the baskel. you'll be drilling through the handle and a single layer of the spiral, so locate the backing piece accordingly. Note also, that as shown in the pholo of the basket laying flat, the handle is positioned so there's a slight space between it and the lop edge of the basket. Be sure to leave this space when drilling your screw holes, or the handle will bind against the top edge of the basket as it's opened and closed. Of course, if you have a binding problem atier assembly, you could always sand to correct the situation. After your machine screw holes are drilled, remove the handle and countersink the holes on the inside of the spiral. This is needed so the screw heads w ill be slightly recessed. A hand countersink can be used, or use a countersink in your power drill. You'll need to hold the basket open to access the holes for this countersinking operation, but don't worry about being too fussy. The important point is to produce a countersink that's deep enough to insure that the screw head doesn't protrude, where it could interfere w ith the abutting spiral. Mount the handle with a pair of 8-32 by Vj in. long brass flathead machine screws (E) and acorn nuts iF). Most hardware stores carry these items. Test ihe action of the handle. If everything works as intended, remove the acorn nuts, add a dab of epoxy inside each of them, and reassemble. This insures that the nuts w ill be locked securely to the screws, preventing any accidental displacement. 6 The base is just three maple sirips. one long <C> and two short (13), Using the full-size pattern as your guide, mount ihe sirips to the bottom of the basket using three V4 in. long by no. 6 brass flathead wood screws <G}. Be sure to countersink for the three screw heads. 7 You'll now need to trim the handle ends to get the hasket to lock tightly in the open position. As show n in Fig. 4, open the basket to its maximum height, pivot the handle open, and mark where the handle contacts the long base strip. Check to make certain that the distance May/June IW4 33 |
||||||||||||||||||||||||


