Woodworker's Journal 1994-18-3, страница 61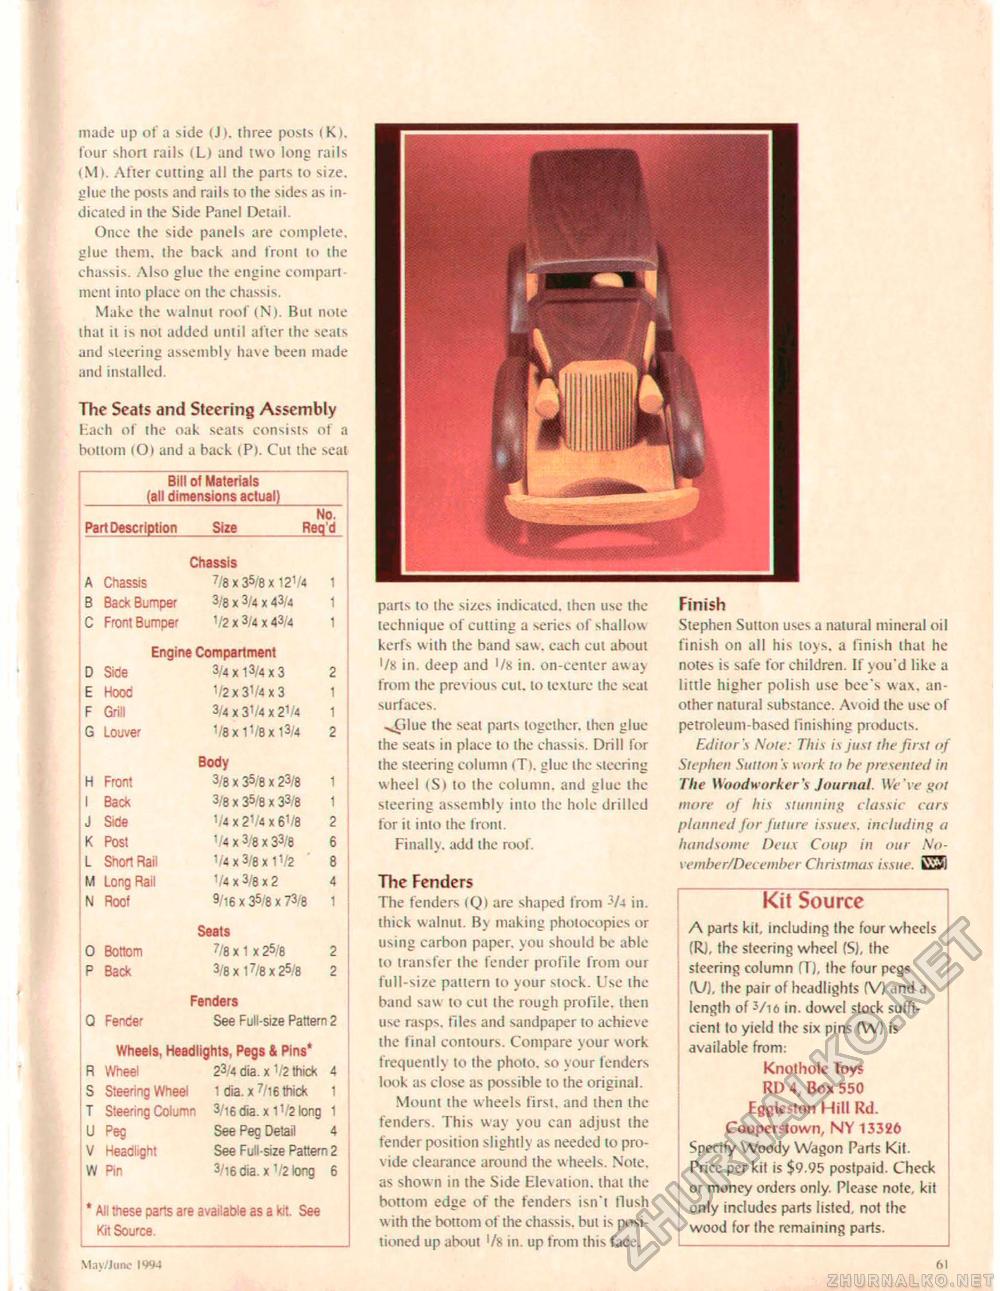
made up of a side (J), three posts (K). four short rails <L) and two long rails (M). After cutting all the pans to size, glue the posts and rails to the sides as indicated in the Side Panel Detail. Once the side panels are complete, glue them, the back and front to the chassis. Also glue the engine compartment into place on the chassis. Make the walnut roof (N). But note that it is not added until after the seats and steering assembly have been made and installed. The Seats and Steering Assembly Each of the oak seats consists of a bottom (O) and a back (P). Cut the seat parts to the sizes indicated, then use the technique of cutting a series of shallow kerfs w ith the band saw. each cut about '/b in. deep and 1 /s in. on-center away from the previous cut. to texture the scat surfaces, ^Glue the seal parts together, then giue the seats in place to the chassis. Drill for the steering column <T>. glue the steering wheel <S) to the column, and glue the steering assembly into the hole drilled for it into (he front. Finally, add the roof. The Fenders The fenders (Q) are shaped from -V4 in. thick walnut. By making photocopies or using carbon paper, you should be able to transfer the fender profile from our full-size pattern to your stock. I'se the band saw to cut the rough profile, then use rasps, files and sandpaper to achieve the final contours. Contpare your work frequently to the photo, so your fenders look as close as possible to the original. Mount the wheels first, and then the fenders. This way you can adjust the fender position slightly as needed to pro-\ide clearance around the wheels. Note, as shown in the Side Elevation, that the bottom edge of the fenders isn't Hush w ith the bottom of the chassis, but is positioned up about >/8 in. up from this face. Finish Stephen Sutton uses a natural mineral oil finish on all his toys, a finish that he notes is safe for children. If you'd like a little higher polish use bee's wax. another natural substance. Avoid the use of petroleum-based finishing products. Editor 's Note: This is just the first nf Stephen Sutton s work to he presented in The Woodworker's Journal. IM?Yr got more of his stunning classic cars planned for future issues, including a handsome Deux Coup in our November/December Christmas issue. Kit Source A parts kit, including the four wheels (RJ, the slecring wheel (5), the steering column fTj, the four pegs (U), the pair of headlights (V) and a length of Vie in. dowel slock sufficient to yield the six pins (W) is available from: Knothole Toys RD 4, Box 550 Eggleslon Hill Rd. Cooperstown, NY 13326 Specify Woody Wagon Parts Kit. Price per kit is $9.95 postpaid. Check or money orders only. Please note, kit only includes parts listed, not the wood for the remaining parts. Bill of Materials (all dimensions actual) Pari Description Size No. Pari Description Size
May/June 1<W4 61 |
||||||||||||||||||||||||||||||||||||||||||||||||||||||||||||||||||||||||||||||||||||||||||||||||||||||||||||||||||||||||||||


