Woodworker's Journal 1994-18-3, страница 58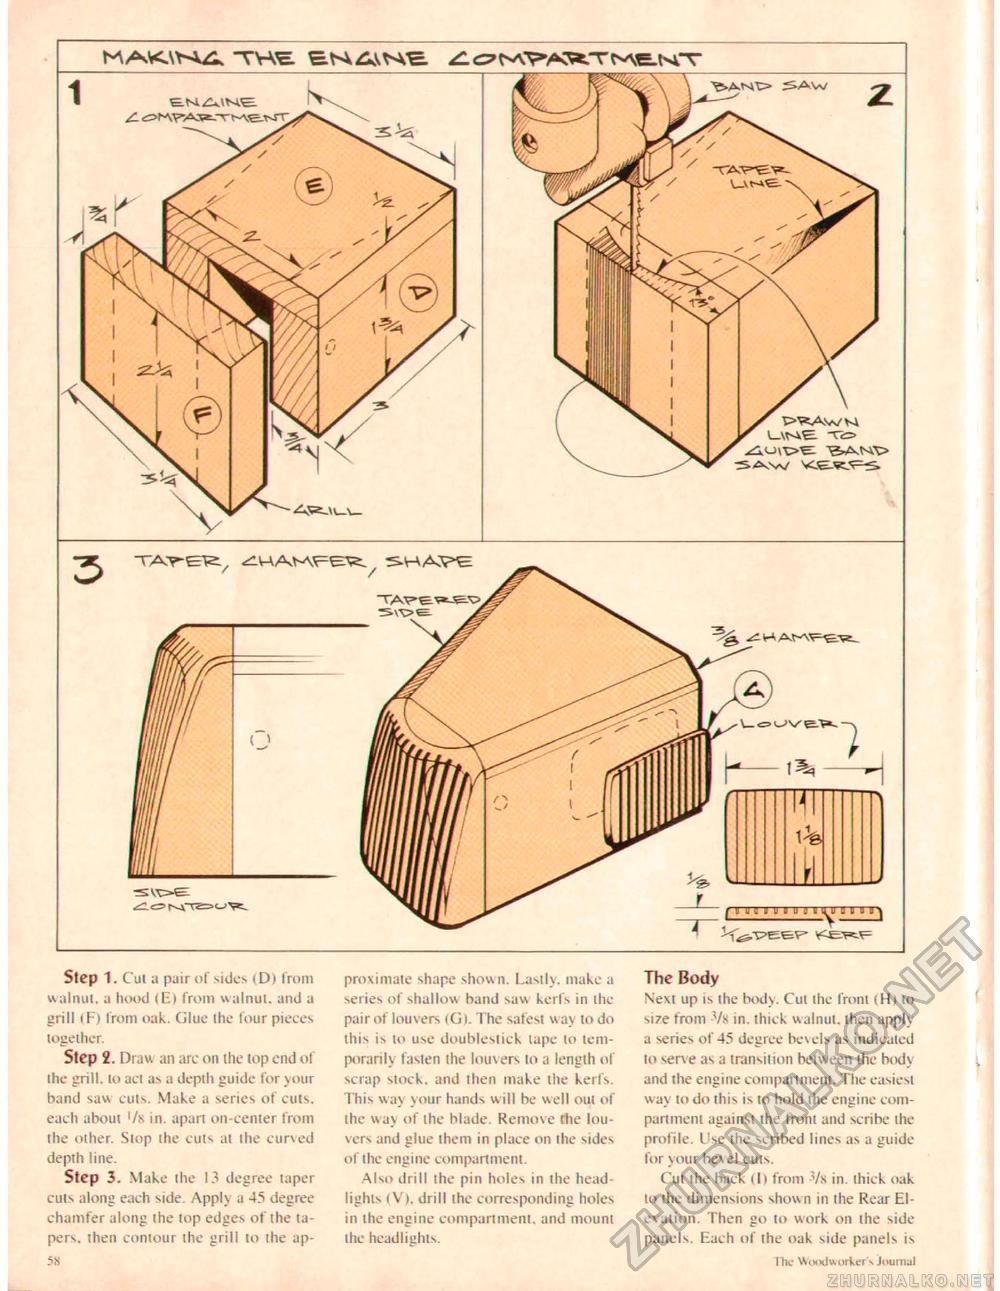
MAK\K^ -TWE: E-^AV^^. t^VE-tsTT Step 1. Cut a paLr of sides iD) from walnut, a hood lE) from walnut, and a grill (F) from oak. Glue the four pieces together. Step 2. Draw an arc on the top end of the grill, to act as a depth guide for your band saw cuts. Make a series of cuts, each about '/» in. apart on-center from the other. Stop the cuts at the curved depth line. Step 3. Make the 13 degree taper cuts along each side. Apply a 4? degree chamfer along ihe top edges of the tapers. then contour the grill to the ap->8 proximate shape shown. Lastly, make a series of shallow band saw kerfs in the pair of louvers 1G). The safest way to do this is to use doublestick tape to temporarily fasten the louvers to a length of scrap stock, and then make the kerfs. This way your hands w ill be well out of the way of the blade. Remove the louvers and glue them in place on the sides of the engine compartment. Also drill the pin holes in the headlights (V'l, drill the corresponding holes in the engine compartment, and mount the headlights. The Body Next up is the body. Cut ihe front (Hj lo size from 7k in. thick walnut, then apply a series of 45 degree bevels as indicated to serve as a transition between the body and the engine compartment. The easiest way to do this is to hold the engine compartment against the front and scribe the profile. l:se the scribed lines as a guide for your bevel culs. Cut the back (I) from 7k in. thick oak to ihe dimensions shown in ihe Rear Elevation. Then go to work on the side panels. Each of Ihe oak side panels is The Woodworker's Journal |


