Woodworker's Journal 1994-18-3, страница 55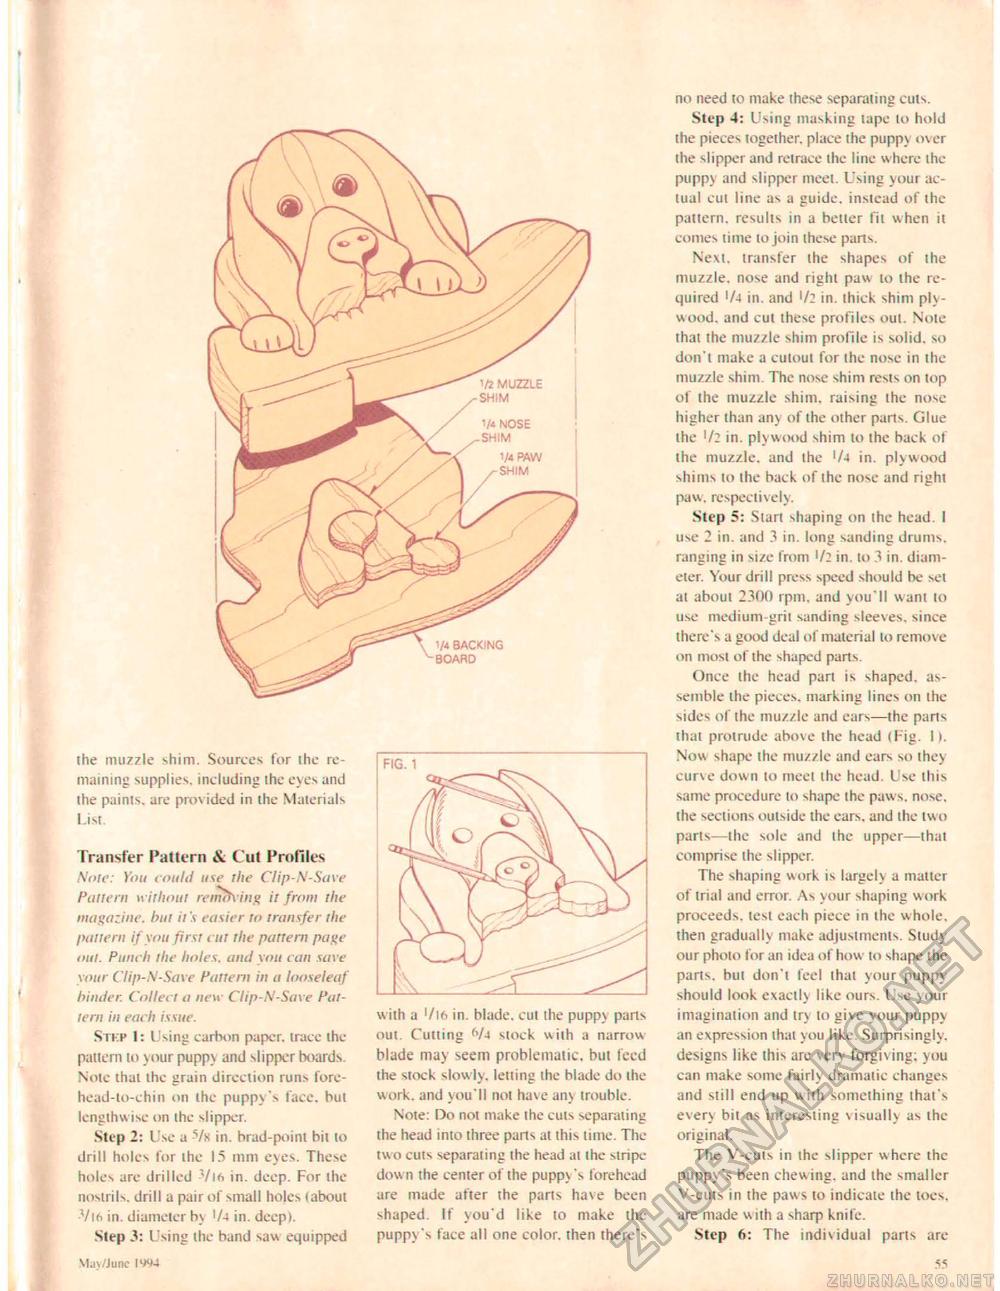
\ 1/4 backing board the muzzle shim. Sources for the remaining supplies, including the eyes and the paints, are provided in the Materials List. Transfer Pattern & t ut Profiles Note: fou could use the Clip-N-Save Pattern without remth'big it from ihe magazine, hut it's easier to transfer the pattern if you first cut the pattern page ma. Punch the holes, aiul you can save your Clip-N-Save Pattern in a looseleaf binder. Collect a new Clip-N-Save Pattern in each issue. Stkp I: Using carbon paper, trace the pattern to your puppy and slipper hoards Note that the grain direction runs forehead-to-chin on the puppy s face, but lengthwise on the slipper. Step 2; Use a 5/s in. brad-point bit to drill holes for the 13 mm eyes. These holes are drilled -Vl6 in. deep. For the nostrils, drill a pair of small holes (about •Vl6 in. diameter by 'A in. deep). Slep Using the band saw equipped \fu>/Junc m-i with a '/if. in. blade, cut the puppy parts oui. Cutting f,A stock with a narrow blade may seem problematic, but feed the stock slowly, letting the hlade do the work, and you'll not have any trouble. Note: Do not make (he cuts separating the head into three parts at (his time. The two cuts separating the head at ihe stripe dow n the center of the pupp> 's forehead are made after the parts have been shaped. If you'd like to make the puppv 's face all one color, then there's no need to make these separating cuts. Step 4: Using masking tape lo hold the pieces together, place the puppv over the slipper and retrace the line where the puppv and slipper meet. Using your actual cut line as a guide, instead of the pattern, results in a better fit when it comes lime to join these parts. Next, transfer ihe shapes of the muzzle, nose and right paw to the required 'A in. and !/2 in. thick shim plywood, and cut these profiles out. Nole that the muzzle shim profile is solid, so don't make a cutout for the nose in ihe muzzle shim. The nose shim rests on top of the muzzle shim, raising the nose higher than any of the other parts. Glue the '/2 in. plywood shim lo Ihe back of ihe muzzle, and the '/a in. plywood shims to the back of the nose and right paw. respectively. Step 5; Start shaping on the head. 1 use 2 in. and 3 in. long sanding drums, ranging in size from in. to 3 in. diameter. Your drill press speed should be set at aboul 2300 rpm, and you'll want to use medium-grit sanding sleeves, since there's a good deal of material to remove on most of the shaped parts. Once (he head pari is shaped, assemble the pieces, marking lines on the sides of the muzzle and ears—the parts that protrude above the head (Fig. I). Now shape the muzzle and ears so they curve dow n to meet the head. Use this same procedure to shape the paws, nose, the seclions outside the cars, and Ihe two parts—the sole and the upper—that comprise the slipper. The shaping work is largely a matter of trial and error, As your shaping work proceeds, lest each piece in the whole, then gradually make adjustments. Study our photo for an idea of how to shape the parts, bul don't feel that your puppy should look exactly like ours. Use your imagination and iry to give your puppy an expression that you like. Surprisingly, designs like ihis arc very forgiving; you can make some fairlv dramatic changes and still end up with something lhai's even bit as interesting visually as the original. The V-cuts in the slipper w here the puppy 's been chewing, and the smaller V-cuts in the paws to indicate the toes, are made w ith a sharp knife. Step 6: The individual parts are 55 |


