Woodworker's Journal 1994-18-6, страница 16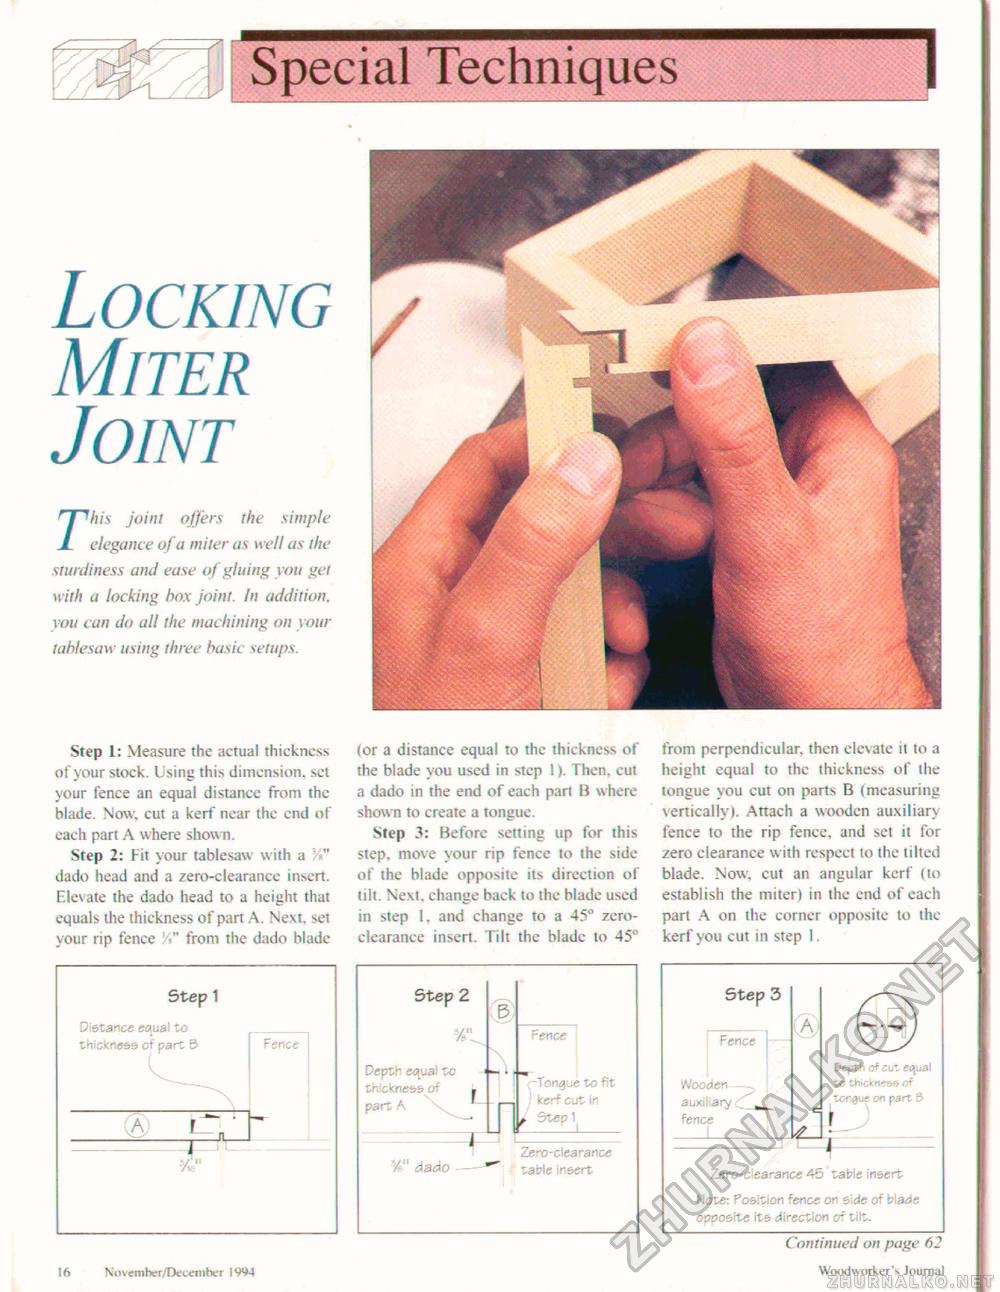
LockingMiterJointrhis joint offers the simple elegance of a miter as well as the sturdiness and ease of gluing you get with a locking box joint. In addition, you can do all the machining on your tahlesaw using three basic setups. Step 1: Measure the actual thickness of your stock. Using this dimension, set your fence an equal distance from the blade. Now. cut a kerf near the end of each part A where shown. Step 2: Fit your tablesaw with a " dado head and a zero-clearance insert. Elevate the dado head to a height that equals the thickness of part A. Next, set your rip fence V*" from the dado blade
(or a distance equal to the thickness of the blade you used in step I). Then, cut a dado in the end of each part B where show n to create a tongue. Step 3: Before setting up for this step, move your np fence to the side of the blade opposite its direction of tilt. Next, change back to the blade used in step 1. and change to a 45° zero-clearance insert. Tilt the blade to 45° from perpendicular, then elevate it to a height equal to the thickness of the tongue you cut on parts B (measuring vertically). Attach a wooden auxiliary fence to the rip fence, and set it for zero clearance with respect to the tilted blade. Now, cut an angular kerf (to establish the miter) in the end of each part A on the corner opposite to the kerf you cut in step 1. Step 2 Depth e^ual to thickness of part A E> fence V" dado j -Tongue to fit kerf cut in f Step 1 Zero-clearance table insert
Zero-clearance 45 table insert Zero-clearance 45 table insert Mote: Position fence on side of blade opposite its direction of ti lt. 16 November/December 1994 Continued on page 62 Woodworker'^ Journal |
|||||||||||||||||||||||||||||||||||||||||


