Woodworker's Journal 1994-18-6, страница 79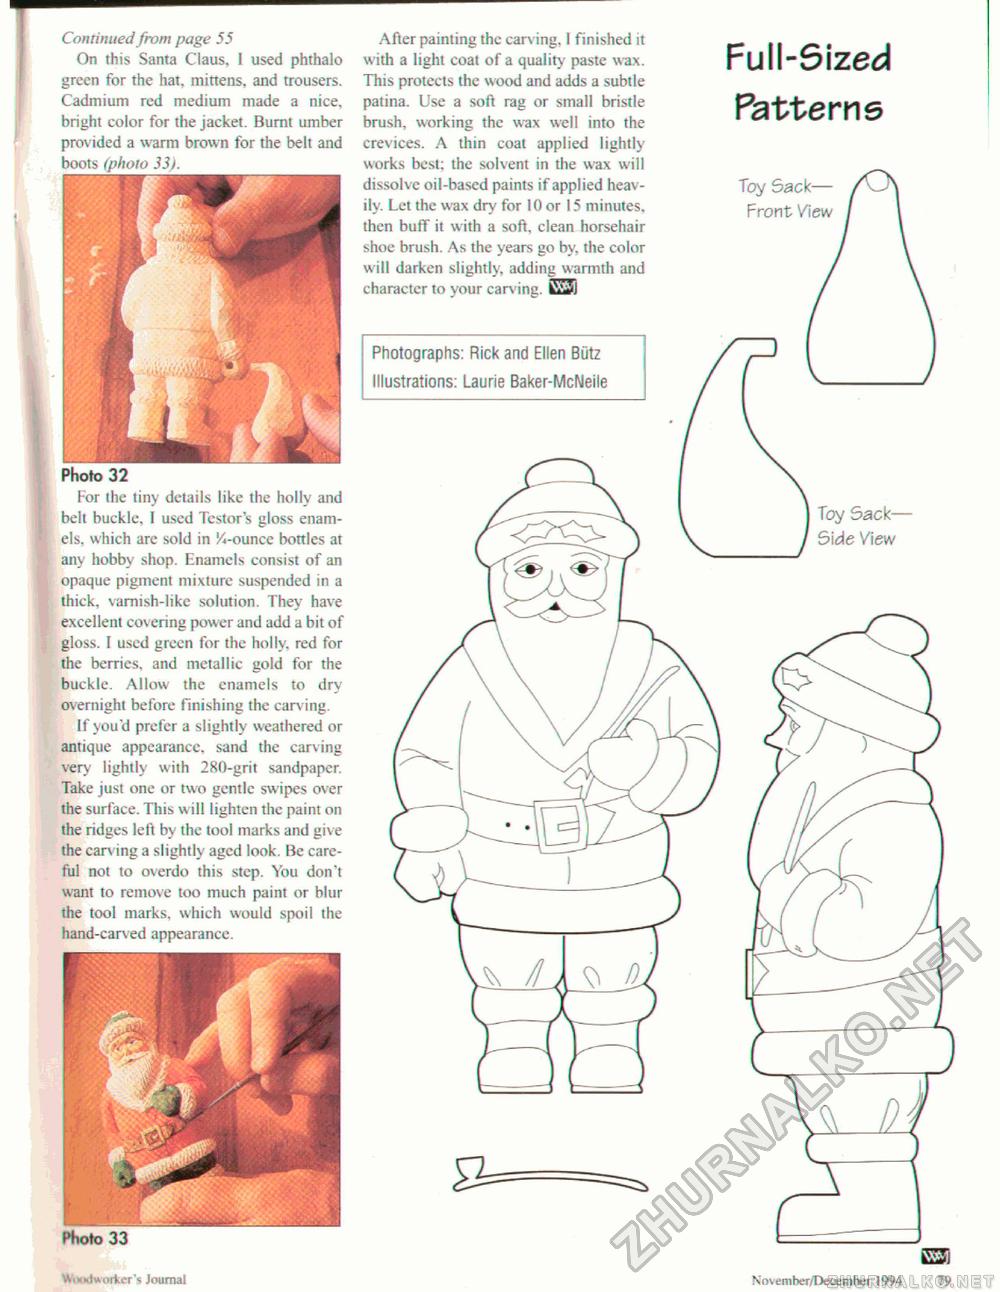
Photographs: Rick and Ellen Biitz Illustrations: Laurie Baker-McNeile Photo 32 For the tiny details like the holly and belt buckle, I used Testor's gloss enamels, which are sold in !4-ounce bottles at any hobby shop. Enamels consist of an opaque pigment mixture suspended in a thick, varnish-like solution. They have excellent covering power and add a bit of gloss. I used green for the holly, red for the berries, and metallic gold for the buckle. Allow the enamels to dry overnight before finishing the carving. If youd prefer a slightly weathered or antique appearancc. sand the carving very lightly with 280-grit sandpaper. Take just one or two gentle swipes over the surface. This w ill lighten the paint on the ridges left by the tool marks and give the carving a slightly aged look. He careful not to overdo this step. You don't want to remove too much paint or blur the tool marks, which would spoil the hand-carved appearance. Continued from page 55 On this Santa Claus, I used phthalo green for the hat. mittens, and trousers. Cadmium red medium made a nice, bright color for the jacket. Burnt umber provided a warm brown for the belt and After painting the carving. I finished it with a light coat of a quality paste wax. This protects the wood and adds a subtle patina. Use a soft rag or small bristle brush, working the wax well into the crevices. A thin coat applied lightly works best; the solvent in the wax will dissolve oil-based paints if applied heavily. Let the wax dry for 10 or 15 minutes, then buff it w ith a soft, clean horsehair shoe brush. As the years go by, the color will darken slightly, adding warmth and character to your carving. tuijjJ Full-Sized Patterns Toy Sack— Front View Toy Sack— Side View E3i November/December 1994 79 Photo 33 Woodworker's Journal |


