Woodworker's Journal 2004-28-6, страница 46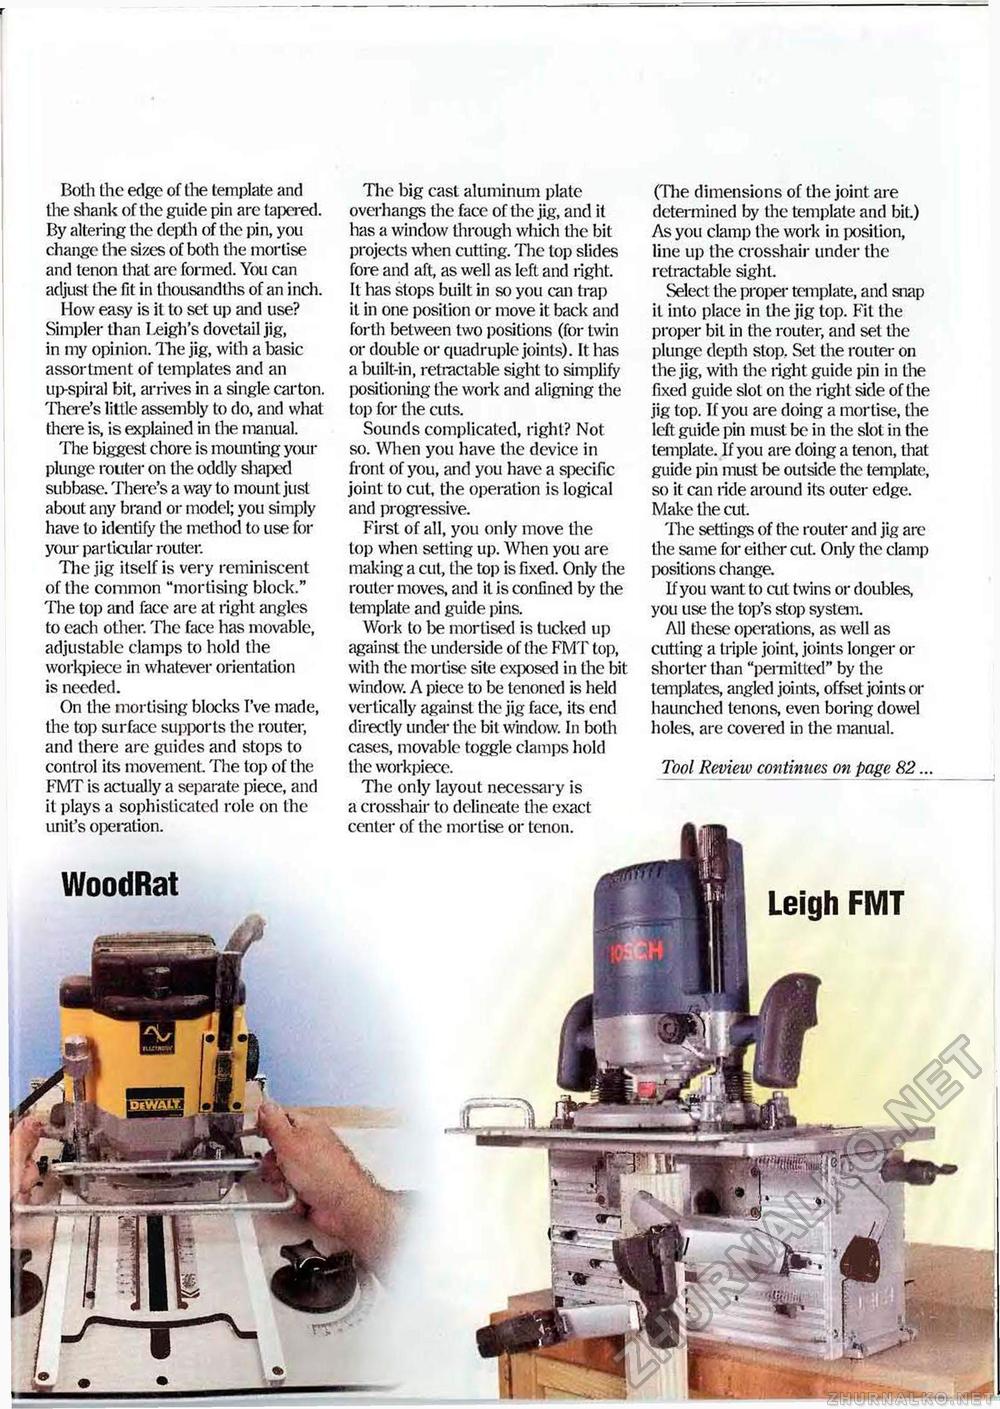
Both the edge of the template and the shank of the guide pin are tapered. By altering the depth of the pin, you change the sizes of both the mortise and tenon that are formed. You can adjust the fit in thousandths of an inch. How easy is it to set up and use? Simpler than I sigh's dovetail jig, in my opinion. Hie jig, with a basic assortment of templates and an up-spiral bit, arrives in a single carton. There's little assembly to do, and what there is, is explained in the manual. The biggest chore is mounting your plunge router on the oddly shaped subbase. There's a way to mount just about any brand or model; you simply have to identify the method to use for your particular router. The jig itself is very reminiscent of the common "mortising block." The top and face are at right angles to each other. 'Hie face has movable, adjustable clamps to hold the workpiece in whatever orientation is needed. On the mortising blocks I've made, the top surface supports the router, and there are guides and stops to control its movement. The top of the FMT is actually a separate piece, and it plays a sophisticated role on the unit's operation. WoodRat The big cast aluminum plate overhangs the face of the jig, and it has a window through which the bit projects when cutting. The top slides fore and aft, as well as left and right. It has stops built in so you can trap it in one position or move it back and forth between two positions (for twin or double or quadruple joints). It has a built-in, retractable sight to simplify positioning the work and aligning the top for the cuts. Sounds complicated, right? Not so. When you have the device in front of you, and you have a specific joint to cut, the operation is logical and progressive. First of all, you only move the top when setting up. When you are making a cut, the top is fixed. Only the router moves, and it is conflnal by the template and guide pins. Work to be mortised is tucked up against the underside of the FMT top, with the mortise site exposed in the bit window. A piece to be tenoned is held vertically against the jig face, its end directly under the bit window. In both cases, movable toggle clamps hold the workpiece. The only layout necessary is a crosshair to delineate the exact center of the mortise or tenon. (The dimensions of the joint are determined by the template and bit.) As you clamp the work in position, line up the crosshair under the retractable sight. Select the proper template, and snap it into place in the jig top. Fit the proper bit in the router, and set the plunge depth stop. Set the router on the jig, with the right guide pin in the fixed guide slot on the right side of the jig top. If you are doing a mortise, the left guide pin must be in the slot in the template. If you are doing a tenon, that guide pin must be outside the template, so it can ride around its outer edge. Make the cut. 'Hie settings of the router and jig are the same for either cut. Only the clamp positions change. If you want to cut twins or doubles, you use the top's stop system. All these operations, as well as cutting a triple joint, joints longer or shorter than "permitted" by the templates, angled joints, offset joints or haunched tenons, even boring dowel holes, are covered in the manual. Tool Review continues on page 82... Leigh FMT |


