Woodworker's Journal 2004-Winter, страница 35
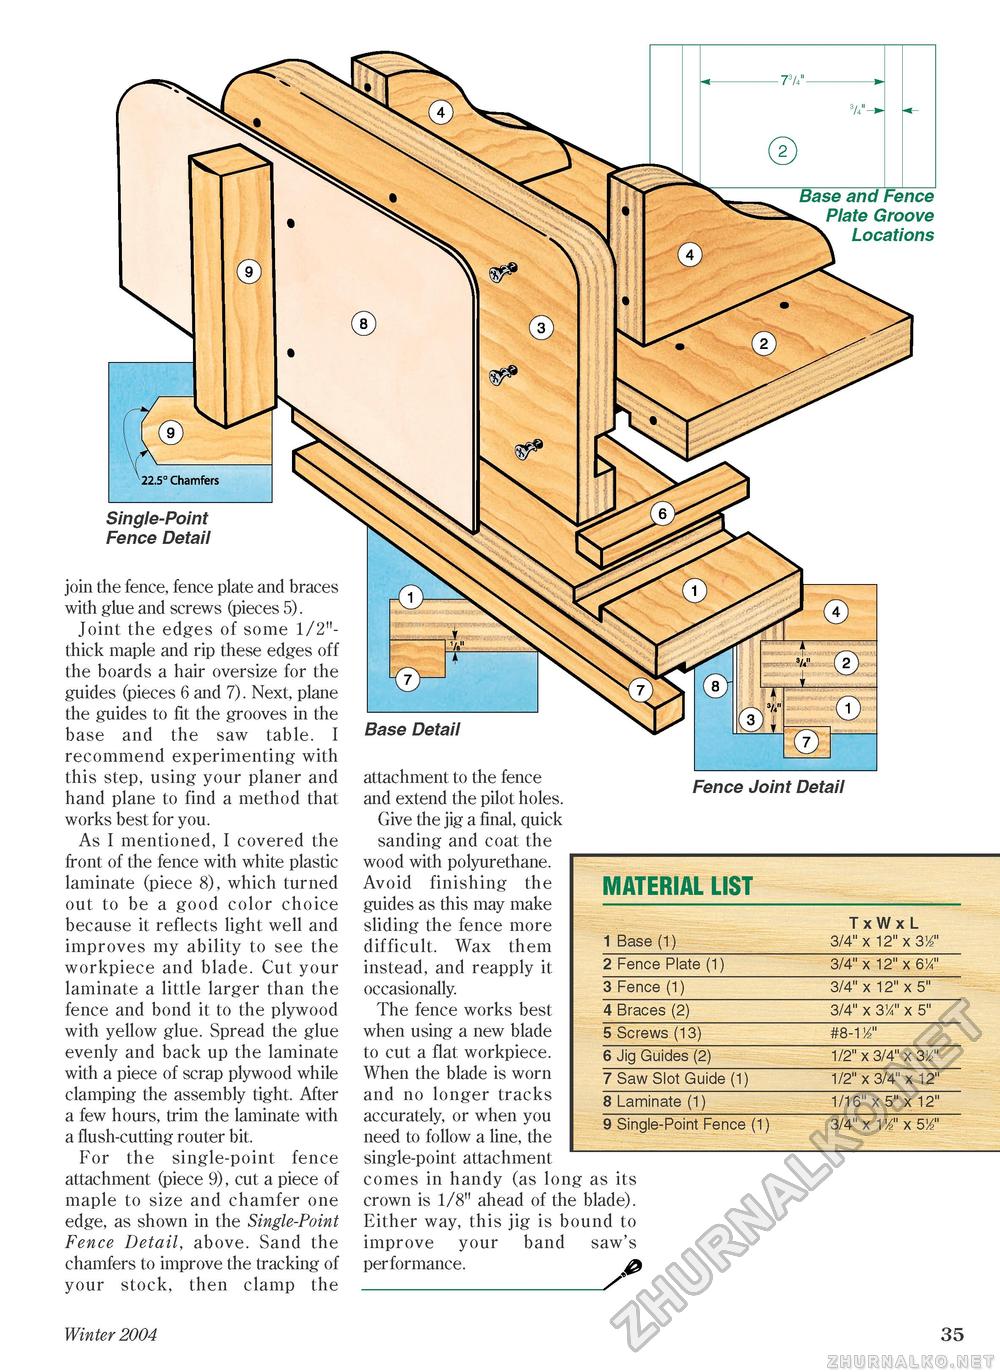
Single-Point Fence Detail join the fence, fence plate and braces with glue and screws (pieces 5). Joint the edges of some 1/2"-thick maple and rip these edges off the boards a hair oversize for the guides (pieces 6 and 7). Next, plane the guides to fit the grooves in the base and the saw table. I recommend experimenting with this step, using your planer and hand plane to find a method that works best for you. As I mentioned, I covered the front of the fence with white plastic laminate (piece 8), which turned out to be a good color choice because it reflects light well and improves my ability to see the workpiece and blade. Cut your laminate a little larger than the fence and bond it to the plywood with yellow glue. Spread the glue evenly and back up the laminate with a piece of scrap plywood while clamping the assembly tight. After a few hours, trim the laminate with a flush-cutting router bit. For the single-point fence attachment (piece 9), cut a piece of maple to size and chamfer one edge, as shown in the Single-Point Fence Detail, above. Sand the chamfers to improve the tracking of your stock, then clamp the Base Detail attachment to the fence and extend the pilot holes. Give the jig a final, quick sanding and coat the wood with polyurethane. Avoid finishing the guides as this may make sliding the fence more difficult. Wax them instead, and reapply it occasionally. The fence works best when using a new blade to cut a flat workpiece. When the blade is worn and no longer tracks accurately, or when you need to follow a line, the single-point attachment comes in handy (as long as its crown is 1/8" ahead of the blade). Either way, this jig is bound to improve your band saw's performance. £ Fence Joint Detail MATERIAL LIST
Winter 2004 35 |


