Woodworker's Journal 2004-Winter, страница 37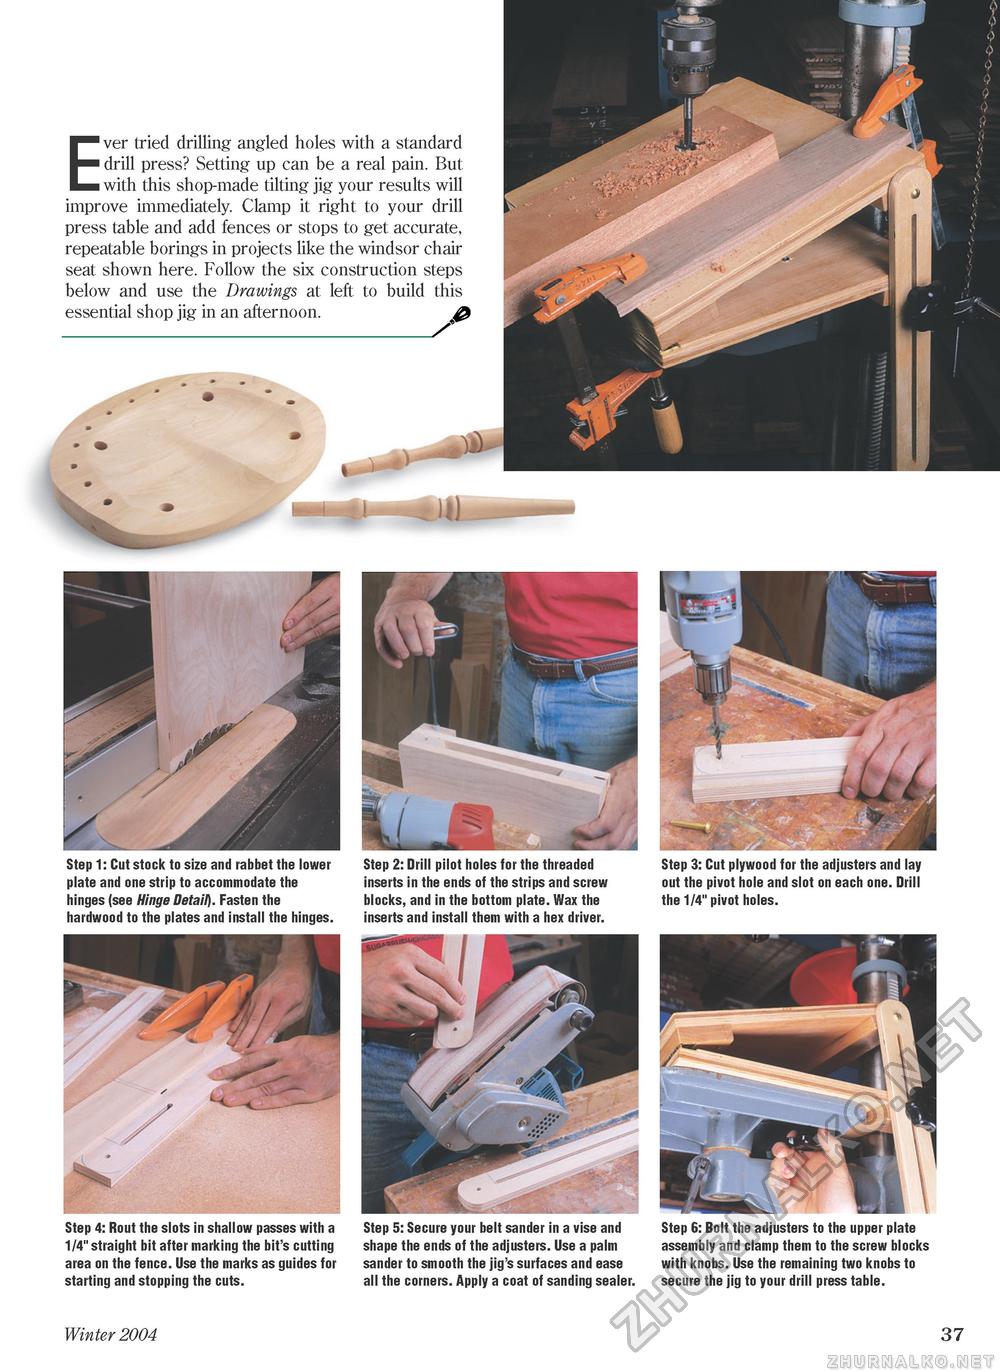
Ever tried drilling angled holes with a standard drill press? Setting up can be a real pain. But with this shop-made tilting jig your results will improve immediately. Clamp it right to your drill press table and add fences or stops to get accurate, repeatable borings in projects like the windsor chair seat shown here. Follow the six construction steps below and use the Drawings at left to build this essential shop jig in an afternoon. ^ Step 1: Cut stock to size and rabbet the lower plate and one strip to accommodate the hinges (see Hinge Detail). Fasten the hardwood to the plates and install the hinges. Step 2: Drill pilot holes for the threaded inserts in the ends of the strips and screw blocks, and in the bottom plate. Wax the inserts and install them with a hex driver. Step 3: Cut plywood for the adjusters and lay out the pivot hole and slot on each one. Drill the 1/4" pivot holes. Step 4: Rout the slots in shallow passes with a 1/4" straight bit after marking the bit's cutting area on the fence. Use the marks as guides for starting and stopping the cuts. Step 5: Secure your belt sander in a vise and shape the ends of the adjusters. Use a palm sander to smooth the jig's surfaces and ease all the corners. Apply a coat of sanding sealer. Step 6: Bolt the adjusters to the upper plate assembly and clamp them to the screw blocks with knobs. Use the remaining two knobs to secure the jig to your drill press table. Winter 2004 37 |


