Woodworker's Journal 2008-32-2, страница 33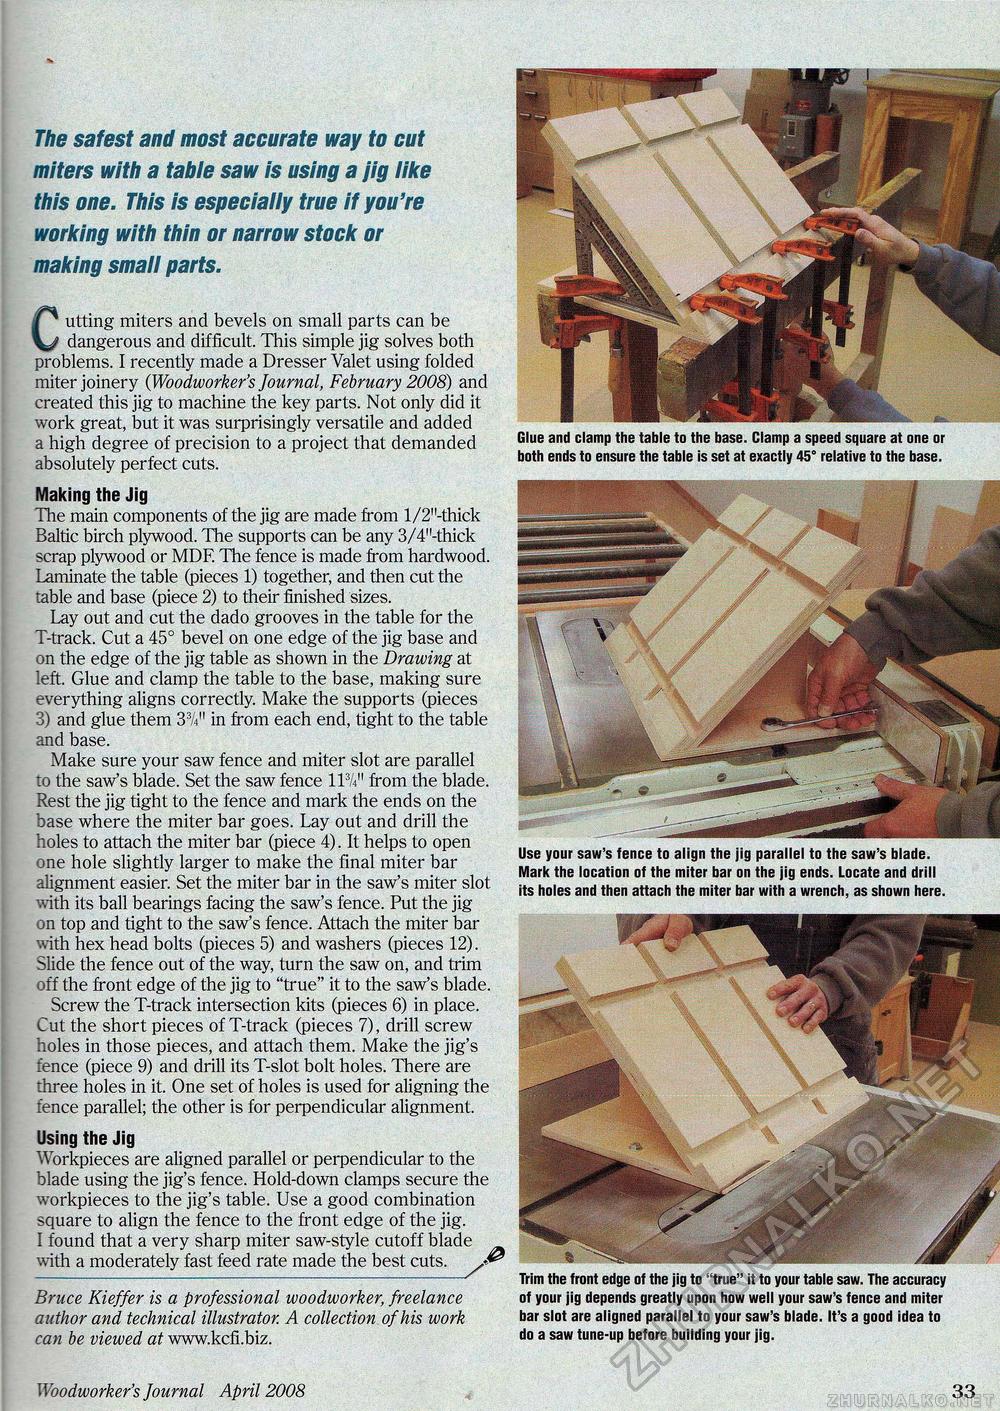
The safest and most accurate way to cut miters with a table saw is using a jig like this one. This is especially true if you're working with thin or narrow stock or making small parts. Cutting miters and bevels on small parts can be dangerous and difficult. This simple jig solves both problems. I recently made a Dresser Valet using folded miter joinery (Woodworker's Journal, February 2008) and created this jig to machine the key parts. Not only did it work great, but it was surprisingly versatile and added a high degree of precision to a project that demanded absolutely perfect cuts. Making the Jig The main components of the jig are made from l/2"-thick Baltic birch plywood. The supports can be any 3/4'1'-thick scrap plywood or MDF. The fence is made from hardwood. Laminate the table (pieces 1) together, and then cut the table and base (piece 2) to their finished sizes. Lay out and cut the dado grooves in the table for the T-track. Cut a 45° bevel on one edge of the jig base and on the edge of the jig table as shown in the Drawing at left. Glue and clamp the table to the base, making sure everything aligns correctly. Make the supports (pieces 3) and glue them 3%" in from each end, tight to the table and base. Make sure your saw fence and miter slot are parallel to the saw's blade. Set the saw fence HW from the blade. Rest the jig tight to the fence and mark the ends on the base where the miter bar goes. Lay out and drill the holes to attach the miter bar (piece 4). It helps to open one hole slightly larger to make the final miter bar alignment easier. Set the miter bar in the saw's miter slot with its ball bearings facing the saw's fence. Put the jig :>n top and tight to the saw's fence. Attach the miter bar with hex head bolts (pieces 5) and washers (pieces 12). Slide the fence out of the way, turn the saw on, and trim off the front edge of the jig to "true" it to the saw's blade. Screw the T-track intersection kits (pieces 6) in place. Cut the short pieces of T-track (pieces 7), drill screw holes in those pieces, and attach them. Make the jig's fence (piece 9) and drill its T-slot bolt holes. There are three holes in it. One set of holes is used for aligning the fence parallel; the other is for perpendicular alignment. Use your saw's fence to align the Jig parallel to the saw's blade. Mark the location of the miter bar on the jig ends. Locate and drill its holes and then attach the miter bar with a wrench, as shown here. Using the Jig Workpieces are aligned parallel or perpendicular to the blade using the jig's fence. Hold-down clamps secure the workpieces to the jig's table. Use a good combination square to align the fence to the front edge of the jig. I found that a very sharp miter saw-style cutoff blade with a moderately fast feed rate made the best cuts. Bruce Kieffer is a professional woodworker, freelance author and technical illustrator. A collection of his work can be viewed at www.kcfi.biz. Trim the front edge of the jig to "true" it to your table saw. The accuracy of your jig depends greatly upon how well your saw's fence and miter bar slot are aligned parallel to your saw's blade. It's a good idea to do a saw tune-up before building your jig. Glue and clamp the table to the base. Clamp a speed square at one or both ends to ensure the table is set at exactly 45° relative to the base. Woodworker's Journal April 2008 33 |


