Woodworker's Journal 2008-32-5, страница 62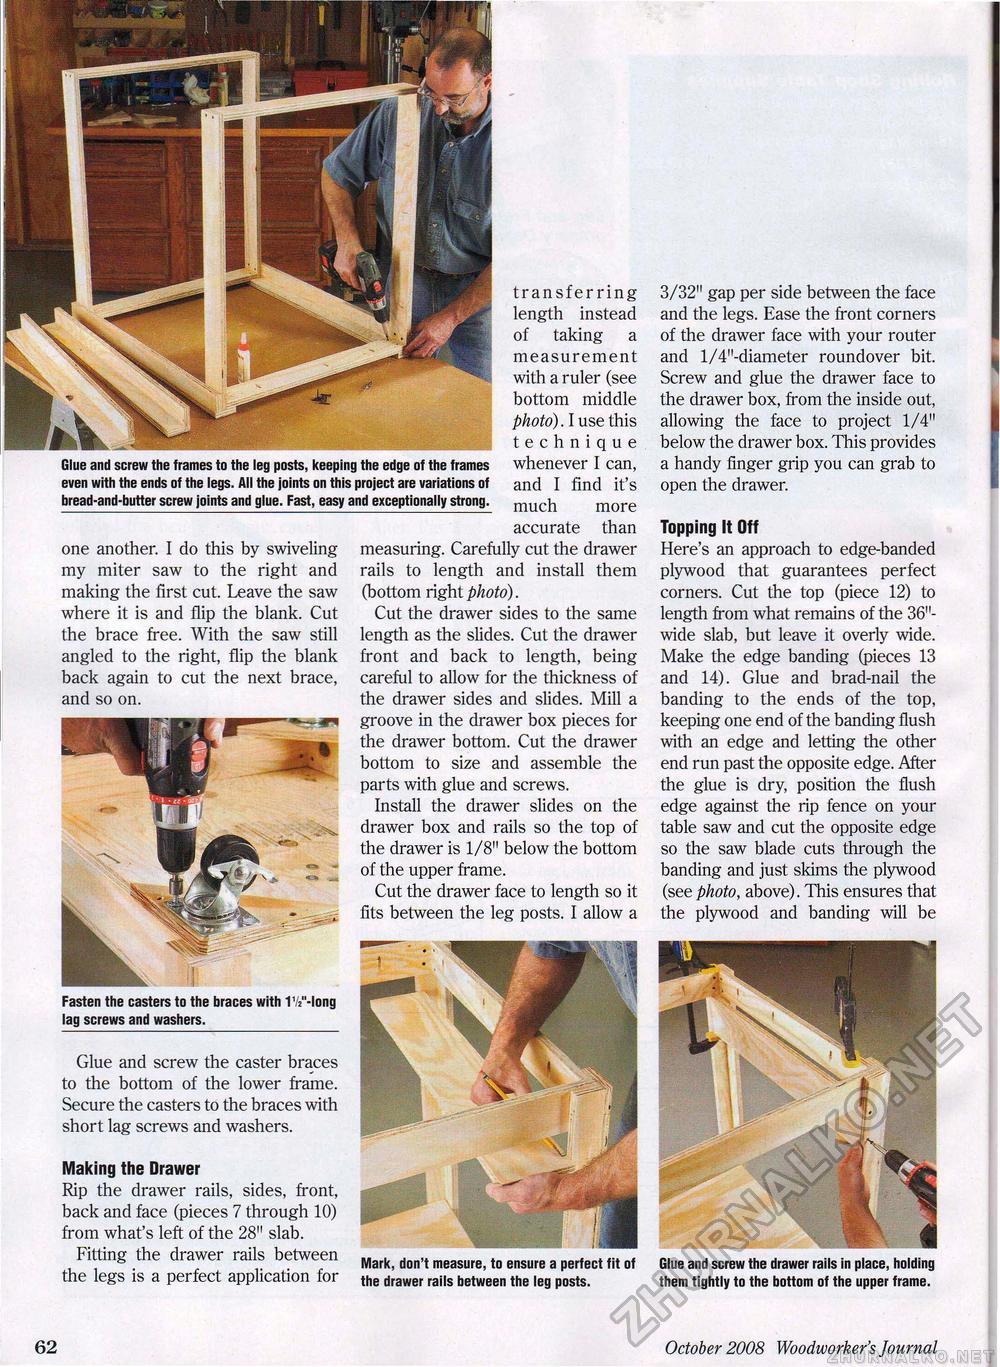
Glue and screw the frames to the leg posts, keeping the edge of the frames even with the ends of the legs. All the joints on this project are variations of bread-and-butter screw joints and glue. Fast, easy and exceptionally strong. one another. I do this by swiveling my miter saw to the right and making the first cut. Leave the saw where it is and flip the blank. Cut the brace free. With the saw still angled to the right, flip the blank back again to cut the next brace, and so on. transferring length instead of taking a measurement with a ruler (see bottom middle photo). I use this technique whenever I can, and I find it's much more accurate than measuring. Carefully cut the drawer rails to length and install them (bottom right photo). Cut the drawer sides to the same length as the slides. Cut the drawer front and back to length, being careful to allow for the thickness of the drawer sides and slides. Mill a groove in the drawer box pieces for the drawer bottom. Cut the drawer bottom to size and assemble the parts with glue and screws. Install the drawer slides on the drawer box and rails so the top of the drawer is 1/8" below the bottom of the upper frame. Cut the drawer face to length so it fits between the leg posts. I allow a 3/32" gap per side between the face and the legs. Ease the front corners of the drawer face with your router and l/4"-diameter roundover bit. Screw and glue the drawer face to the drawer box, from the inside out, allowing the face to project 1/4" below the drawer box. This provides a handy finger grip you can grab to open the drawer. Topping It Off Here's an approach to edge-banded plywood that guarantees perfect corners. Cut the top (piece 12) to length from what remains of the 36"-wide slab, but leave it overly wide. Make the edge banding (pieces 13 and 14). Glue and brad-nail the banding to the ends of the top, keeping one end of the banding flush with an edge and letting the other end run past the opposite edge. After the glue is dry, position the flush edge against the rip fence on your table saw and cut the opposite edge so the saw blade cuts through the banding and just skims the plywood (see photo, above). This ensures that the plywood and banding will be Fasten the casters to the braces with 17:"-long lag screws and washers. Glue and screw the caster braces to the bottom of the lower frame. Secure the casters to the braces with short lag screws and washers. Making the Drawer Rip the drawer rails, sides, front, back and face (pieces 7 through 10) from what's left of the 28" slab. Fitting the drawer rails between the legs is a perfect application for Mark, don't measure, to ensure a perfect fit of the drawer rails between the leg posts. Glue and screw the drawer rails in place, holding them tightly to the bottom of the upper frame. 62 October 2008 Woodworker's Journal |


