Woodworker's Journal 2008-32-5, страница 60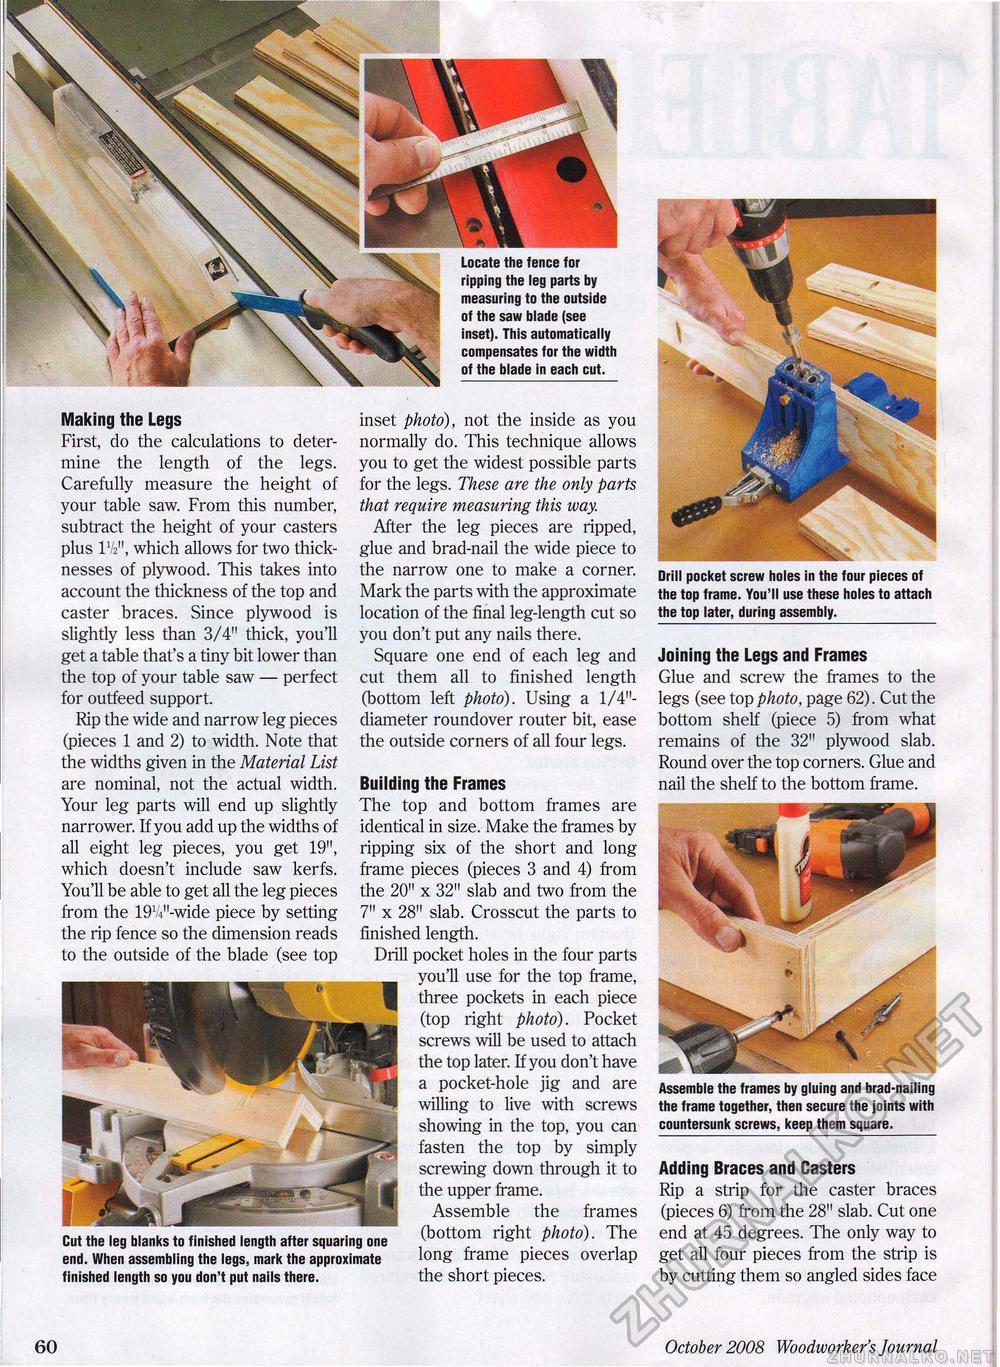
Locate the fence for ripping the leg parts by measuring to the outside of the saw blade (see inset). This automatically compensates for the width of the blade in each cut. Making the Legs First, do the calculations to determine the length of the legs. Carefully measure the height of your table saw. From this number, subtract the height of your casters plus IV2", which allows for two thicknesses of plywood. This takes into account the thickness of the top and caster braces. Since plywood is slightly less than 3/4" thick, you'll get a table that's a tiny bit lower than the top of your table saw — perfect for outfeed support. Rip the wide and narrow leg pieces (pieces 1 and 2) to width. Note that the widths given in the Material List are nominal, not the actual width. Your leg parts will end up slightly narrower. If you add up the widths of all eight leg pieces, you get 19", which doesn't include saw kerfs. You'll be able to get all the leg pieces from the 19V4n-wide piece by setting the rip fence so the dimension reads to the outside of the blade (see top Cut the leg blanks to finished length after squaring one end. When assembling the legs, mark the approximate finished length so you don't put nails there. inset photo), not the inside as you normally do. This technique allows you to get the widest possible parts for the legs. These are the only parts that require measuring this way. After the leg pieces are ripped, glue and brad-nail the wide piece to the narrow one to make a corner. Mark the parts with the approximate location of the final leg-length cut so you don't put any nails there. Square one end of each leg and cut them all to finished length (bottom left photo). Using a 1/4"-diameter roundover router bit, ease the outside corners of all four legs. Building the Frames The top and bottom frames are identical in size. Make the frames by ripping six of the short and long frame pieces (pieces 3 and 4) from the 20" x 32" slab and two from the 7" x 28" slab. Crosscut the parts to finished length. Drill pocket holes in the four parts you'll use for the top frame, three pockets in each piece (top right photo). Pocket screws will be used to attach the top later. If you don't have a pocket-hole jig and are willing to live with screws showing in the top, you can fasten the top by simply screwing down through it to the upper frame. Assemble the frames (bottom right photo). The long frame pieces overlap the short pieces. Drill pocket screw holes in the four pieces of the top frame. You'll use these holes to attach the top later, during assembly. Adding Braces and Casters Rip a strip for the caster braces (pieces 6) from the 28" slab. Cut one end at 45 degrees. The only way to get all four pieces from the strip is by cutting them so angled sides face Joining the Legs and Frames Glue and screw the frames to the legs (see top photo, page 62). Cut the bottom shelf (piece 5) from what remains of the 32" plywood slab. Round over the top corners. Glue and nail the shelf to the bottom frame. Assemble the frames by gluing and brad-nailing the frame together, then secure the joints with countersunk screws, keep them square. 60 October 2008 Woodworker's Journal |


