Woodworker's Journal 2009-33-2, страница 48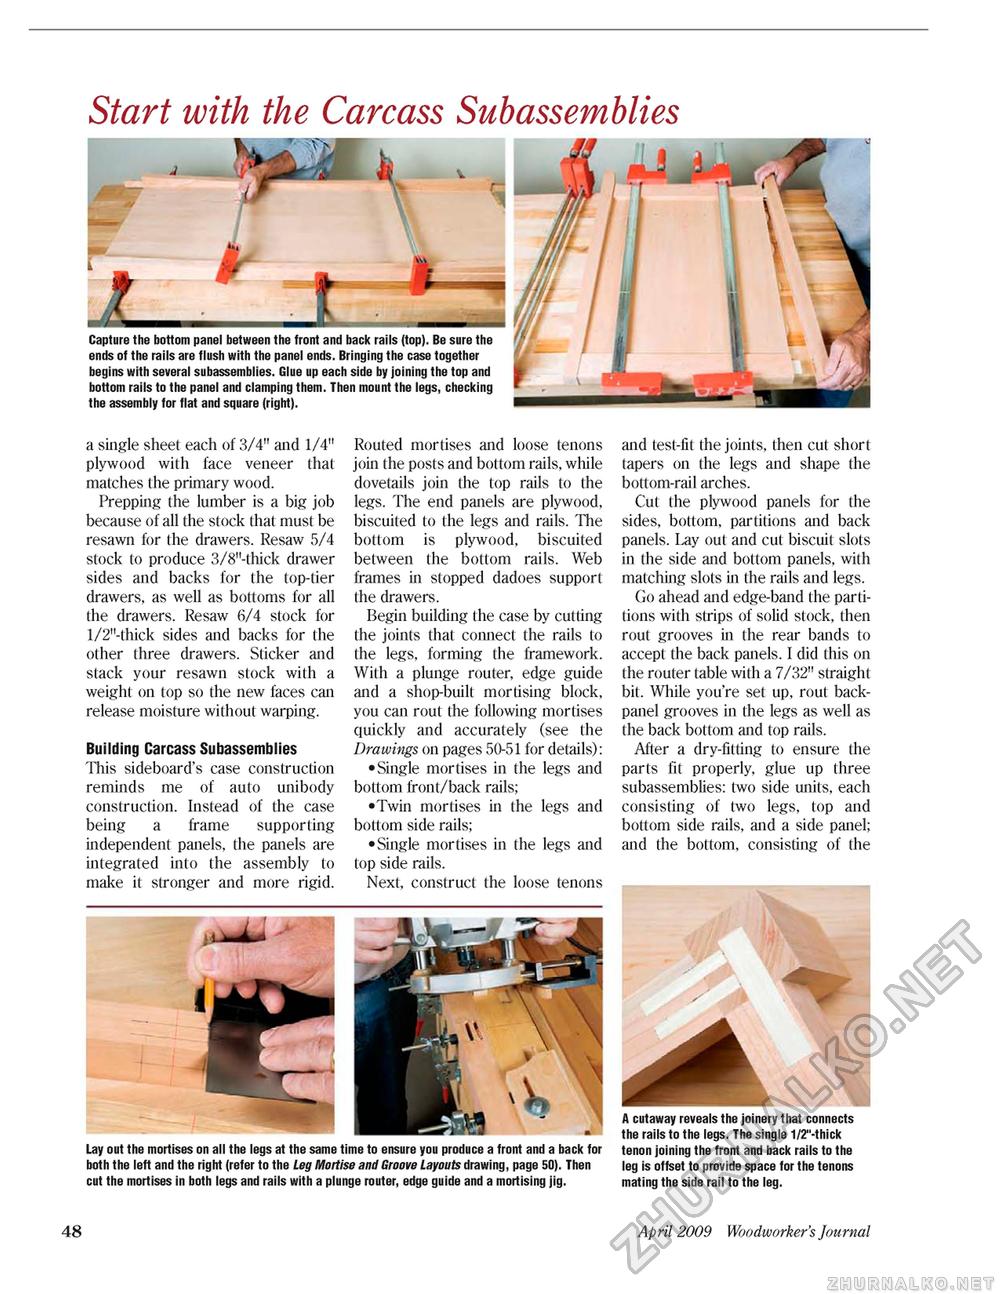
Start with the Carcass Subassemblies M
Capture the bottom panel between the front and back rails (top). Be sure the ends of the rails are flush with the panel ends. Bringing the case together begins with several subassemblies. Glue up each side by joining the top and bottom rails to the panel and clamping them. Then mount the legs, checking the assembly for flat and square (right). Capture the bottom panel between the front and back rails (top). Be sure the ends of the rails are flush with the panel ends. Bringing the case together begins with several subassemblies. Glue up each side by joining the top and bottom rails to the panel and clamping them. Then mount the legs, checking the assembly for flat and square (right). a single sheet each of 3/4" and 1/4" plywood with face veneer that matches the primary wood. Prepping the lumber is a big job because of all the stock that must be resawn for the drawers. Resaw 5/4 stock to produce 3/8"-thick drawer sides and backs for the top-tier drawers, as well as bottoms for all the drawers. Resaw 6/4 stock for l/2"-thick sides and backs for the other three drawers. Sticker and slack your resawn stock with a weight on top so the new faces can release moisture without warping. Building Carcass Subassemblies This sideboard's case construction reminds me of auto unibody construction. Instead of the case being a frame supporting independent panels, the panels are integrated into the assembly to make it stronger and more rigid. Routed mortises and loose tenons join the posts and bottom rails, while dovetails join the top rails to the legs. The end panels are plywood, biscuited to the legs and rails. Hie bottom is plywood, biscuited between (he bottom rails. Web frames in stopped dadoes support the drawers. Begin building the case by cutting the joints that connect the rails to the legs, forming the framework. Willi a plunge router, edge guide and a shop-built mortising block, you can rout the following mortises quickly and accurately (see the Drawings on pages 50-51 for details): •Single mortises in the legs and bottom front/back rails; •Twin mortises in the legs and bottom side rails; •Single mortises in the legs and top side rails. Next, construct the loose tenons and test-fit the joints, then cut short tapers on the legs and shape the bottom-rail arches. Cut the plywood panels for the sides, bottom, partitions and back panels. I .ay out and cut biscuit slots in the side and bottom panels, with matching slots in the rails and legs. Go ahead and edge-band the partitions with strips of solid stock, then rout grooves in the rear bands to accept the back panels. I did this on the router table with a 7/32" straight bit. While you're set up, rout back-panel grooves in the legs as well as the back bottom and top rails. After a dry-fitting to ensure the parts tit properly, glue up three subassemblies: two side units, each consisting of two legs, top and bottom side rails, and a side panel; and the bottom, consisting of the Lay out the mortises on all the legs at the same time to ensure you produce a front and a back for both the left and the right (refer to the Leg Mortise and Groove Layouts drawing, page 50). Then cut the mortises in both legs and rails with a plunge router, edge guide and a mortising jig. A cutaway reveals the joinery that connects the rails to the legs. The single 1/2"-thick tenon joining the front and back rails to the leg is offset to provide space for the tenons mating the side rail to the leg. 48 April 2009 Woodworker's Journal |


