Woodworker's Journal 2009-33-2, страница 49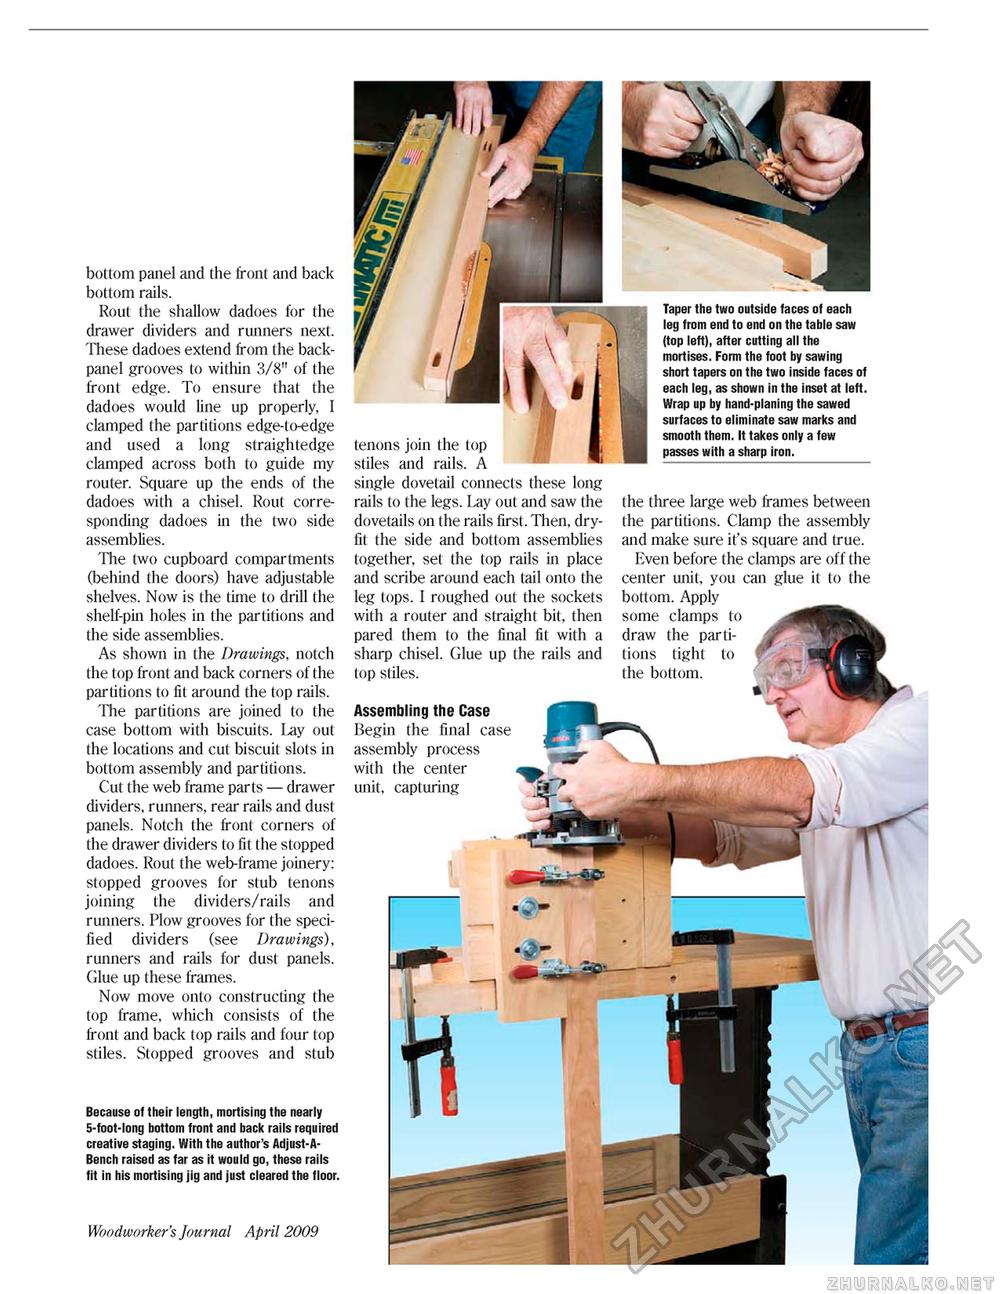
bottom panel and the front and back bottom rails. Rout the shallow dadoes for the drawer dividers and runners next. These dadoes extend from the back-panel grooves to within 3/8" of the front edge. To ensure that the dadoes would line up properly, I clamped the partitions edge-to-edge and used a long straightedge clamped across both to guide my router. Square up the ends of Ihe dadoes with a chisel. Rout corresponding dadoes in the two side assemblies. The two cupboard compartments (behind the doors) have adjustable shelves. Now is the time to drill the shelf-pin holes in the partitions and the side assemblies. As shown in the Drawings, notch the top front and back corners of the partitions to fit around the top rails. The partitions are joined to Ihe case bottom with biscuits. Lay out the locations and cut biscuit slots in bottom assembly and partitions. Cut the web frame parts — drawer dividers, runners, rear rails and dust panels. Notch the front corners of the drawer dividers to fit the stopped dadoes. Rout the web-frame joinery: stopped grooves for stub tenons joining the dividers/rails and runners. Plow grooves for the specified dividers (see Drawings), runners and rails for dust panels. Glue up these frames. Now move onto constructing the top frame, which consists of the front and back top rails and four top stiles. Stopped grooves and stub Because of their length, mortising the nearly S-foot-long bottom front and back rails required creative staging. With the author's fldjust-fl-Bench raised as far as it would go, these rails fit in his mortising jig and just cleared the floor. Woodworker's Journal April 2009 1 5 tenons join the top stiles and rails. A single dovetail connects these long rails to the legs. Lay out and saw the dovetails on the rails first. Then, dry-fit the side and bottom assemblies together, set the top rails in place and scribe around each tail onto the leg tops. I roughed out the sockets with a router and straight bit, then pared them to the final fit with a sharp chisel. Glue up the rails and top stiles. Assembling the Case Begin the final case assembly process with the center unit, capturing Taper the two outside faces of each leg from end to end on the table saw (top left), after cutting all the mortises. Form the foot by sawing short tapers on the two inside faces of each leg, as shown in the inset at left. Wrap up by hand-planing the sawed surfaces to eliminate saw marks and smooth them. It takes only a few passes with a sharp iron. the three large web frames between the partitions. Clamp the assembly and make sure it's square and true. Even before the clamps are off the center unit, you can glue it to the bottom. Apply some clamps to draw the partitions tight to the bottom. |


