Woodworker's Journal 2009-33-2, страница 54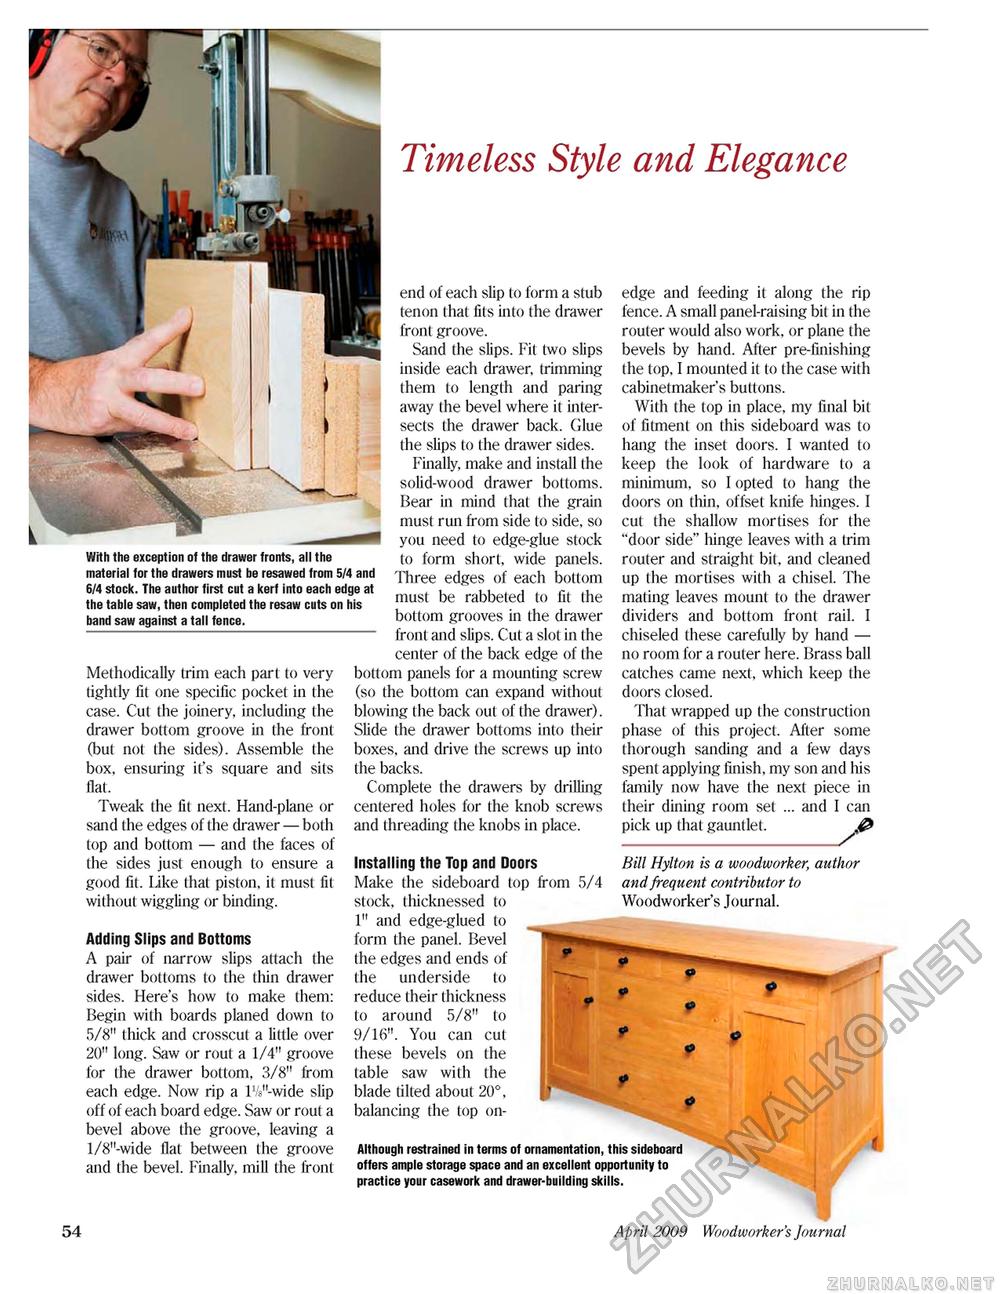
Timeless Style and Elegance With the exception of the drawer fronts, all the material for the drawers must be resawed from 5/4 and 6/4 stock. The author first cut a kerf into each edge at the table saw, then completed the resaw cuts on his band saw against a tall fence. Methodically trim each part to very tightly fit one specific pocket in the case. Cut the joinery, including the drawer bottom groove in the front (but not the sides). Assemble the box, ensuring it's square and sits flat. Tweak the fit next. Hand-plane or sand the edges of the drawer — both top and bottom — and the faces of the sides just enough to ensure a good fit. like that piston, it must fit without wiggling or binding. Adding Slips and Bottoms A pair of narrow slips attach the drawer bottoms to the thin drawer sides. Here's how to make them: Begin with boards planed down to 5/8" thick and crosscut a little over 20" long. Saw or rout a 1/4" groove for the drawer bottom, 3/8" from each edge. Now rip a W-wide slip off of each board edge. Saw or rout a bevel above the groove, leaving a l/8"-wide flat between the groove and the bevel. Finally, mill the front end of each slip to form a stub tenon that fits into the drawer front groove. Sand the slips. Fit two slips inside each drawer, trimming them to length and paring away the bevel where it intersects the drawer back. Glue the slips to the drawer sides. Finally, make and install the solid-wood drawer bottoms. Bear in mind that the grain must run from side to side, so you need to edge-glue stock to form short, wide panels. Three edges of each bottom must be rabbeted to fit the bottom grooves in the drawer front and slips. Cut a slot in the center of the back edge of the bottom panels for a mounting screw (so the bottom can expand without blowing (he back out of the drawer). Slide the drawer bottoms into their boxes, and drive the screws up into the backs. Complete the drawers by drilling centered holes for the knob screws and threading the knobs in place. Installing the Top and Doors Make the sideboard top from 5/4 stock, ihicknessed to 1" and edge-glued to form the panel. Bevel the edges and ends of the underside to reduce their thickness to around 5/8" to 9/16". You can cut these bevels on the table saw with the blade tilted about 20°, balancing the top on- fllthough restrained in terms of ornamentation, this sideboard offers ample storage space and an excellent opportunity to practice your casework and drawer-building skills. edge and feeding it along the rip fence. A small panel-raising bit in the router would also work, or plane the bevels by hand. After pre-finishing the top, I mounted it to the case with cabinetmaker's buttons. With the top in place, my final bit of fitment on this sideboard was to hang the inset doors. I wanted to keep the look of hardware to a minimum, so I opted to hang the doors on thin, offset knife hinges. I cut the shallow mortises for the "door side" hinge leaves with a trim router and straight bit, and cleaned up (he mortises with a chisel. The mating leaves mount to the drawer dividers and bottom front rail. 1 chiseled these carefully by hand — no room for a router here. Brass ball catches came next, which keep the doors closed. That wrapped up (he construction phase of this project. After some thorough sanding and a few days spent applying finish, my son and his family now have the next piece in their dining room set ... and I can pick up that gauntlet._ Bill Hylton is a woodworker, author and frequent contributor to Woodworker's Journal. 54 April 2009 Woodworker's Journal |


