Woodworker's Journal 2009-33-4, страница 17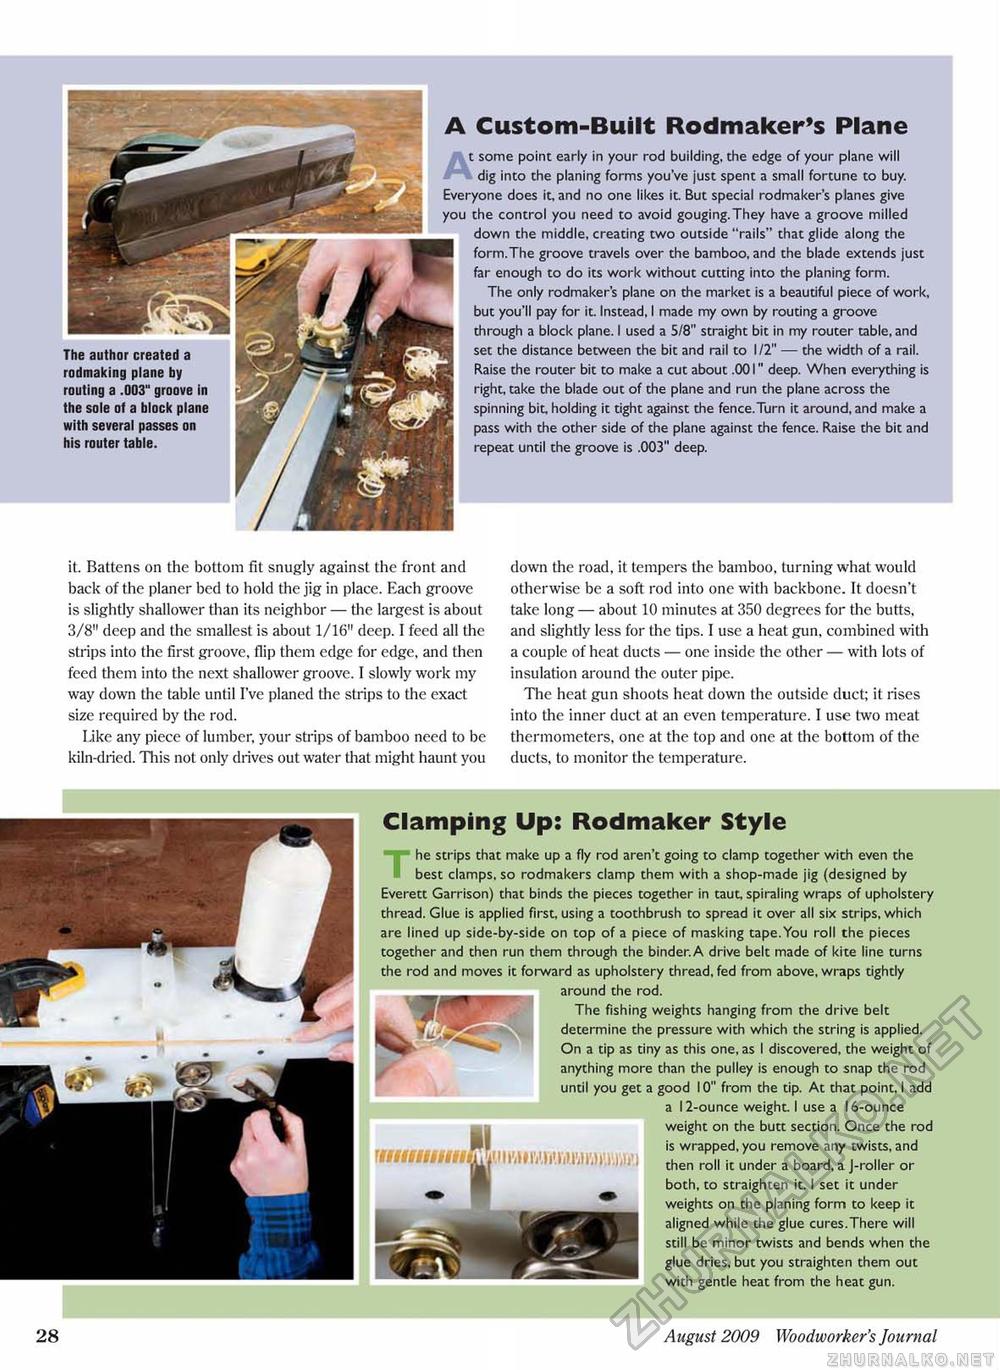
The author created a rodmaking plane by routing a .003" groove in the sole of a block plane with several passes on his router table. A Custom-Built Rodmaker's Plane At some point early in your rod building, the edge of your plane will dig into the planing forms you've just spent a small fortune to buy. Everyone does it, and no one likes it. But special rodmaker's planes give you the control you need to avoid gouging.They have a groove milled down the middle, creating two outside "rails" that glide along the form.The groove travels over the bamboo, and the blade extends just far enough to do its work without cutting into the planing form. The only rodmaker's plane on the market is a beautiful piece of work, but you'll pay for it. Instead, I made my own by routing a groove through a block plane. I used a 5/8" straight bit in my router table, and set the distance between the bit and rail to I IT — the width of a rail. Raise the router bit to make a cut about .001" deep. When everything is right, take the blade out of the plane and run the plane across the spinning bit, holding it tight against the fence.Turn it around, and make a pass with the other side of the plane against the fence. Raise the bit and repeat until the groove is .003" deep. it. Battens on the bottom fit snugly against the front and back of the planer bed to hold the jig in place. Each groove is slightly shallower than its neighbor — the largest is about 3/8" deep and the smallest is about 1/16" deep. I feed all the strips into the first groove, flip them edge for edge, and then feed them into the next shallower groove. I slowly work my way down the table until I've planed the strips to the exact size required by the rod. Like any piece of lumber, your strips of bamboo need to be kiln-dried. This not only drives out water that might haunt you down the road, it tempers the bamboo, turning what would otherwise be a soft rod into one with backbone. It doesn't take long — about 10 minutes at 350 degrees for the butts, and slightly less for the tips. I use a heat gun, combined with a couple of heat ducts — one inside the other — with lots of insulation around the outer pipe. The heat gun shoots heat down the outside duct; it rises into the inner duct at an even temperature. I use two meat thermometers, one at the top and one at the bottom of the ducts, to monitor the temperature. Clamping Up: Rodmaker Style he strips that make up a fly rod aren't going to clamp cogether with even the best clamps, so rodmakers clamp them with a shop-made jig (designed by Everett Garrison) that binds the pieces together in taut, spiraling wraps of upholstery thread. Glue is applied first, using a toothbrush to spread it over all six strips, which are lined up side-by-side on top of a piece of masking tape. You roll the pieces together and then run them through the binder.A drive belt made of kite line turns the rod and moves it forward as upholstery thread, fed from above, wraps tightly around the rod. The fishing weights hanging from the drive belt determine the pressure with which the string is applied. On a tip as tiny as this one, as I discovered, the weight of anything more than the pulley is enough to snap the rod until you get a good 10" from the tip. At that point, I add a 12-ounce weight. I use a 16-ounce weight on the butt section. Once the rod is wrapped, you remove any twists, and then roll it under a board, a J-roller or both, to straighten it. I set it under weights on the planing form to keep it aligned while the glue cures.There will still be minor twists and bends when the glue dries, but you straighten them out with gentle heat from the heat gun. 28 August 2009 Woodworker's Journal |


