Woodworker's Journal 2009-33-5, страница 36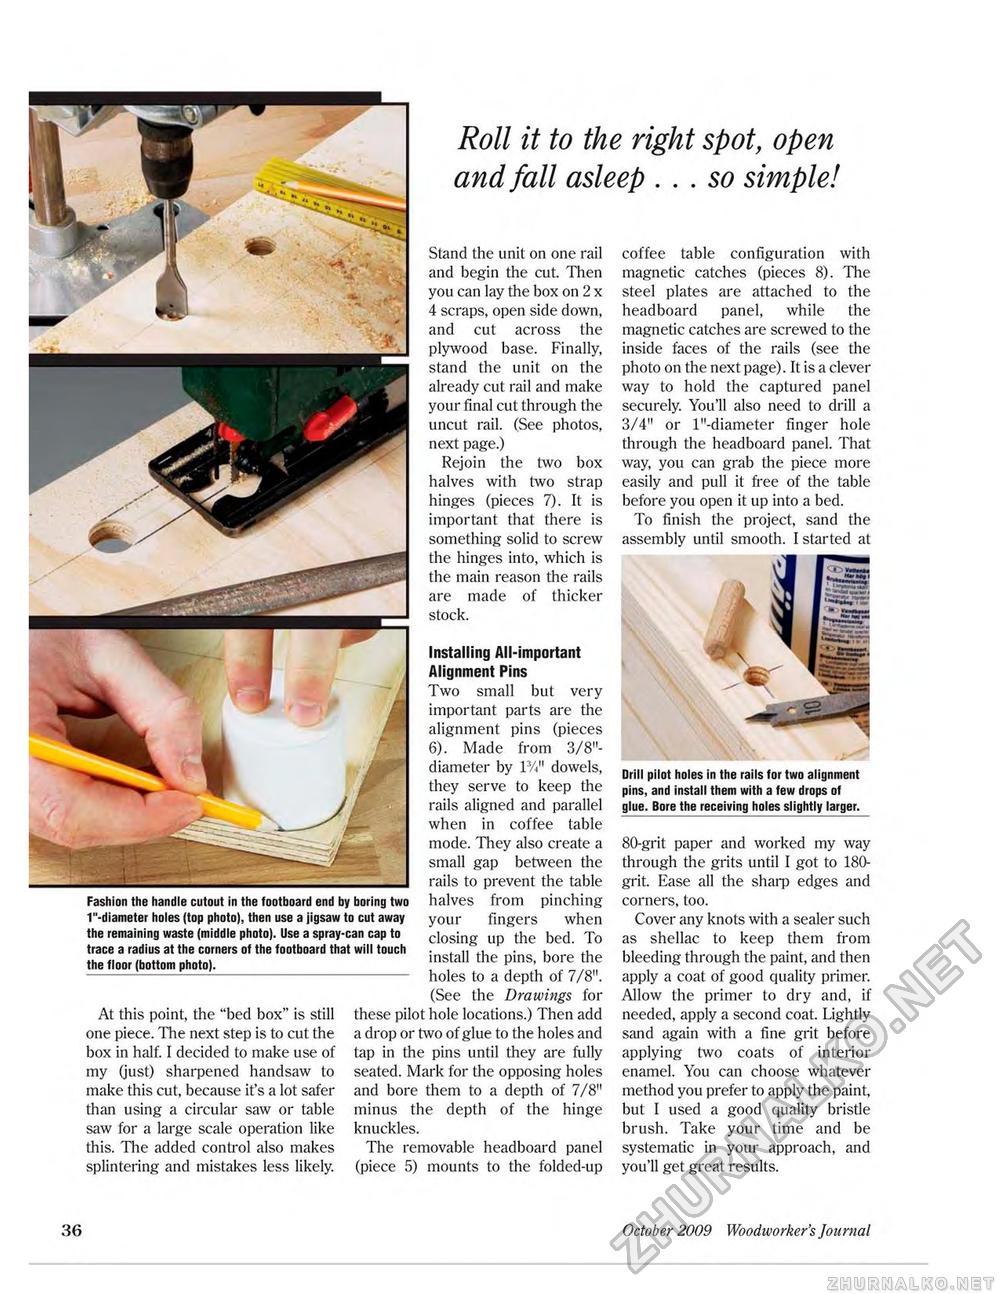
Roll it to the right spot, open and fall asleep ... so simple! Stand the unit on one rail and begin the cut. Then you can lay the box on 2 x 4 scraps, open side down, and cut across the plywood base. Finally, stand the unit on the already cut rail and make your final cut through the uncut rail. (See photos, next page.) Rejoin the two box halves with two strap hinges (pieces 7). It is important that there is something solid to screw the hinges into, which is the main reason the rails are made of thicker stock. Fashion the handle cutout in the footboard end by boring two t"-diameter holes (top photo), then use a jigsaw to cut away the remaining waste (middle photo). Use a spray-can cap to trace a radius at the corners of the footboard that will touch the floor (bottom photo). At this point, the "bed box" is still one piece. The next step is to cut the box in half. I decided to make use of my (just) sharpened handsaw to make this cut, because it's a lot safer than using a circular saw or table saw for a large scale operation like this. The added control also makes splintering and mistakes less likely. Installing All-important Alignment Pins Two small but very important parts are the alignment pins (pieces 6). Made from 3/8"-diameter by 1%" dowels, they serve to keep the rails aligned and parallel when in coffee table mode. They also create a small gap between the rails to prevent the table halves from pinching your fingers when closing up the bed. To install the pins, bore the holes to a depth of 7/8". (See the Drawings for these pilot hole locations.) Then add a drop or two of glue to the holes and tap in the pins until they are fully seated. Mark for the opposing holes and bore them to a depth of 7/8" minus the depth of the hinge knuckles. The removable headboard panel (piece 5) mounts to the folded-up 80-grit paper and worked my way through the grits until I got to 180-grit. Ease all the sharp edges and corners, too. Cover any knots with a sealer such as shellac to keep them from bleeding through the paint, and then apply a coat of good quality primer. Allow the primer to dry and, if needed, apply a second coat. Lightly sand again with a fine grit before applying two coats of interior enamel. You can choose whatever method you prefer to apply the paint, but I used a good quality bristle brush. Take your time and be systematic in your approach, and you'll get great results. coffee table configuration with magnetic catches (pieces 8). The steel plates are attached to the headboard panel, while the magnetic catches are screwed to the inside faces of the rails (see the photo on the next page). It is a clever way to hold the captured panel securely. You'll also need to drill a 3/4" or l"-diameter finger hole through the headboard panel. That way, you can grab the piece more easily and pull it free of the table before you open it up into a bed. To finish the project, sand the assembly until smooth. I started at Drill pilot holes in the rails for two alignment pins, and install them with a few drops of glue. Bore the receiving holes slightly larger. 36 October 2009 Woodivorker's Journal |


