Woodworker's Journal fall-2008, страница 86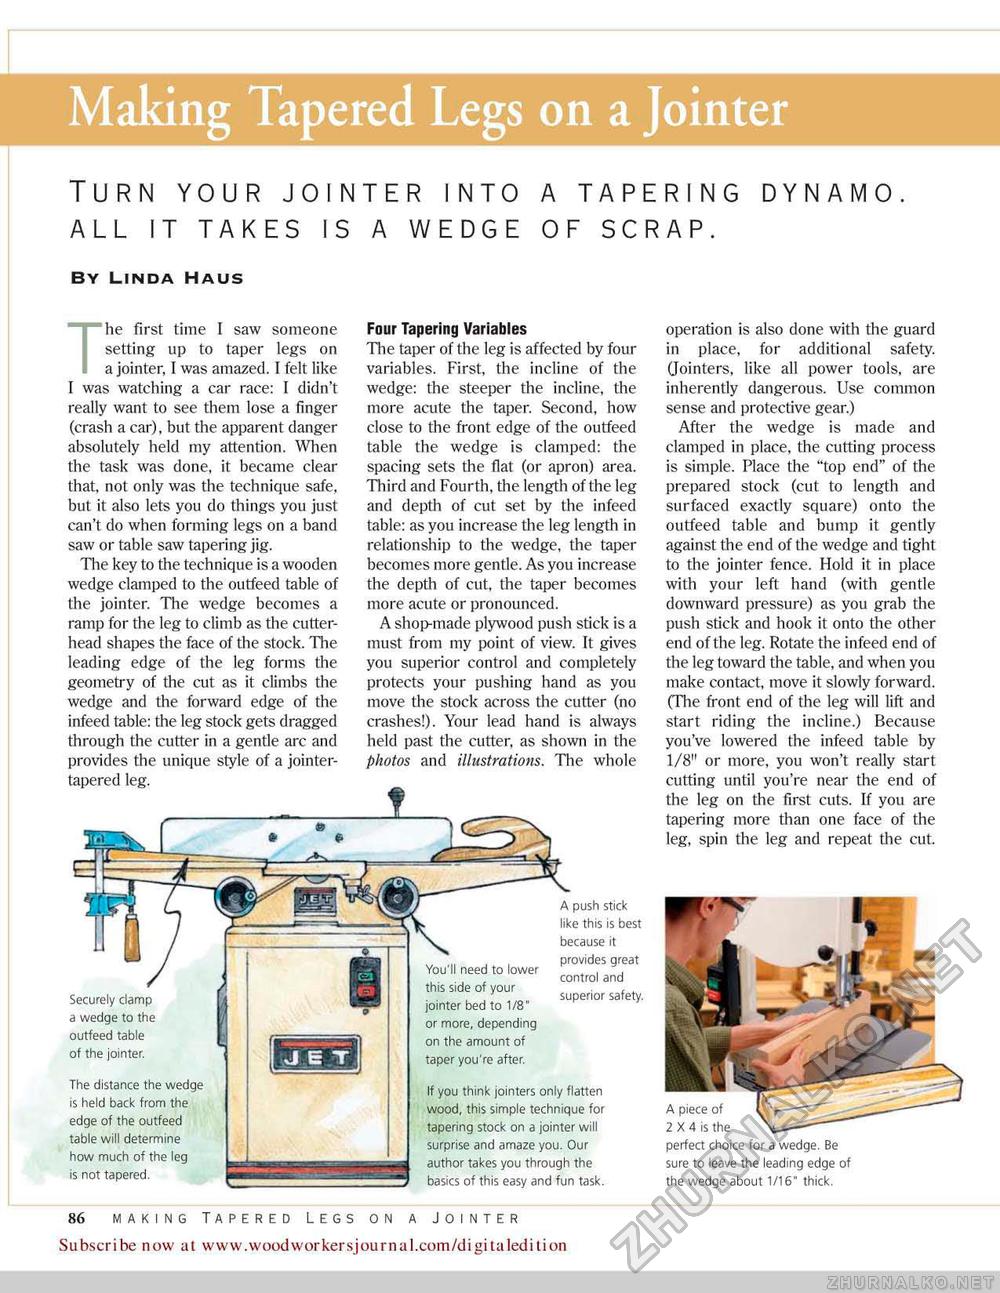
Turn your jointer into a tapering dynamo all it takes is a wedge of scrap. by linda haus operation is also done with the guard in place, for additional safety. Qointers, like all power tools, are inherently dangerous. Use common sense and protective gear.) After the wedge is made and clamped in place, the cutting process is simple. Place the "top end" of the prepared stock (cut to length and surfaced exactly square) onto the outfeed table and bump it gently against the end of the wedge and tight to the jointer fence. Hold it in place with your left hand (with gentle downward pressure) as you grab the push stick and hook it onto the other end of the leg. Rotate the infeed end of the ieg toward the table, and when you make contact, move it slowly forward. (The front end of the leg will lift and start riding the incline.) Because you've lowered the infeed table by 1/8" or more, you won't really start cutting until you're near the end of the leg on the first cuts. If you are tapering more than one face of the leg, spin the leg and repeat the cut. perfect choice for a wedge. Be sure to leave the leading edge of the wedge about 1/16" thick. The first time [ saw someone setting up to taper legs on a jointer, I was amazed. I felt like I was watching a car race: I didn't really want to see them lose a finger (crash a car), but the apparent danger absolutely held my attention. When the task was done, it became clear that, not only was the technique safe, but it also lets you do things you just can't do when forming legs on a band saw or table saw tapering jig. The key to the technique is a wooden wedge clamped to the outfeed table of the jointer. The wedge becomes a ramp for the leg to climb as the cutter-head shapes the face of the stock. The leading edge of the leg forms the geometry of the cut as it climbs the wedge and the forward edge (if the infeed table: the leg stock gets dragged through the cutter in a gentle arc and provides the unique style of a jointer-tapered leg. Four Tapering Variables The taper of the leg is affected by four variables. First, the incline of the wedge: the steeper the incline, the more acute the taper. Second, how close to the front edge of the outfeed table the wedge is clamped: the spacing sets the flat (or apron) area. Third and Fourth, the length of the leg and depth of cut set by the infeed table: as you increase the leg length in relationship to the wedge, the taper becomes more gentle. As you increase the depth of cut, the taper becomes more acute or pronounced. A shop-made plywood push stick is a must from my point of view. It gives you superior control and completely protects your pushing hand as you move the stock across the cutter {no crashes!). Your lead hand is always held past the cutter, as shown in the photos and illustrations. The whole Securely clamp a wedge to the outfeed table of the jointer. The distance the wedge is held back from the edge of the outfeed table will determine how much of the leg is not tapered. If you think jointers only flatten wood, this simple technigue for tapering stock on a jointer will surprise and amaze you. Our author takes you through the basics of this easy and fun task. You'll need to lower this side of your jointer bed to 1/8" or more, depending on the amount of taper you're after. A push stick like this is best because it provides great control and superior safety. 86 making tapered legs on a jointer Subscribe now at www.woodwoirkersjournal.com/digitaledition |


