Woodworker's Journal fall-2009, страница 23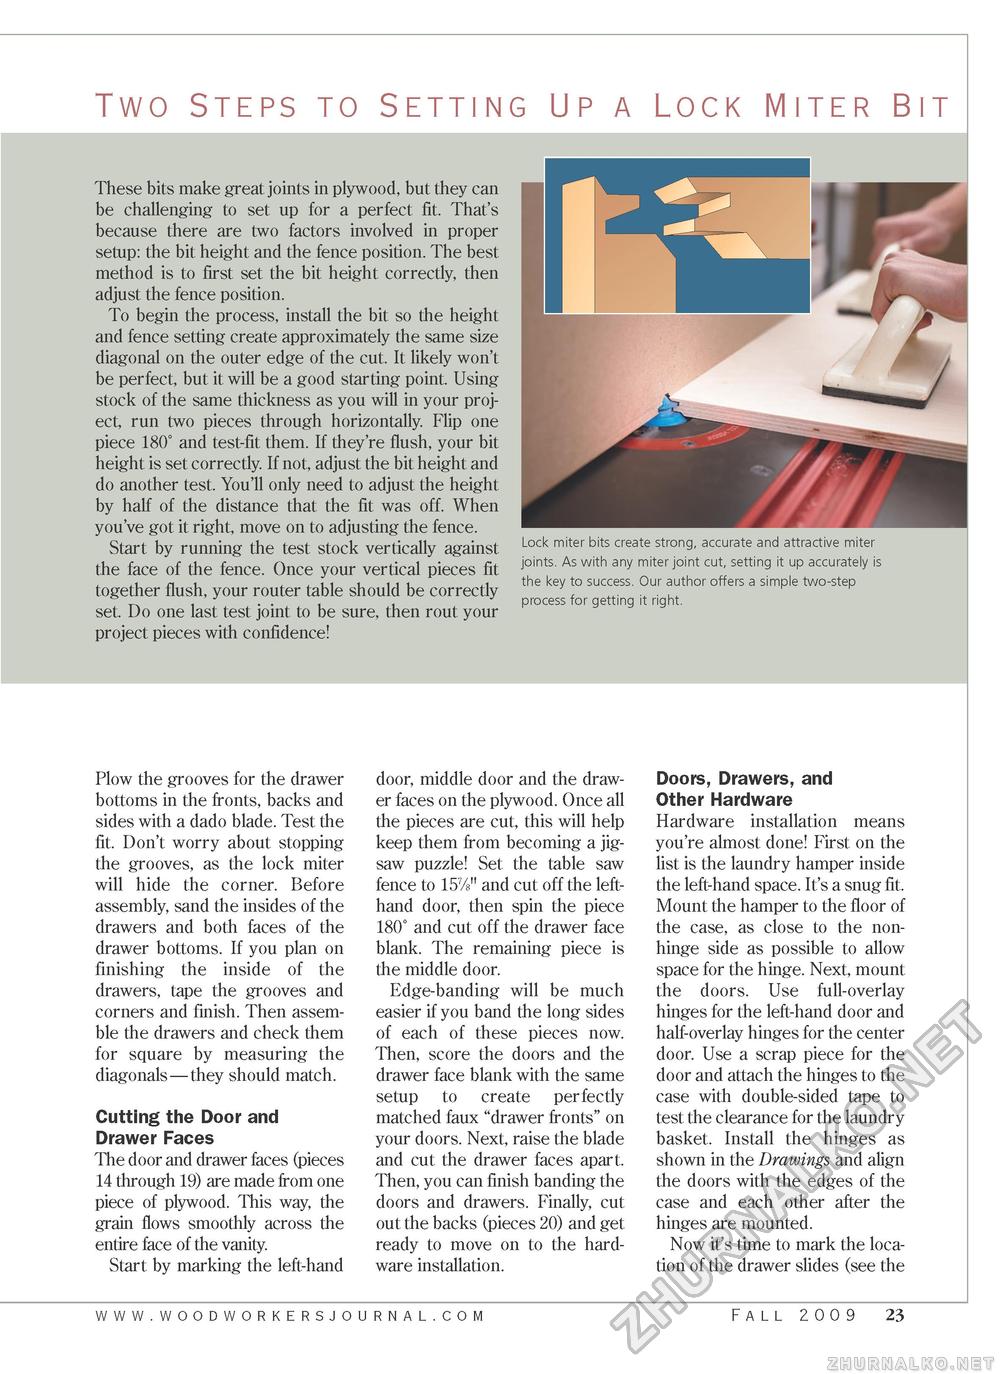
Two Steps to Setting Up a Lock Miter Bit These bits make great joints in plywood, but they can be challenging to set up for a perfect fit. That's because there are two factors involved in proper setup: the bit height and the fence position. The best method is to first set the bit height correctly, then adjust the fence position. To begin the process, install the bit so the height and fence setting create approximately the same size diagonal on the outer edge of the cut. It likely won't be perfect, but it will be a good starting point. Using stock of the same thickness as you will in your project, run two pieces through horizontally. Flip one piece 180° and test-fit them. If they're flush, your bit height is set correctly. If not, adjust the bit height and do another test. You'll only need to adjust the height by half of the distance that the fit was off. When you've got it right, move on to adjusting the fence. Start by running the test stock vertically against the face of the fence. Once your vertical pieces fit together flush, your router table should be correctly set. Do one last test joint to be sure, then rout your project pieces with confidence! Lock miter bits create strong, accurate and attractive miter joints. As with any miter joint cut, setting it up accurately is the key to success. Our author offers a simple two-step process for getting it right. Plow the grooves for the drawer bottoms in the fronts, backs and sides with a dado blade. Test the fit. Don't worry about stopping the grooves, as the lock miter will hide the corner. Before assembly, sand the insides of the drawers and both faces of the drawer bottoms. If you plan on finishing the inside of the drawers, tape the grooves and corners and finish. Then assemble the drawers and check them for square by measuring the diagonals—they should match. Cutting the Door and Drawer Faces The door and drawer faces (pieces 14 through 19) are made from one piece of plywood. This way, the grain flows smoothly across the entire face of the vanity. Start by marking the left-hand door, middle door and the drawer faces on the plywood. Once all the pieces are cut, this will help keep them from becoming a jigsaw puzzle! Set the table saw fence to 157/8" and cut off the left-hand door, then spin the piece 180° and cut off the drawer face blank. The remaining piece is the middle door. Edge-banding will be much easier if you band the long sides of each of these pieces now. Then, score the doors and the drawer face blank with the same setup to create perfectly matched faux "drawer fronts" on your doors. Next, raise the blade and cut the drawer faces apart. Then, you can finish banding the doors and drawers. Finally, cut out the backs (pieces 20) and get ready to move on to the hardware installation. Doors, Drawers, and Other Hardware Hardware installation means you're almost done! First on the list is the laundry hamper inside the left-hand space. It's a snug fit. Mount the hamper to the floor of the case, as close to the non-hinge side as possible to allow space for the hinge. Next, mount the doors. Use full-overlay hinges for the left-hand door and half-overlay hinges for the center door. Use a scrap piece for the door and attach the hinges to the case with double-sided tape to test the clearance for the laundry basket. Install the hinges as shown in the Drawings and align the doors with the edges of the case and each other after the hinges are mounted. Now it's time to mark the location of the drawer slides (see the Fall 2009 23 |


