Woodworker's Journal fall-2009, страница 30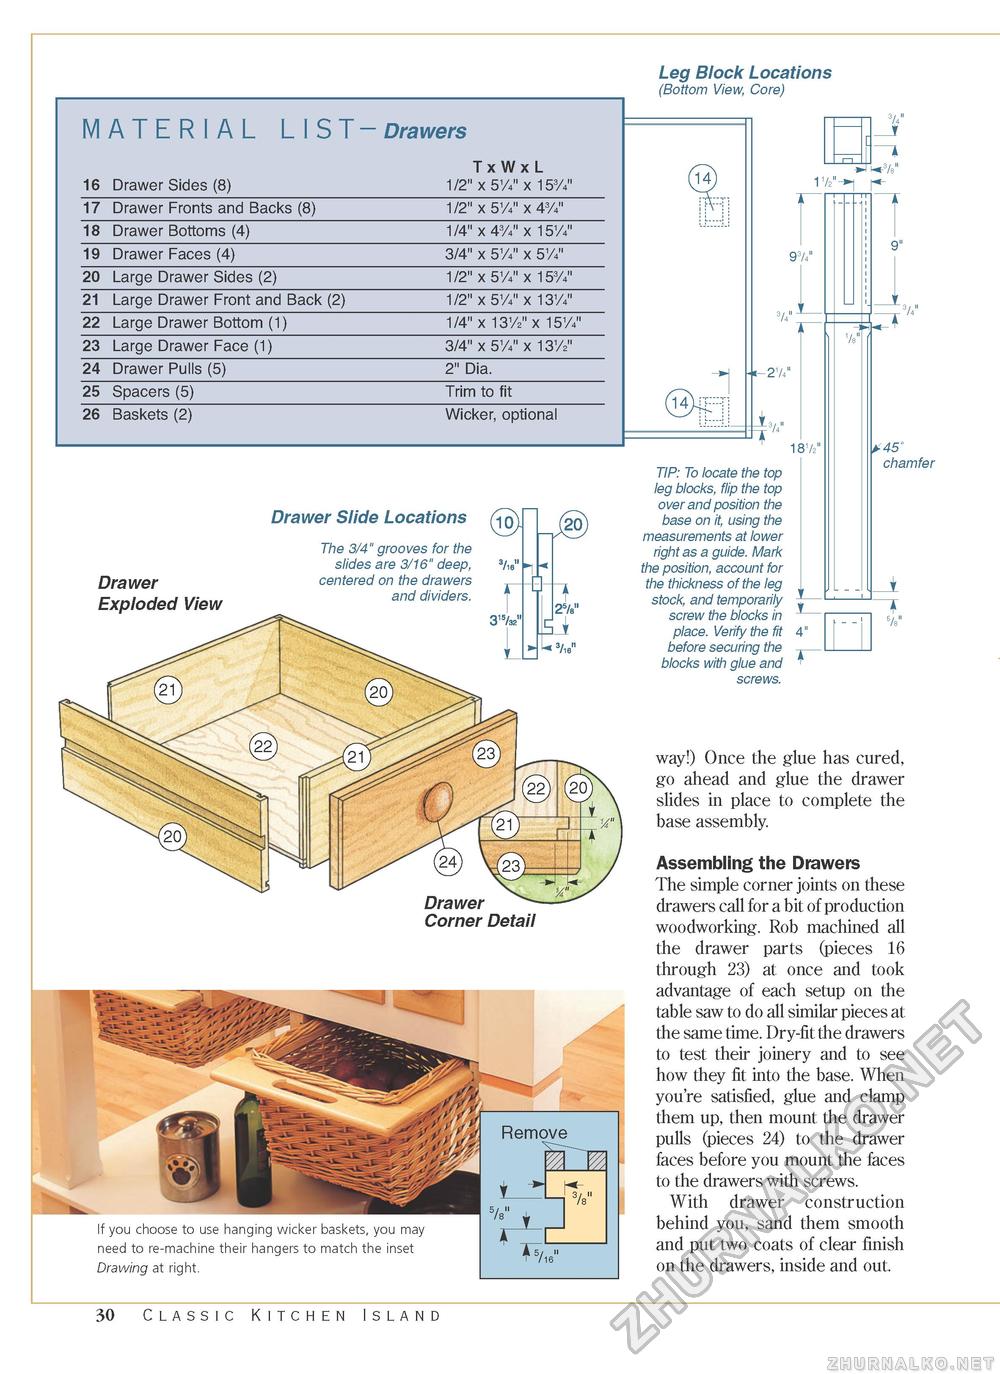
Drawer Slide Locations (^q Drawer Exploded View The 3/4" grooves for the slides are 3/16" deep, 3/le" centered on the drawers and dividers. ' Drawer Corner Detail If you choose to use hanging wicker baskets, you may need to re-machine their hangers to match the inset Drawing at right. Leg Block Locations (Bottom View, Core) ^ 1 f14UI:::-Ti 4 93/4" -274" J 1872" TIP: To locate the top leg blocks, flip the top over and position the base on it, using the measurements at lower right as a guide. Mark the position, account for the thickness of the leg stock, and temporarily screw the blocks in place. Verify the fit before securing the blocks with glue and screws. *45° chamfer "T 58 way!) Once the glue has cured, go ahead and glue the drawer slides in place to complete the base assembly. Assembling the Drawers The simple corner joints on these drawers call for a bit of production woodworking. Rob machined all the drawer parts (pieces 16 through 23) at once and took advantage of each setup on the table saw to do all similar pieces at the same time. Dry-fit the drawers to test their joinery and to see how they fit into the base. When you're satisfied, glue and clamp them up, then mount the drawer pulls (pieces 24) to the drawer faces before you mount the faces to the drawers with screws. With drawer construction behind you, sand them smooth and put two coats of clear finish on the drawers, inside and out. 30 Classic Kitchen Island |


