Woodworker's Journal Full-Length-Curio-Cabinet, страница 9
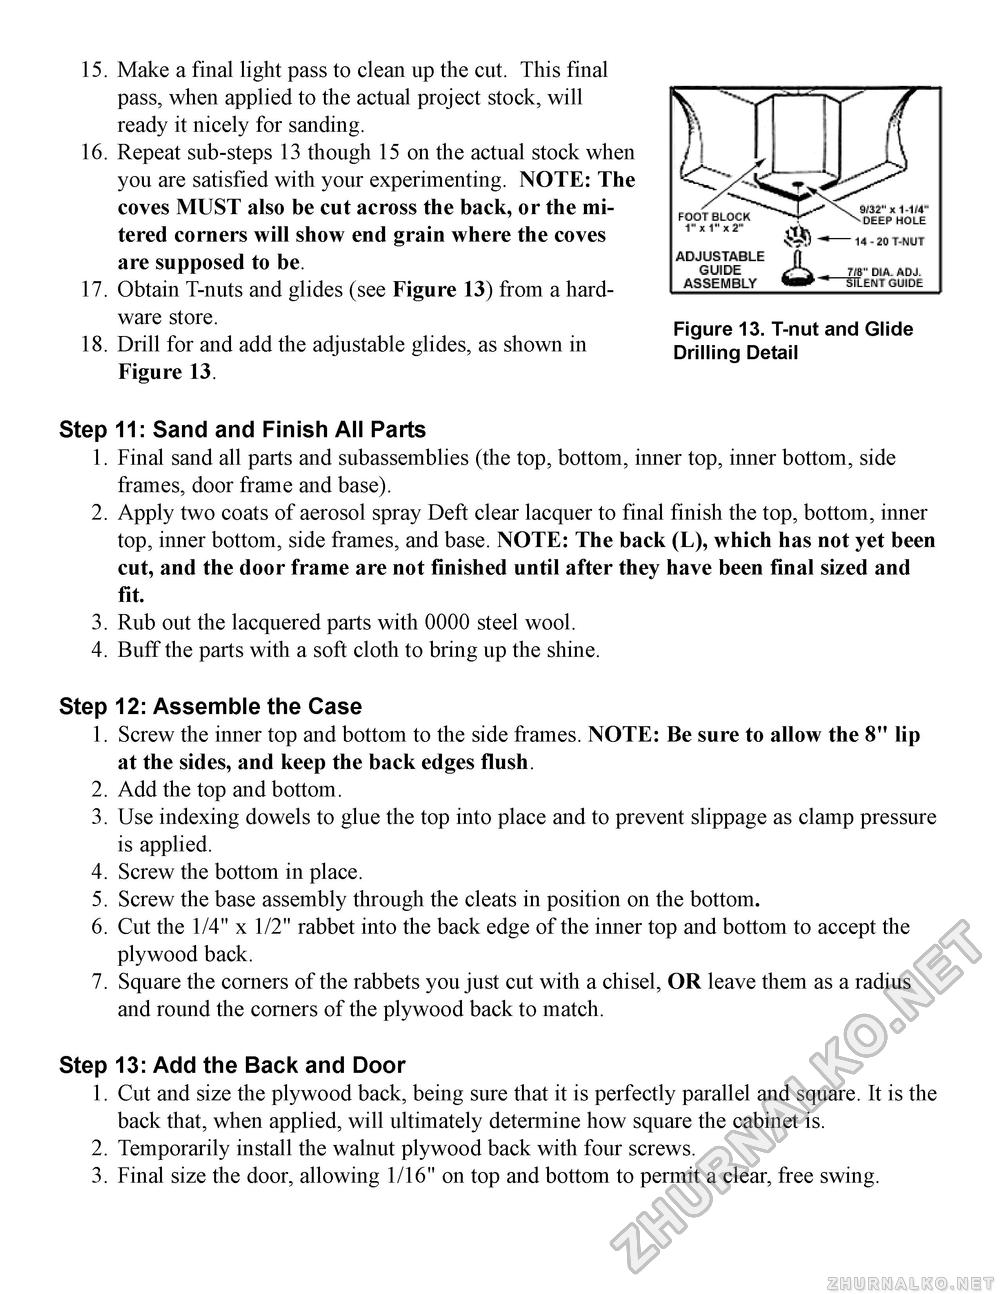
15. Make a final light pass to clean up the cut. This final pass, when applied to the actual project stock, will ready it nicely for sanding. 16. Repeat sub-steps 13 though 15 on the actual stock when you are satisfied with your experimenting. NOTE: The coves MUST also be cut across the back, or the mi-tered corners will show end grain where the coves are supposed to be. 17. Obtain T-nuts and glides (see Figure 13) from a hardware store. 18. Drill for and add the adjustable glides, as shown in Figure 13. Step 11: Sand and Finish All Parts1. Final sand all parts and subassemblies (the top, bottom, inner top, inner bottom, side frames, door frame and base). 2. Apply two coats of aerosol spray Deft clear lacquer to final finish the top, bottom, inner top, inner bottom, side frames, and base. NOTE: The back (L), which has not yet been cut, and the door frame are not finished until after they have been final sized and fit. 3. Rub out the lacquered parts with 0000 steel wool. 4. Buff the parts with a soft cloth to bring up the shine. Step 12: Assemble the Case1. Screw the inner top and bottom to the side frames. NOTE: Be sure to allow the 8" lip at the sides, and keep the back edges flush. 2. Add the top and bottom. 3. Use indexing dowels to glue the top into place and to prevent slippage as clamp pressure is applied. 4. Screw the bottom in place. 5. Screw the base assembly through the cleats in position on the bottom. 6. Cut the 1/4" x 1/2" rabbet into the back edge of the inner top and bottom to accept the plywood back. 7. Square the corners of the rabbets you just cut with a chisel, OR leave them as a radius and round the corners of the plywood back to match. Step 13: Add the Back and Door1. Cut and size the plywood back, being sure that it is perfectly parallel and square. It is the back that, when applied, will ultimately determine how square the cabinet is. 2. Temporarily install the walnut plywood back with four screws. 3. Final size the door, allowing 1/16" on top and bottom to permit a clear, free swing. Figure 13. T-nut and Glide Drilling Detail |


