Woodworker's Journal Full-Length-Curio-Cabinet, страница 6
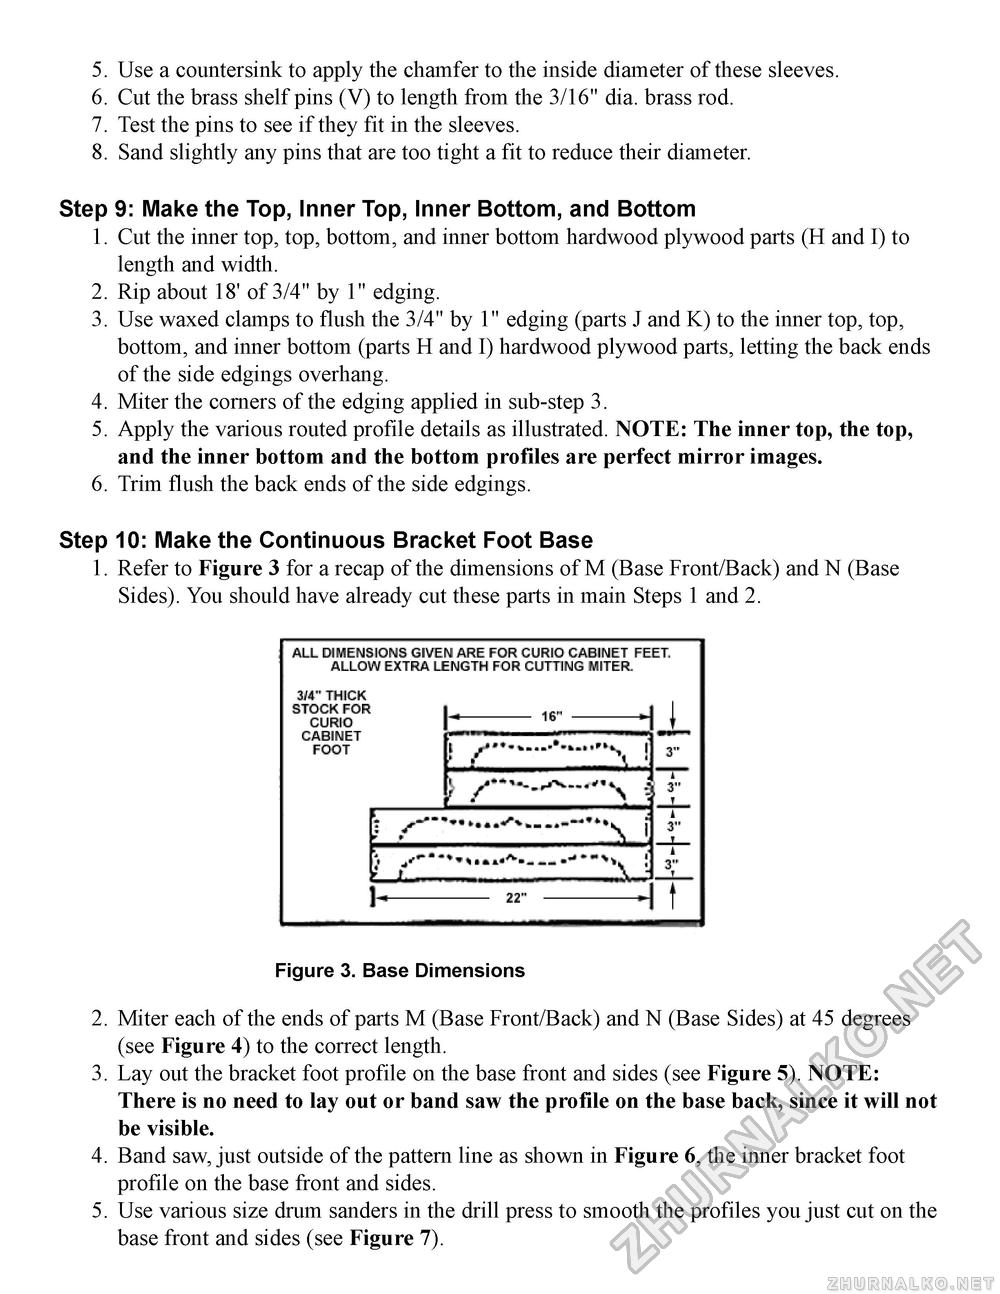
Use a countersink to apply the chamfer to the inside diameter of these sleeves. Cut the brass shelf pins (V) to length from the 3/16" dia. brass rod. Test the pins to see if they fit in the sleeves. Sand slightly any pins that are too tight a fit to reduce their diameter. 9: Make the Top, Inner Top, Inner Bottom, and BottomCut the inner top, top, bottom, and inner bottom hardwood plywood parts (H and I) to length and width. Rip about 18' of 3/4" by 1" edging. Use waxed clamps to flush the 3/4" by 1" edging (parts J and K) to the inner top, top, bottom, and inner bottom (parts H and I) hardwood plywood parts, letting the back ends of the side edgings overhang. Miter the corners of the edging applied in sub-step 3. Apply the various routed profile details as illustrated. NOTE: The inner top, the top, and the inner bottom and the bottom profiles are perfect mirror images. Trim flush the back ends of the side edgings. 10: Make the Continuous Bracket Foot BaseRefer to Figure 3 for a recap of the dimensions of M (Base Front/Back) and N (Base Sides). You should have already cut these parts in main Steps 1 and 2. Figure 3. Base Dimensions Miter each of the ends of parts M (Base Front/Back) and N (Base Sides) at 45 degrees (see Figure 4) to the correct length. Lay out the bracket foot profile on the base front and sides (see Figure 5). NOTE: There is no need to lay out or band saw the profile on the base back, since it will not be visible. Band saw, just outside of the pattern line as shown in Figure 6, the inner bracket foot profile on the base front and sides. Use various size drum sanders in the drill press to smooth the profiles you just cut on the base front and sides (see Figure 7). |


