Woodworker's Journal summer-2009, страница 37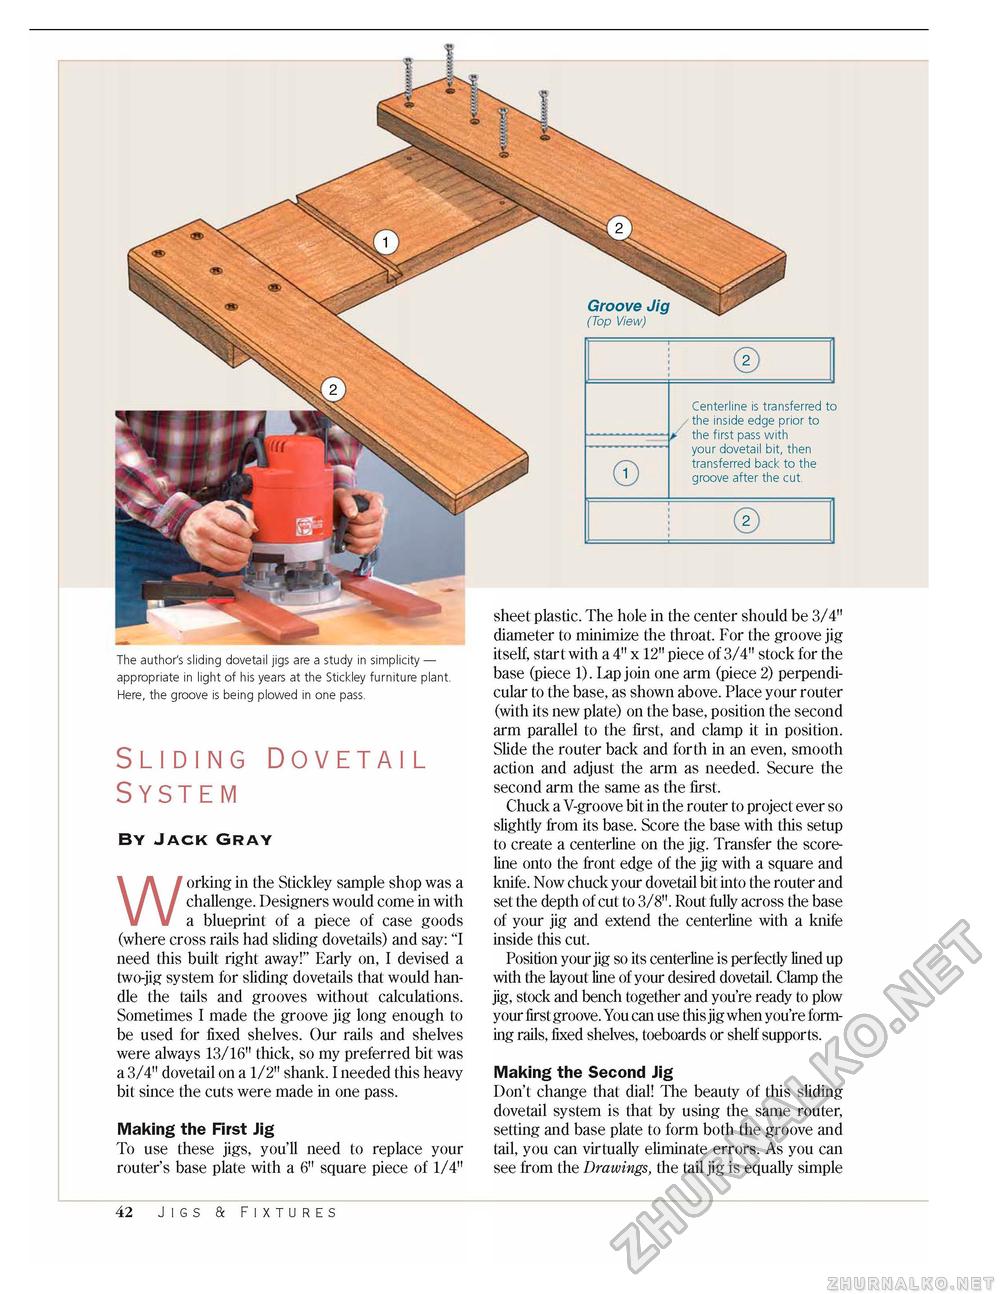
Centerline is transferred to the inside edge prior to a the first pass with your dovetail bit, then transferred back to the groove after the cut. The author's sliding dovetail jigs are a study in simplicity — appropriate in light of his years at the Stickley furniture plant Here, the groove is being plowed in one pass. Sliding Dovetail SystemBy Jack GrayWorking in the Stickley sample shop was a challenge. Designers would come in with a blueprint of a piece of case goods (where cross rails had sliding dovetails) and say: "I need this built right away!" Early on, I devised a two-jig system for sliding dovetails that would handle the tails and grooves without calculations. Sometimes I made the groove jig long enough to be used for fixed shelves. Our rails and shelves were always 13/16" thick, so my preferred bit was a 3/4" dovetail on a 1/2" shank. I needed this heavy bit since the cuts were made in one pass. Making the First Jig To use these jigs, you'll need to replace your router's base plate with a 6" square piece of 1/4" sheet plastic. The hole in the center should be 3/4" diameter to minimize the throat. For the groove jig itself, start with a 4" x 12" piece of 3/4" stock for the base (piece 1). Lap join one arm (piece 2) perpendicular to the base, as shown above. Place your router (with its new plate) on the base, position the second arm parallel to the first, and clamp it in position. Slide the router back and forth in an even, smooth action and adjust the arm as needed. Secure the second arm the same as the first. Chuck a V-groove bit in the router to project ever so slightly from its base. Score the base with this setup to create a centerline on the jig. Transfer the score-line onto the front edge of the jig with a square and knife. Now chuck your dovetail bit into the router and set the depth of cut to 3/8". Rout fully across the base of your jig and extend the centerline with a knife inside this cut. Position your jig so its centerline is perfectly lined up with the layout line of your desired dovetail. Clamp the jig, stock and bench together and you're ready to plow your first groove. You can use this jig when you're forming rails, fixed shelves, toeboards or shelf supports. Making the Second Jig Don't change that dial! The beauty of this sliding dovetail system is that by using the same router, setting and base plate to form both the groove and tail, you can virtually eliminate errors. As you can see from the Drawings, the tail jig is equally simple 42 Jigs a Fixtures |


