Woodworker's Journal winter-2009, страница 30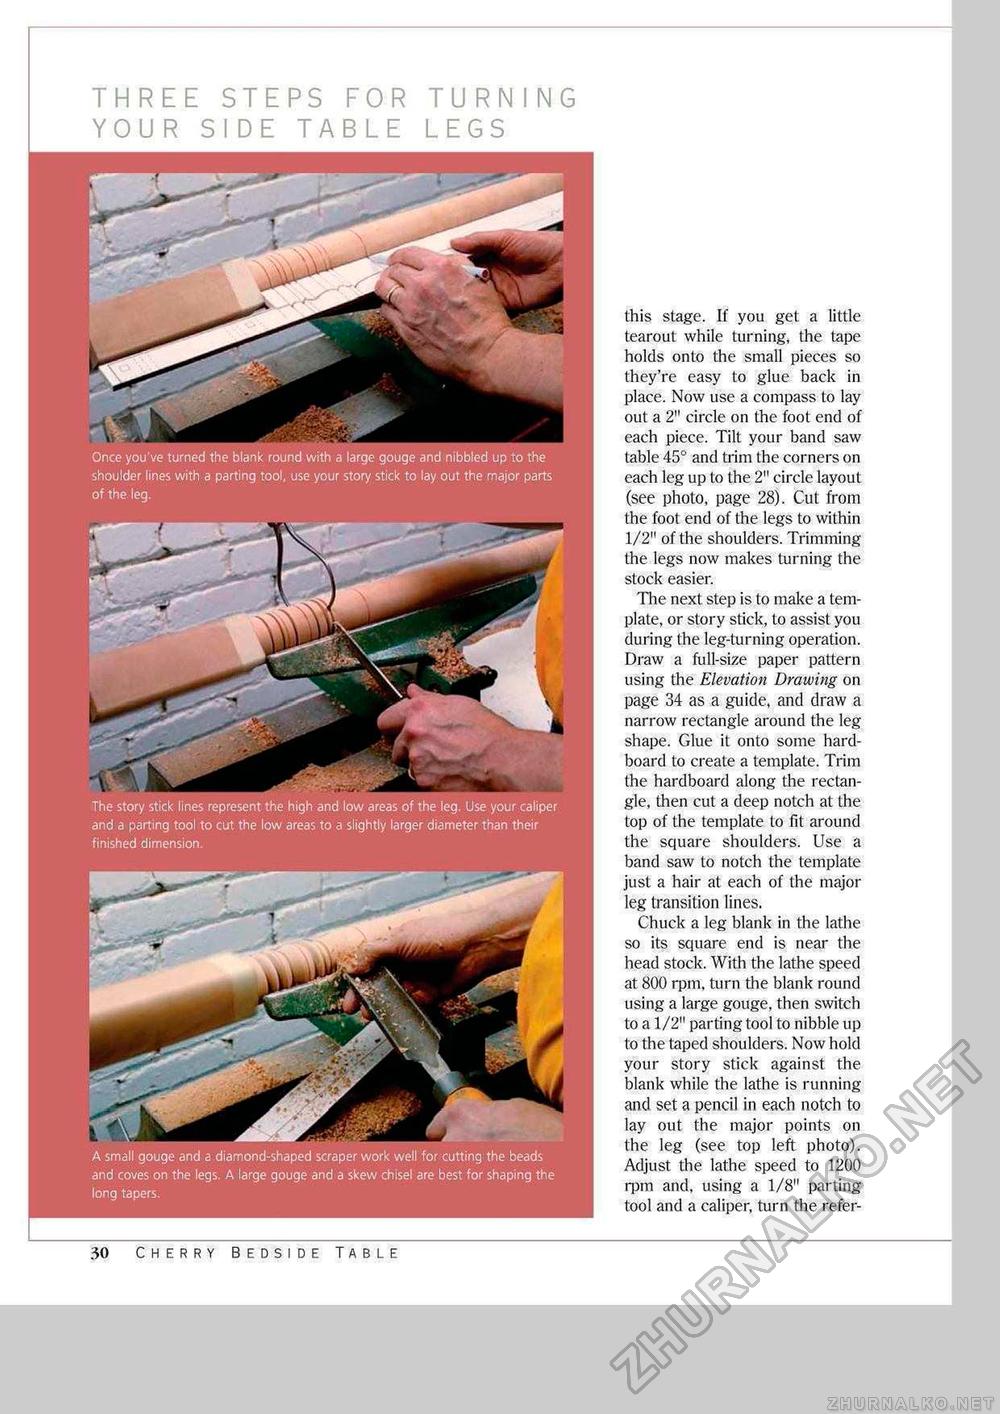
three steps for turning your side table legs A small gouge and a diamond-shaped scraper work well for cutting the beads and coves on the legs. A large gouge and a skew chisel are best for shaping the long tapers. this stage. If you get a little tearout while turning, the tape holds onto the small pieces so they're easy to glue back in place. Now use a compass to lay out a 2" circle on the foot end of each piece. Tilt your band saw table 45° and trim the corners on each leg up to the 2" circle layout (see photo, page 28). Cut from the foot end of the legs to within 1/2" of the shoulders. Trimming the legs now makes turning the slock easier. The next step is lo make a template, or story stick, to assist you during the leg-turning operation. Draw a full-size paper pattern using the Elevation Drawing on page 34 as a guide, and draw a narrow rectangle around the leg shape. Glue it onto some hard-board to create a template. Trim the hardboard along the rectangle, then cut a deep notch at the top of the template to fit around the square shoulders. Use a band saw to notch the template just a hair at each of the major leg transition lines. Chuck a leg blank in the lathe so its square end is near the head stock. With the lathe speed at 800 rpm, turn the blank round using a large gouge, then switch to a 1/2" parting tool to nibble up to the taped shoulders. Now hold your story stick against the blank while the lathe is running and set a pencil in each notch to lay out the major points on the leg (see top left photo). Adjust the lathe speed to 1200 rpm and, using a 1/8" parting tool and a caliper, turn the refer- 30 Cherry Bedside Table |


