Woodworker's Journal winter-2009, страница 48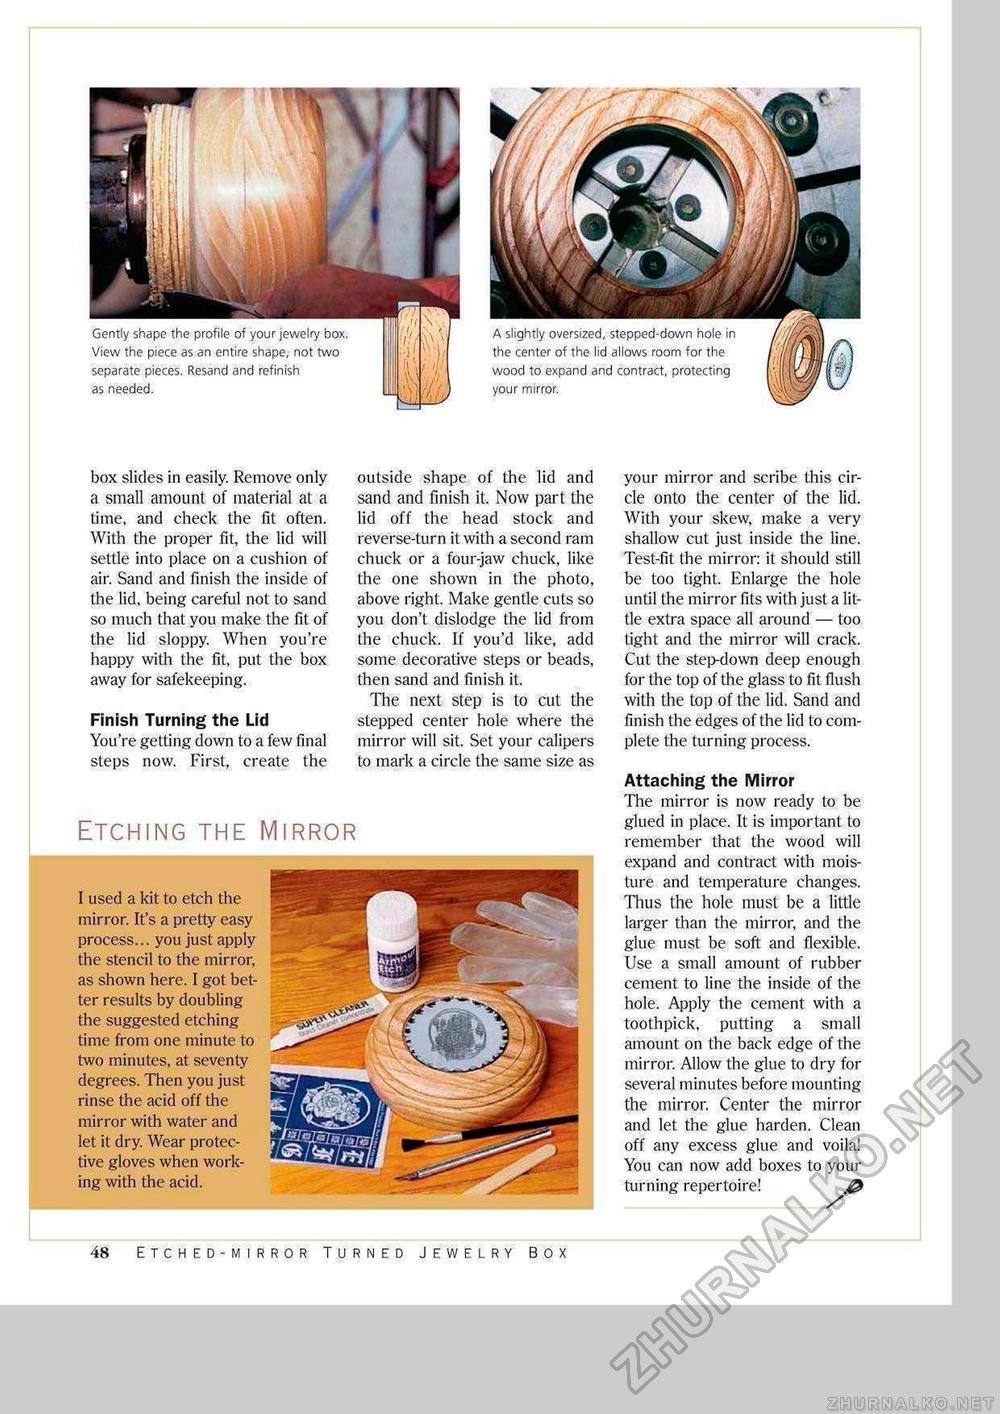
Gently shape the profile of your jewelry box. View the piece as an entire shape, not two separate pieces. Resand and refinish as needed. A slightly oversized, stepped-down hole in the center of the lid allows room for the wood to expand and contract, protecting your mirror. box slides in easily. Remove only a small amount of material at a time, and check the fit often. With the proper fit, the lid will settle into place on a cushion of air. Sand and finish the inside of the lid, being careful not to sand so much that you make the fit of the lid sloppy. When you're happy with the fit, put the box away for safekeeping. Finish Turning the Lid You're getting down to a few final steps now. First, create the Etching the Mirror outside shape of the lid and sand and finish it. Now part the lid off the head stock and reverse-turn it with a second ram chuck or a four-jaw chuck, like the one shown in the photo, above right. Make gentle cuts so you don't dislodge the lid from the chuck. If you'd like, add some decorative steps or beads, then sand and finish it. The next step is to cut the stepped center hole where the mirror will sit. Set your calipers to mark a circle the same size as your mirror and scribe this circle onto the center of the lid. With your skew, make a very shallow cut just inside the line. Test-fit the mirror: it should still be too tight. Enlarge the hole until the mirror fits with just a little extra space all around — too light and the mirror will crack. Cut the step-down deep enough for the top of the glass to fit flush with the top of the lid. Sand and finish the edges of the lid to complete the turning process. Attaching the Mirror The mirror is now ready to be glued in place. It is important to remember that the wood will expand and contract with moisture and temperature changes. Thus the hole must be a little larger than the mirror, and the glue must be soft and flexible. Use a small amount of rubber cement to line the inside of the hole. Apply the cement with a toothpick, putting a small amount on the back edge of the mirror. Allow the glue to dry for several minutes before mounting the mirror. Center the mirror and let the glue harden. Clean off any excess glue and voila! You can now add boxes to your turning repertoire! I used a kit to etch the mirror. It's a pretty easy process... you just apply the stencil to the mirror, as shown here. I got better results by doubling the suggested etching time from one minute to two minutes, at seventy degrees. Then you just rinse the acid off the mirror with water and let it dry. Wear protective gloves when working with the acid. 48 Etched-mirror Turned Jewelry Box |


