Woodworker's Journal winter-2009, страница 54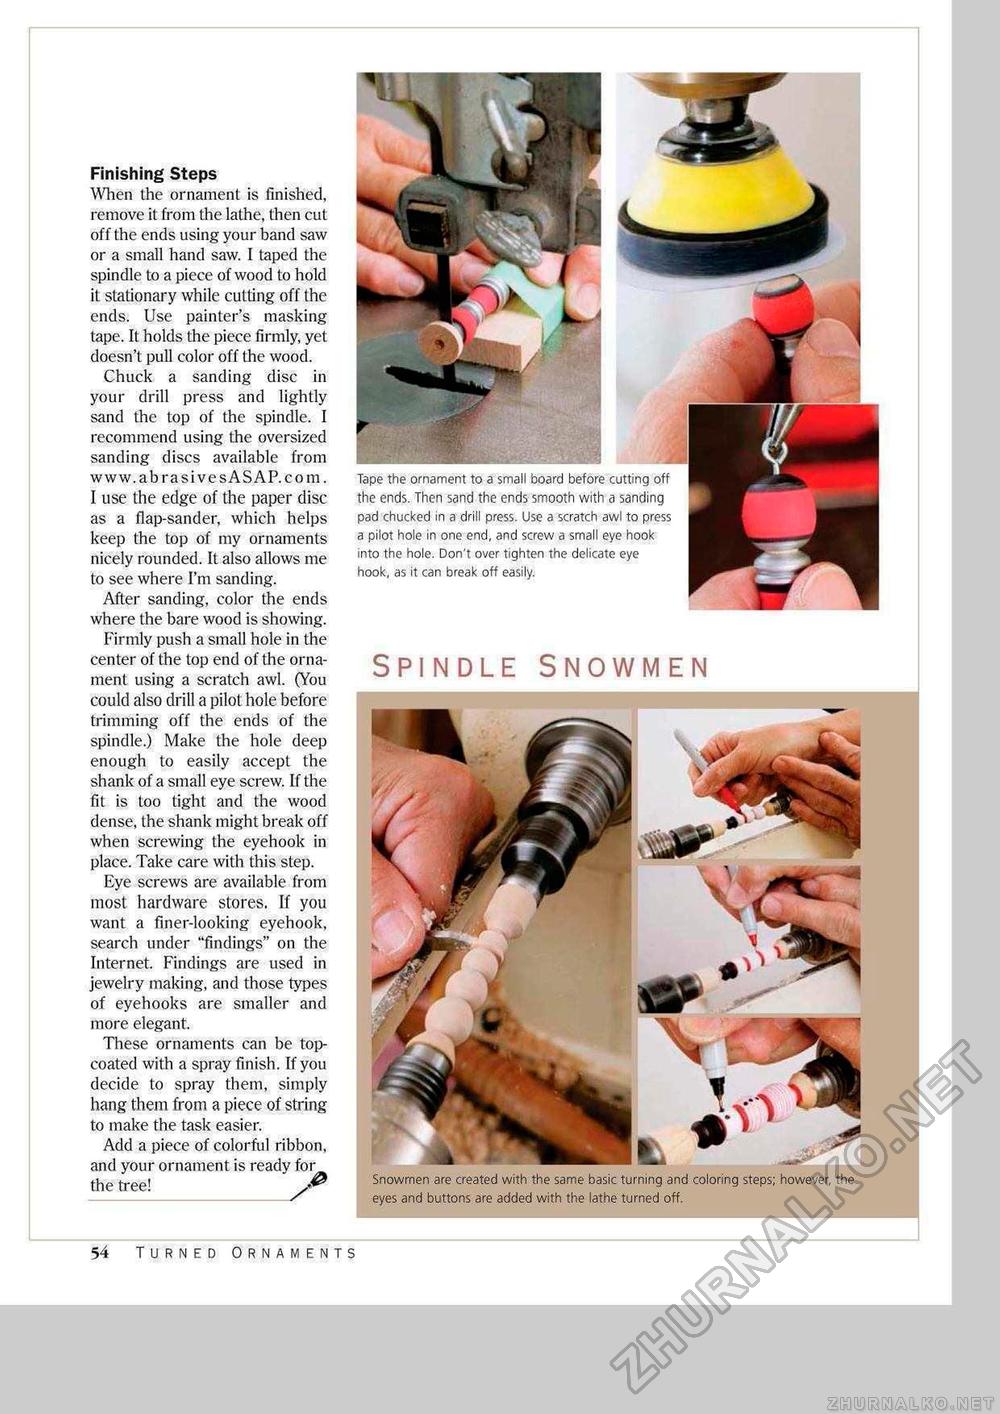
Finishing Steps When the ornament is finished, remove it from the lathe, then cut off the ends using your band saw or a small hand saw. I taped the spindle to a piece of wood to hold it stationary while cutting off the ends. Use painter's masking tape. It holds the piece firmly, yet doesn't pull color off the wood. Chuck a sanding disc in your drill press and lightly sand the top of the spindle. I recommend using the oversized sanding discs available from www.abrasivesASAP.com. I use the edge of the paper disc as a flap-sander, which helps keep the top of my ornaments nicely rounded. It also allows me to see where I'm sanding. After sanding, color the ends where the bare wood is showing. Firmly push a small hole in the center of the top end of the ornament using a scratch awl. (You could also drill a pilot hole before trimming off the ends of the spindle.) Make the hole deep enough to easily accept the shank of a small eye screw. If the fit is too tight and the wood dense, the shank might break off when screwing the eyehook in place. Take care with this step. Eye screws are available from most hardware stores. If you want a finer-looking eyehook, search under "findings" on the Internet. Findings are used in jewelry making, and those types of eyehooks are smaller and more elegant. These ornaments can be top-coated with a spray finish. If you decide to spray them, simply hang them from a piece of string to make the task easier. Add a piece of colorful ribbon, and your ornament is ready for the tree! JF Snowmen are created with the same basic turning and coloring steps; however, the eyes and buttons are added with the lathe turned off. Tape the ornament to a small board before cutting off the ends. Then sand the ends smooth with a sanding pad chucked in a drill press. Use a scratch awl to press a pilot hole in one end, and screw a small eye hook into the hole. Don't over tighten the delicate eye hook, as it can break off easily. 54 Turned Ornaments |


