Woodworker's Journal winter-2009, страница 74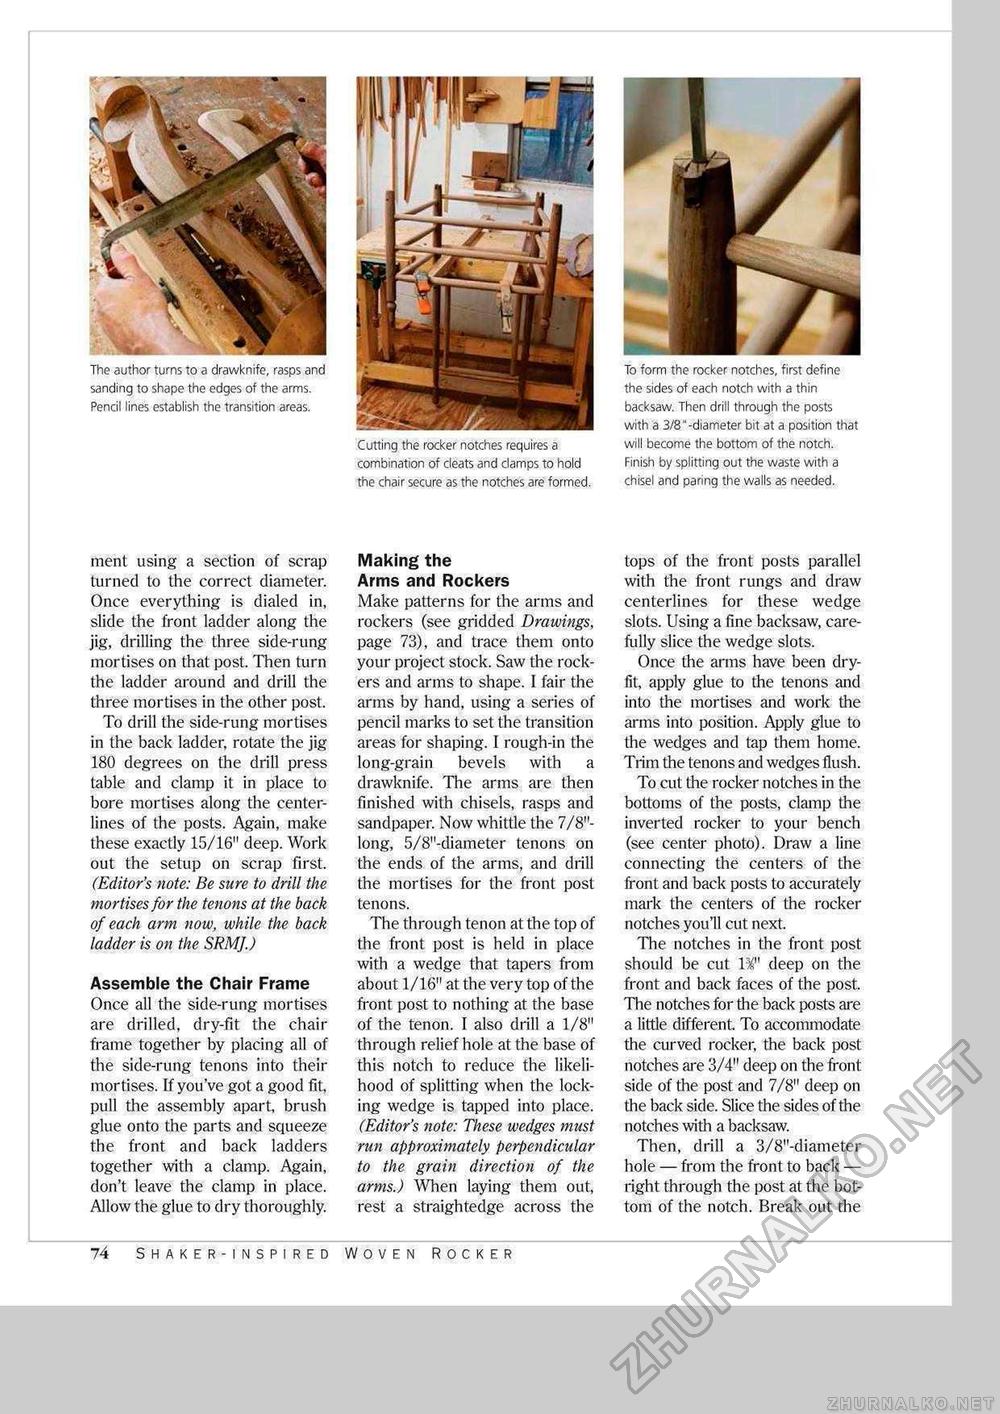
The author turns to a drawknife, rasps and sanding to shape the edges of the arms. Pencil lines establish the transition areas. Cutting the rocker notches requires a combination of cleats and clamps to hold the chair secure as the notches are formed. To form the rocker notches, first define the sides of each notch with a thin backsaw. Then drill through the posts with a 3/8"-diameter bit at a position that will become the bottom of the notch. Finish by splitting out the waste with a chisel and paring the walls as needed. nient using a section of scrap turned to the correct diameter. Once everything is dialed in, slide the front ladder along the jig, drilling the three side-rung mortises on that post. Then turn the ladder around and drill the three mortises in the other post. To drill the side-rung mortises in the back ladder, rotate the jig 180 degrees on the drill press table and clamp it in place to bore mortises along the center-lines of the posts. Again, make these exactly 15/16" deep. Work out the setup on scrap first. (Editor's note: Be sure to drill the mortises for the tenons at the back of each arm now, while the back ladder is on the SRMJ.) Assemble the Chair Frame Once all the side-rung mortises are drilled, dry-fit the chair frame together by placing all of the side-rung tenons into their mortises. If you've got a good fit, pull the assembly apart, brush glue onto the parts and squeeze the front and back ladders together with a clamp. Again, don't leave the clamp in place. Allow the glue to dry thoroughly. Making the Arms and Rockers Make patterns for the arms and rockers (see gridded Drawings, page 73), and trace them onto your project stock. Saw the rockers and arms to shape. I fair the arms by hand, using a series of pencil marks to set the transition areas for shaping. I rough-in the long-grain bevels with a drawknife. The arms are then finished with chisels, rasps and sandpaper. Now whittle the 7/8"-long, 5/8"-diameter tenons on the ends of the arms, and drill the mortises for the front post tenons. The through tenon at the top of the front post is held in place with a wedge that tapers from about 1/16" at the very top of the front post to nothing at the base of the tenon. I also drill a 1/8" through relief hole at the base of this notch to reduce the likelihood of splitting when the locking wedge is tapped into place. (Editor's note: These wedges must run approximately perpendicular to the grain direction of the arms.) When laying them out, rest a straightedge across the tops of the front posts parallel with the front rungs and draw centerlines for these wedge slots. Using a fine backsaw, carefully slice the wedge slots. Once the arms have been dry-fit, apply glue to the tenons and into the mortises and work the arms into position. Apply glue to the wedges and tap them home. Trim the tenons and wedges flush. To cut the rocker notches in the bottoms of the posts, clamp the inverted rocker to your bench (see center photo). Draw a line connecting the centers of the front and back posts to accurately mark the centers of the rocker notches you'll cut next The notches in the front post should be cut deep on the front and back faces of the post. The notches for the back posts are a little different To accommodate the curved rocker, the back post notches are 3/4" deep on the front side of the post and 7/8" deep on the back side. Slice the sides of the notches with a backsaw. Then, drill a 3/8"-diameter hole — from the front to back — right through the post at the bottom of the notch. Break out the 74 Shaker-inspired w oven Rocker |


