Woodworker's Journal winter-2009, страница 73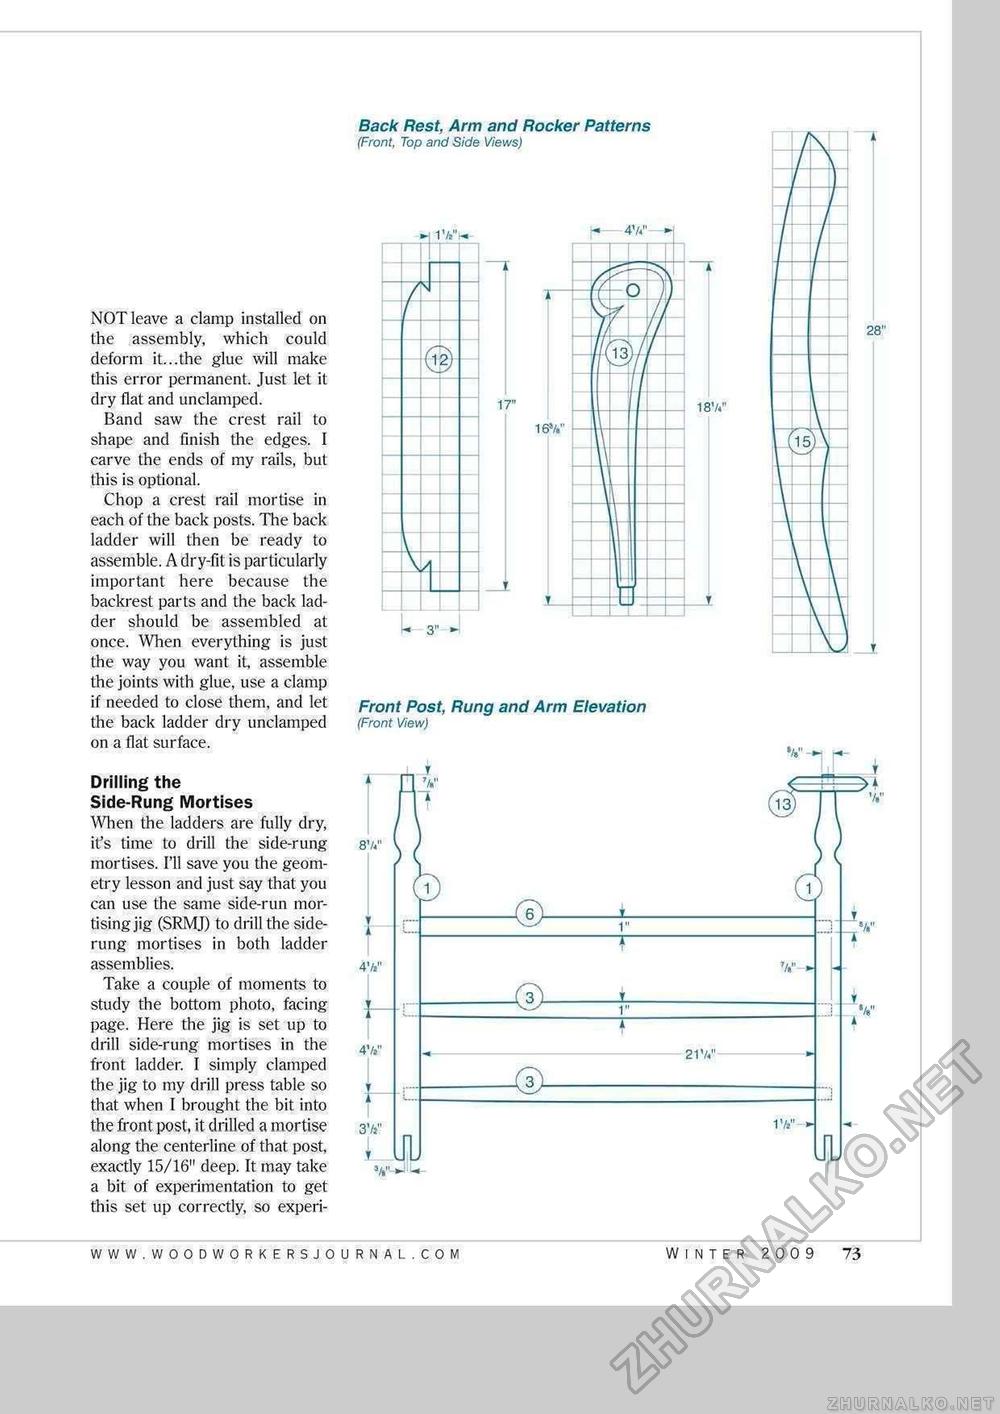
Back Rest, Arm and Rocker Patterns (Front, Top and Side Views) NOT leave a clamp installed on the assembly, which could deform it...the glue will make this error permanent. Just let it dry flat and undamped. Band saw the crest rail to shape and finish the edges. I carve the ends of my rails, but this is optional. Chop a crest rail mortise in each of the back posts. The back ladder will then be ready to assemble. A dry-fit is particularly important here because the backrest parts and the back ladder should be assembled at once. When everything is just the way you want it, assemble the joints with glue, use a clamp if needed to close them, and let the back ladder dry undamped on a flat surface. Drilling the Side-Rung Mortises When the ladders are fully dry, it's time to drill the side-rung mortises. I'll save you the geometry lesson and just say that you can use the same side-run mortising jig (SRMJ) to drill the side-rung mortises in both ladder assemblies. Take a couple of moments to study the bottom photo, facing page. Here the jig is set up to drill side-rung mortises in the front ladder. I simply clamped the jig to my drill press table so that when I brought the bit into the front post, it drilled a mortise along the centerline of that post, exactly 15/16" deep. It may take a bit of experimentation to get this set up correctly, so experi- 1 Vw - 4V«" ► 17" 18V." 16s/. K 3" »- Front Post, Rung and Arm Elevation (Front View) 28" WINTER 2009 73 |


