Woodworker's Journal winter-2010, страница 59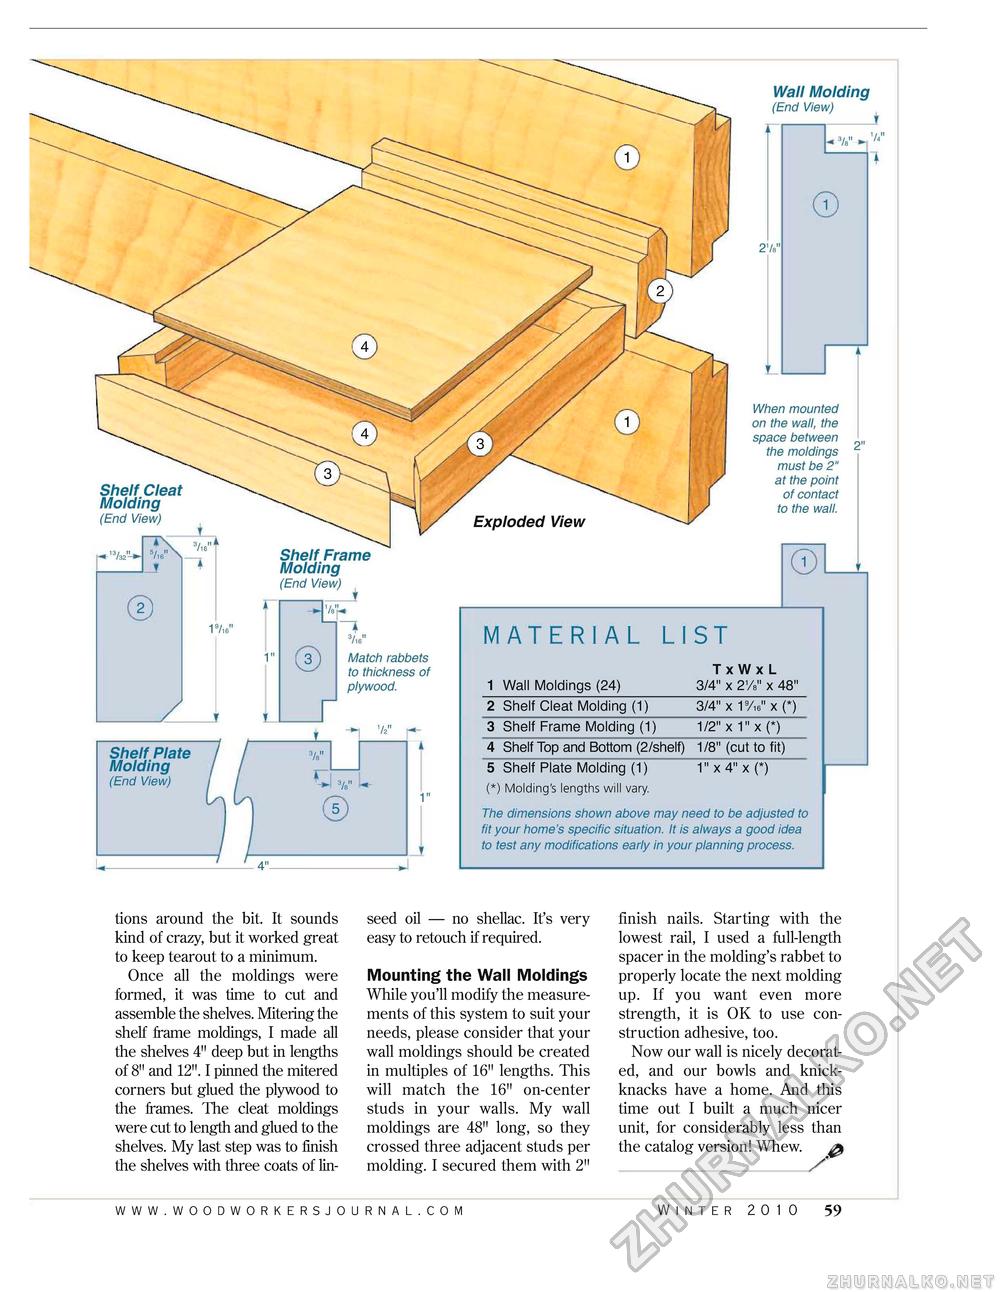
TxWxL 1 Wall Moldings (24) 3/4" x 21/8" x 48" TxWxL 1 Wall Moldings (24) 3/4" x 21/8" x 48"
5 Shelf Plate Molding (1) 1" x 4" x (*) (*) Molding's lengths will vary. 5 Shelf Plate Molding (1) 1" x 4" x (*) (*) Molding's lengths will vary. The dimensions shown above may need to be adjusted to fit your home's specific situation. It is always a good idea to test any modifications early in your planning process. Wall Molding (End View) 3/a" When mounted on the wall, the space between the moldings must be 2" at the point of contact to the wall. Shelf Cleat Molding (End View) 13/32^ Shelf Plate Molding (End View) Shelf Frame Molding (End View) + Match rabbets to thickness of plywood. tions around the bit. It sounds kind of crazy, but it worked great to keep tearout to a minimum. Once all the moldings were formed, it was time to cut and assemble the shelves. Mitering the shelf frame moldings, I made all the shelves 4" deep but in lengths of 8" and 12". I pinned the mitered corners but glued the plywood to the frames. The cleat moldings were cut to length and glued to the shelves. My last step was to finish the shelves with three coats of lin seed oil — no shellac. It's very easy to retouch if required. Mounting the Wall Moldings While you'll modify the measurements of this system to suit your needs, please consider that your wall moldings should be created in multiples of 16" lengths. This will match the 16" on-center studs in your walls. My wall moldings are 48" long, so they crossed three adjacent studs per molding. I secured them with 2" finish nails. Starting with the lowest rail, I used a full-length spacer in the molding's rabbet to properly locate the next molding up. If you want even more strength, it is OK to use construction adhesive, too. Now our wall is nicely decorated, and our bowls and knick-knacks have a home. And this time out I built a much nicer unit, for considerably less than the catalog version! Whew. ^ winter 2010 59 |


