Creative Woodworks & crafts 1997-08, страница 56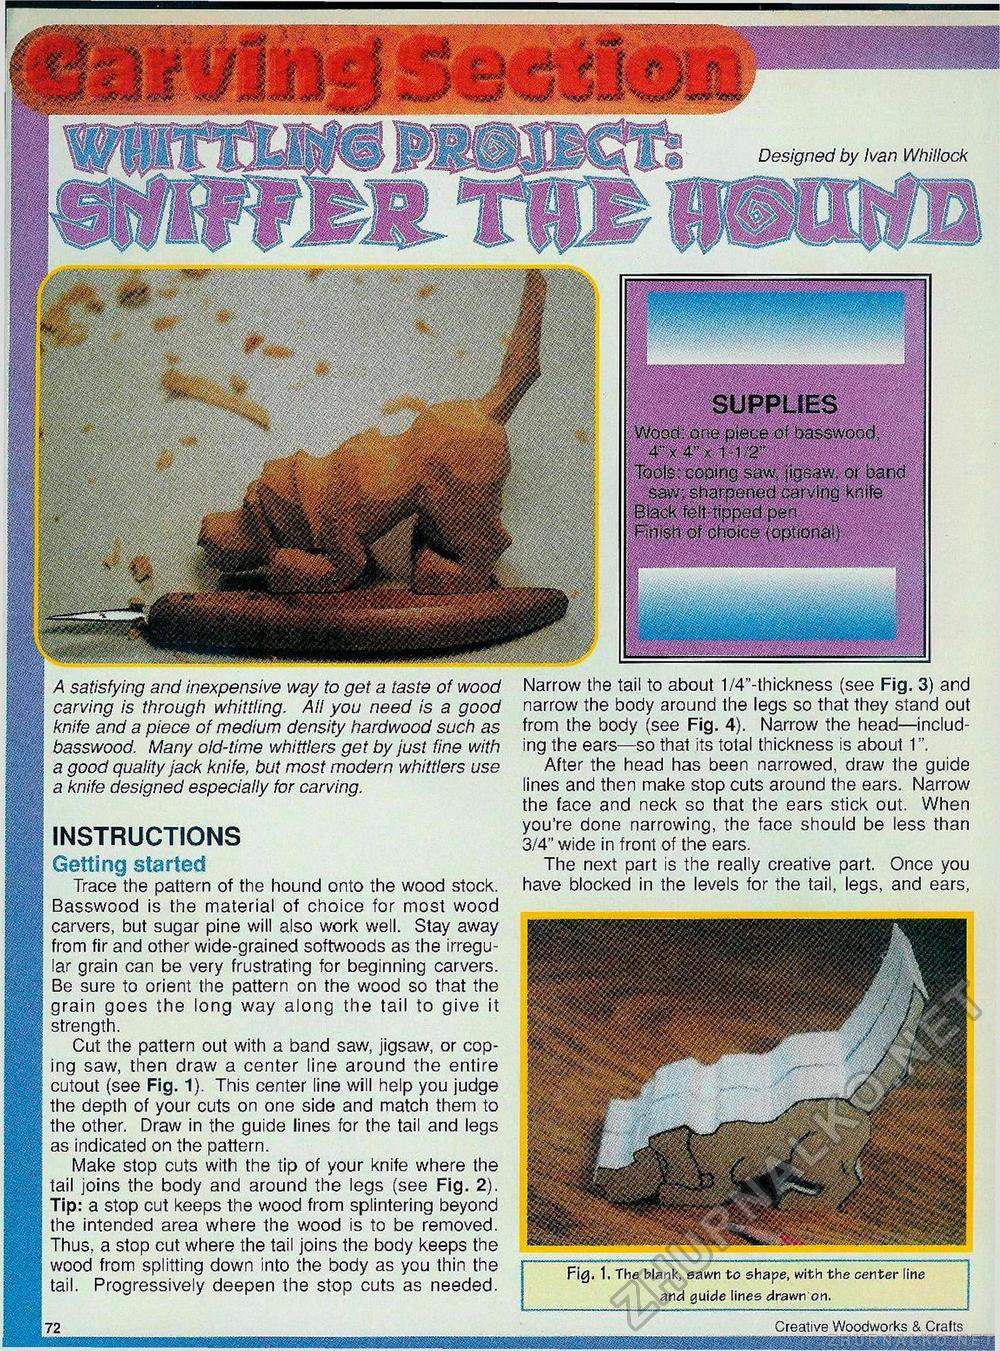
SUPPLIES Wood: one piece of basswood, Tools:coping saw." jigsaw, or band saw; sharpened carving knife Black felt-tipped pen Finish of choice (optional) Designed by Ivan Whillock A satisfying and inexpensive way to get a taste of wood carving is through whittling. All you need is a good knife and a piece of medium density hardwood such as basswood. Many old-time whittlers get by just fine with a good quality jack knife, but most modern whittlers use a knife designed especially for carving. INSTRUCTIONS Getting started Trace the pattern of the hound onto the wood stock. Basswood is the material of choice for most wood carvers, but sugar pine will also work well. Stay away from fir and other wide-grained softwoods as the irregular grain can be very frustrating for beginning carvers. Be sure to orient the pattern on the wood so that the grain goes the long way along the tail to give it strength. Cut the pattern out with a band saw, jigsaw, or coping saw, then draw a center line around the entire cutout (see Fig. 1). This center line will help you judge the depth of your cuts on one side and match them to the other. Draw in the guide lines for the tail and legs as indicated on the pattern. Make stop cuts with the tip of your knife where the tail joins the body and around the legs (see Fig. 2). Tip: a stop cut keeps the wood from splintering beyond the intended area where the wood is to be removed. Thus, a stop cut where the tail joins the body keeps the wood from splitting down into the body as you thin the tail. Progressively deepen the stop cuts as needed. Narrow the tail to about 1/4"-thickness (see Fig. 3) and narrow the body around the legs so that they stand out from the body (see Fig. 4). Narrow the head—including the ears—so that its total thickness is about 1". After the head has been narrowed, draw the guide lines and then make stop cuts around the ears. Narrow the face and neck so that the ears stick out. When you're done narrowing, the face should be less than 3/4" wide in front of the ears. The next part is the really creative part. Once you have blocked in the levels for the tail, legs, and ears, Fig. 1. The blank, sawn to shape, with the center line and guide lines drawn on. |


