Creative Woodworks & crafts 1997-08, страница 58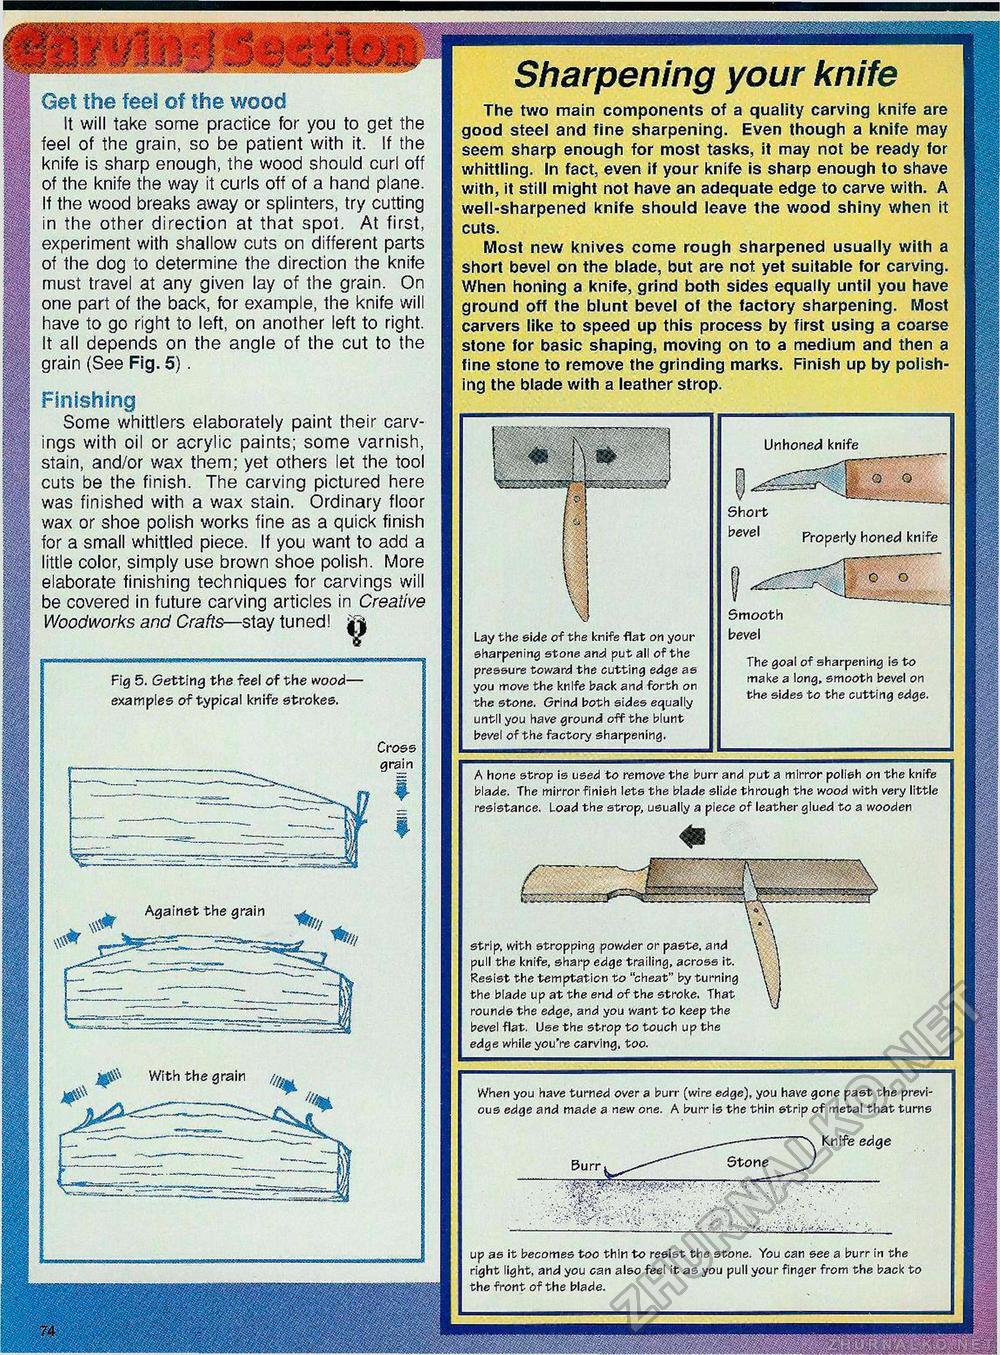
Sharpening your knife The two main components of a quality carving knife are good steel and fine sharpening. Even though a knife may seem sharp enough for most tasks, it may not be ready for whittling. In fact, even if your knife is sharp enough to shave with, it still might not have an adequate edge to carve with. A well-sharpened knife should leave the wood shiny when it cuts. Most new knives come rough sharpened usually with a short bevel on the blade, but are not yet suitable for carving. When honing a knife, grind both sides equally until you have ground off the blunt bevel of the factory sharpening. Most carvers like to speed up this process by first using a coarse stone for basic shaping, moving on to a medium and then a fine stone to remove the grinding marks. Finish up by polishing the blade with a leather strop. Get the feet of the wood It will take some practice for you to get the feel of the grain, so be patient with it. If the knife is sharp enough, the wood should curl off of the knife the way it curls off of a hand plane. If the wood breaks away or splinters, try cutting in the other direction at that spot. At first, experiment with shallow cuts on different parts of the dog to determine the direction the knife must travel at any given lay of the grain. On one part of the back, for example, the knife will have to go right to left, on another left to right. It all depends on the angle of the cut to the grain (See Fig. 5). Finishing Some whittlers elaborately paint their carvings with oil or acrylic paints; some varnish, stain, and/or wax them; yet others let the tool cuts be the finish. The carving pictured here was finished with a wax stain. Ordinary floor wax or shoe polish works fine as a quick finish for a small whittled piece. If you want to add a little color, simply use brown shoe polish. More elaborate finishing techniques for carvings will be covered in future carving articles in Creative Woodworks and Crafts—stay tu n ed I || Unhoned knife Short bevel Properly honed knife Smooth bevel Lay the side of the knife flat on your sharpening stone and put all of the pressure toward the cutting edge as you move the knife back and forth or the stone. Grind both sides equally until you have ground off the blunt bevel of the factory sharpening. The goal of sharpening is to make a long, smooth bevel on the sides to the cutting edge. Fig 5. Getting the feel of the wood examples of typical knife strokes. A hone strop is used to remove the burr and put a mirror polish on the knife blade. The mirror finish lets the blade slide through the wood with very little resistance. Load the strop, usually a piece of leather glued to a wooden Against the grain strip, with stropping powder or paste, and pull the knife, sharp edge trailing, across it. Resist the temptation to "cheat" by turning the blade up at the end of the stroke. That rounds the edge, and you want to keep the bevel flat. Use the strop to touch up the edge while you're carving, too. When you have turned over a burr (wire edge), you have gone past the previous edge and made a new one. A burr Is the thin strip of metal that turns ——--Knife edge Burr, Stone J up as it becomes too thin to resist the stone. You can see a burr in the right light, and you can also feel it as you pull your finger from the back to the front of the blade. |


