Creative Woodworks & crafts 1997-08, страница 60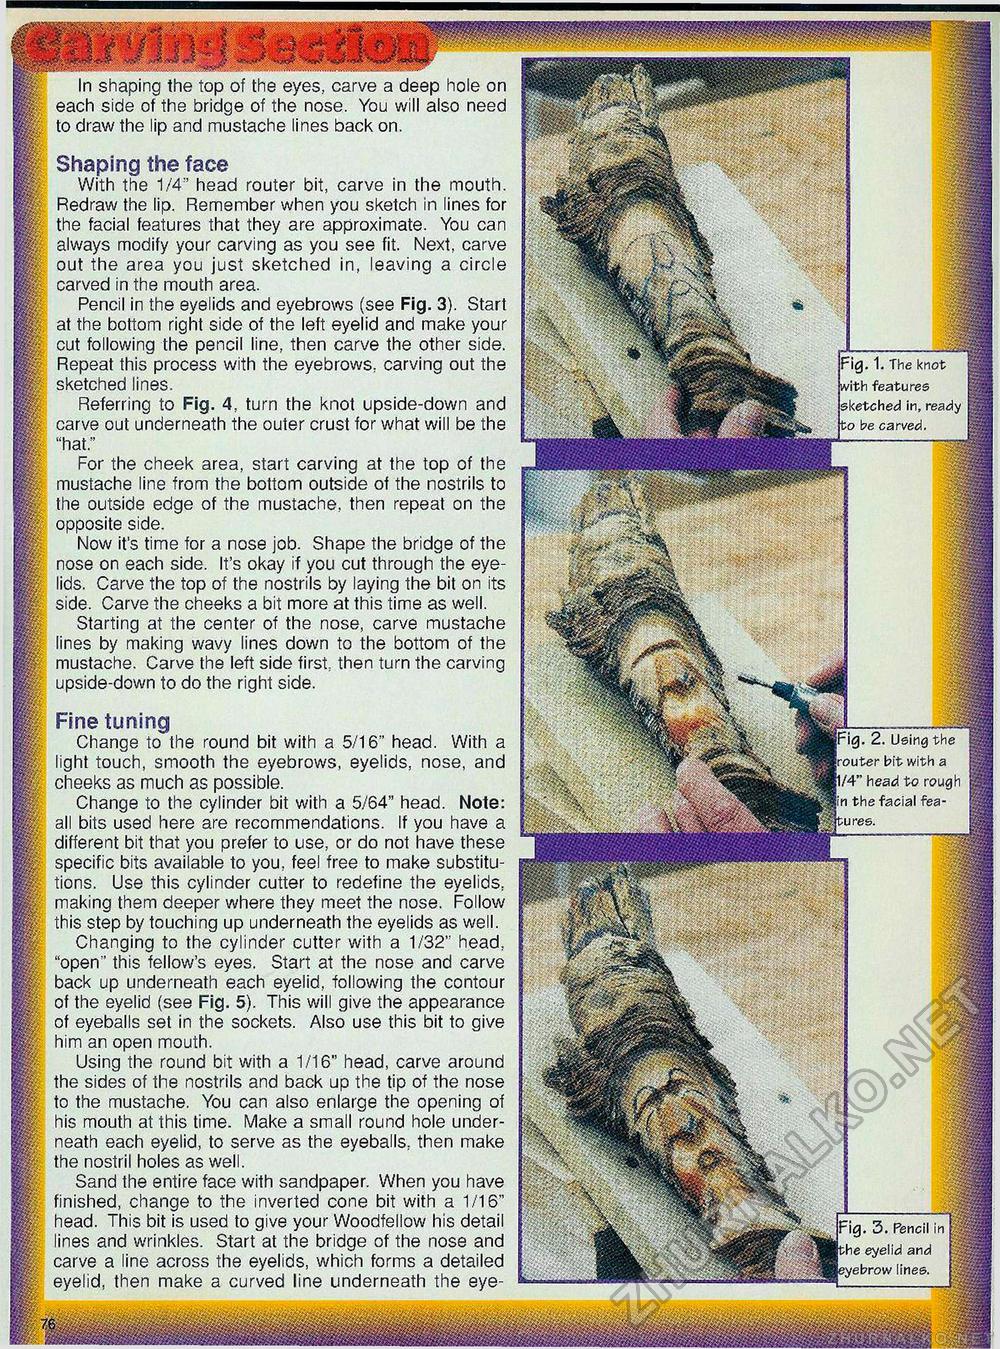
In shaping the top of the eyes, carve a deep hole on each side of the bridge of the nose. You will also need to draw the lip and mustache lines back on. Shaping the face With the 1/4'' head router bit, carve in the mouth. Redraw the lip. Remember when you sketch in lines for the facial features that they are approximate. You can always modify your carving as you see fit. Next, carve out the area you just sketched in, leaving a circle carved in the mouth area. Pencil in the eyelids and eyebrows (see Fig. 3). Start at the bottom right side of the left eyelid and make your cut following the pencil line, then carve the other side. Repeat this process with the eyebrows, carving out the sketched lines. Referring to Fig. 4, turn the knot upside-down and carve out underneath the outer crust for what will be the "hat." For the cheek area, start carving at the top of the mustache line from the bottom outside of the nostrils to the outside edge of the mustache, then repeat on the opposite side. Now it's time for a nose job. Shape the bridge of the nose on each side. It's okay if you cut through the eyelids. Carve the top of the nostrils by laying the bit on its side. Carve the cheeks a bit more at this time as well. Starting at the center of the nose, carve mustache lines by making wavy lines down to the bottom of the mustache. Carve the left side first, then turn the carving upside-down to do the right side. Fine tuning Change to the round bit with a 5/16" head. With a light touch, smooth the eyebrows, eyelids, nose, and cheeks as much as possible. Change to the cylinder bit with a 5/64" head. Note: all bits used here are recommendations. If you have a different bit that you prefer to use, or do not have these specific bits available to you, feel free to make substitutions. Use this cylinder cutter to redefine the eyelids, making them deeper where they meet the nose. Follow this step by touching up underneath the eyelids as well. Changing to the cylinder cutter with a 1/32" head, "open" this fellow's eyes. Start at the nose and carve back up underneath each eyelid, following the contour of the eyelid (see Fig. 5). This will give the appearance of eyeballs set in the sockets. Also use this bit to give him an open mouth. Using the round bit with a 1/16" head, carve around the sides of the nostrils and back up the tip of the nose to the mustache. You can also enlarge the opening of his mouth at this time. Make a small round hole underneath each eyelid, to serve as the eyeballs, then make the nostril holes as well. Sand the entire face with sandpaper. When you have finished, change to the inverted cone bit with a 1/16" head. This bit is used to give your Woodfellow his detail lines and wrinkles. Start at the bridge of the nose and carve a line across the eyelids, which forms a detailed eyelid, then make a curved line underneath the eye- Fig. 1. The knot with features sketched in, ready to be carved. tm PS Fig. 2. Using the [router bit with a |1/4" head to rough jin the facial features. IFig. 3. Pencil in the eyelid and eyebrow lines. |


