Creative Woodworks & crafts 1997-08, страница 66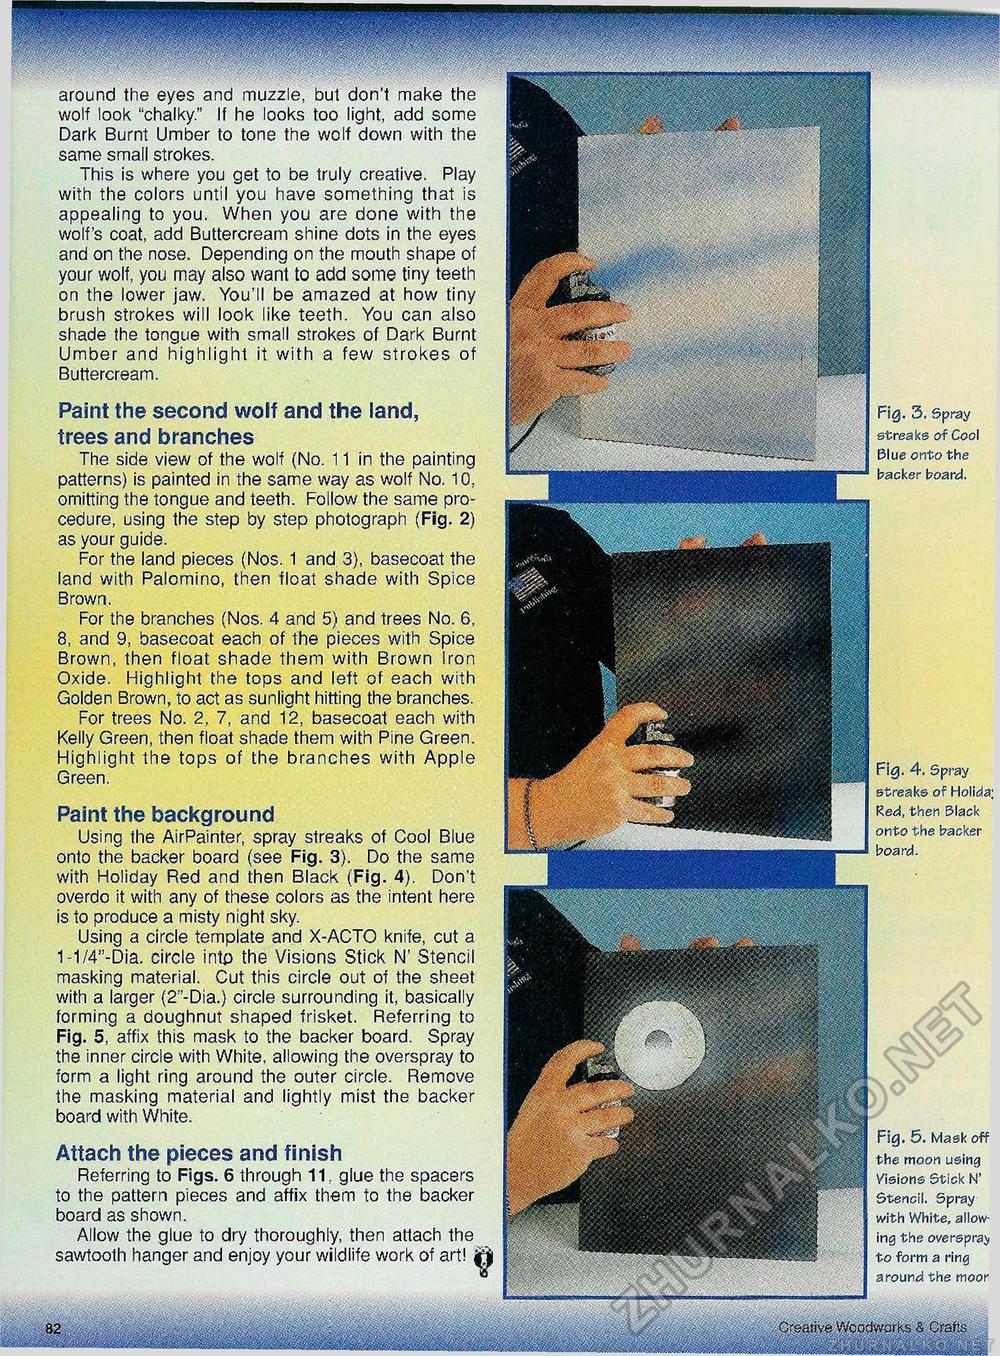
Creative Woodworks & Crafts around the eyes and muzzle, but don't make the wolf look "chalky." If he looks too light, add some Dark Burnt Umber to tone the wolf down with the same small strokes. This is where you get to be truly creative. Play with the colors until you have something that is appealing to you. When you are done with the wolf's coat, add Buttercream shine dots in the eyes and on the nose. Depending on the mouth shape of your wolf, you may also want to add some tiny teeth on the lower jaw. You'll be amazed at how tiny brush strokes will look like teeth. You can also shade the tongue with small strokes of Dark Burnt Umber and highlight it with a few strokes of Buttercream. Paint the second wolf and the land, trees and branches The side view of the wolf (No. 11 in the painting patterns) is painted in the same way as wolf No. 10, omitting the tongue and teeth. Follow the same procedure, using the step by step photograph (Fig. 2) as your guide. For the land pieces (Nos. 1 and 3), basecoat the land with Palomino, then float shade with Spice Brown. For the branches (Nos. 4 and 5) and trees No. 6, 8, and 9, basecoat each of the pieces with Spice Brown, then float shade them with Brown Iron Oxide. Highlight the tops and left of each with Golden Brown, to act as sunlight hitting the branches. For trees No. 2, 7, and 12, basecoat each with Kelly Green, then float shade them with Pine Green. Highlight the tops of the branches with Apple Green. Paint the background Using the AirPainter, spray streaks of Cool Blue onto the backer board (see Fig. 3). Do the same with Holiday Red and then Black (Fig. 4). Don't overdo it with any of these colors as the intent here is to produce a misty night sky. Using a circle template and X-ACTO knife, cut a 1-1/4"-Dia. circle intp the Visions Stick N' Stencil masking material. Cut this circle out of the sheet with a larger (2"-Dia.) circle surrounding it, basically forming a doughnut shaped frisket. Referring to Fig. 5, affix this mask to the backer board. Spray the inner circle with White, allowing the overspray to form a light ring around the outer circle. Remove the masking material and lightly mist the backer board with White. Attach the pieces and finish Referring to Figs. 6 through 11 glue the spacers to the pattern pieces and affix them to the backer board as shown. Allow the glue to dry thoroughly, then attach the sawtooth hanger and enjoy your wildlife work of art! jjf Fig. 3. Spray streaks of Cool Blue onto the backer board. Fig. 4. Spray streaks of Holida Red, then Black onto the backer board. Fig. 5. Mask off the moon using Visions Stick N' Stencil. Spray with White, allowing the overspray to form a ring around the moor |


