Creative Woodworks & crafts 1997-12, страница 39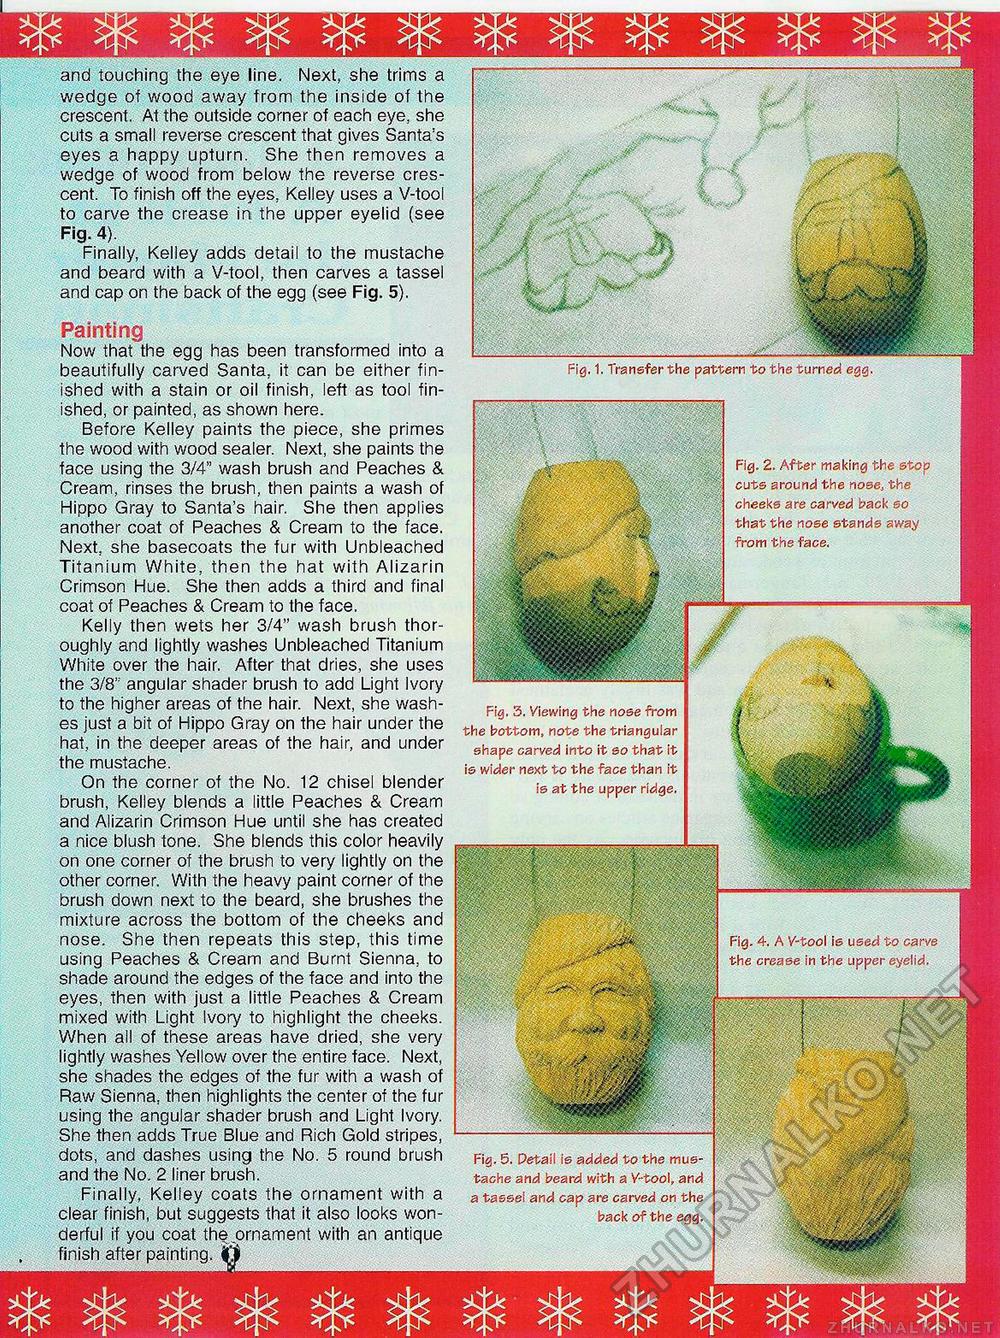
and touching the eye line. Next, she trims a wedge of wood away from the inside of the crescent. At the outside corner of each eye, she cuts a small reverse crescent that gives Santa's eyes a happy upturn. She then removes a wedge of wood from below the reverse crescent. To finish off the eyes, Kelley uses a V-tool to carve the crease in the upper eyelid (see Fig. 4). Finally, Kelley adds detail to the mustache and beard with a V-tool, then carves a tassel and cap on the back of the egg (see Fig. 5). Painting Now that the egg has been transformed into a beautifully carved Santa, it can be either finished with a stain or oil finish, left as tool finished, or painted, as shown here. Before Kelley paints the piece, she primes the wood with wood sealer. Next, she paints the face using the 3/4" wash brush and Peaches & Cream, rinses the brush, then paints a wash of Hippo Gray to Santa's hair. She then applies another coat of Peaches & Cream to the face. Next, she basecoats the fur with Unbleached Titanium White, then the hat with Alizarin Crimson Hue. She then adds a third and final coat of Peaches & Cream to the face. Kelly then wets her 3/4" wash brush thoroughly and lightly washes Unbleached Titanium White over the hair. After that dries, she uses the 3/8" angular shader brush to add Light Ivory to the higher areas of the hair. Next, she washes just a bit of Hippo Gray on the hair under the hat, in the deeper areas of the hair, and under the mustache. On the comer of the No. 12 chisel blender brush, Kelley blends a little Peaches & Cream and Alizarin Crimson Hue until she has created a nice blush tone. She blends this color heavily on one corner of the brush to very lightly on the other corner. With the heavy paint corner of the brush down next to the beard, she brushes the mixture across the bottom of the cheeks and nose. She then repeats this step, this time using Peaches & Cream and Burnt Sienna, to shade around the edges of the face and into the eyes, then with just a little Peaches & Cream mixed with Light Ivory to highlight the cheeks. When all of these areas have dried, she very lightly washes Yellow over the entire face. Next, she shades the edges of the fur with a wash of Raw Sienna, then highlights the center of the fur using the angular shader brush and Light Ivory. She then adds True Blue and Rich Gold stripes, dots, and dashes using the No. 5 round brush and the No. 2 liner brush. Finally, Kelley coats the ornament with a clear finish, but suggests that it also looks wonderful if you coat the, ornament with an antique finish after painting. Fig, 1. Transfer the pattern to the turned egg. Fig. 2. After making the stop cuts around the nose, the cheeks are carved back so that the nose stands away from the face. Fig. 3. Viewing the nose from the bottom, note the triangular shape carved into it so that it is wider next to the face than it is at the upper ridge. Fig. 5. Detail is added to the mustache and beard with a V-tool, and a tassel and cap are carved on the back of the egg. |


