Creative Woodworks & crafts 1998-07, страница 53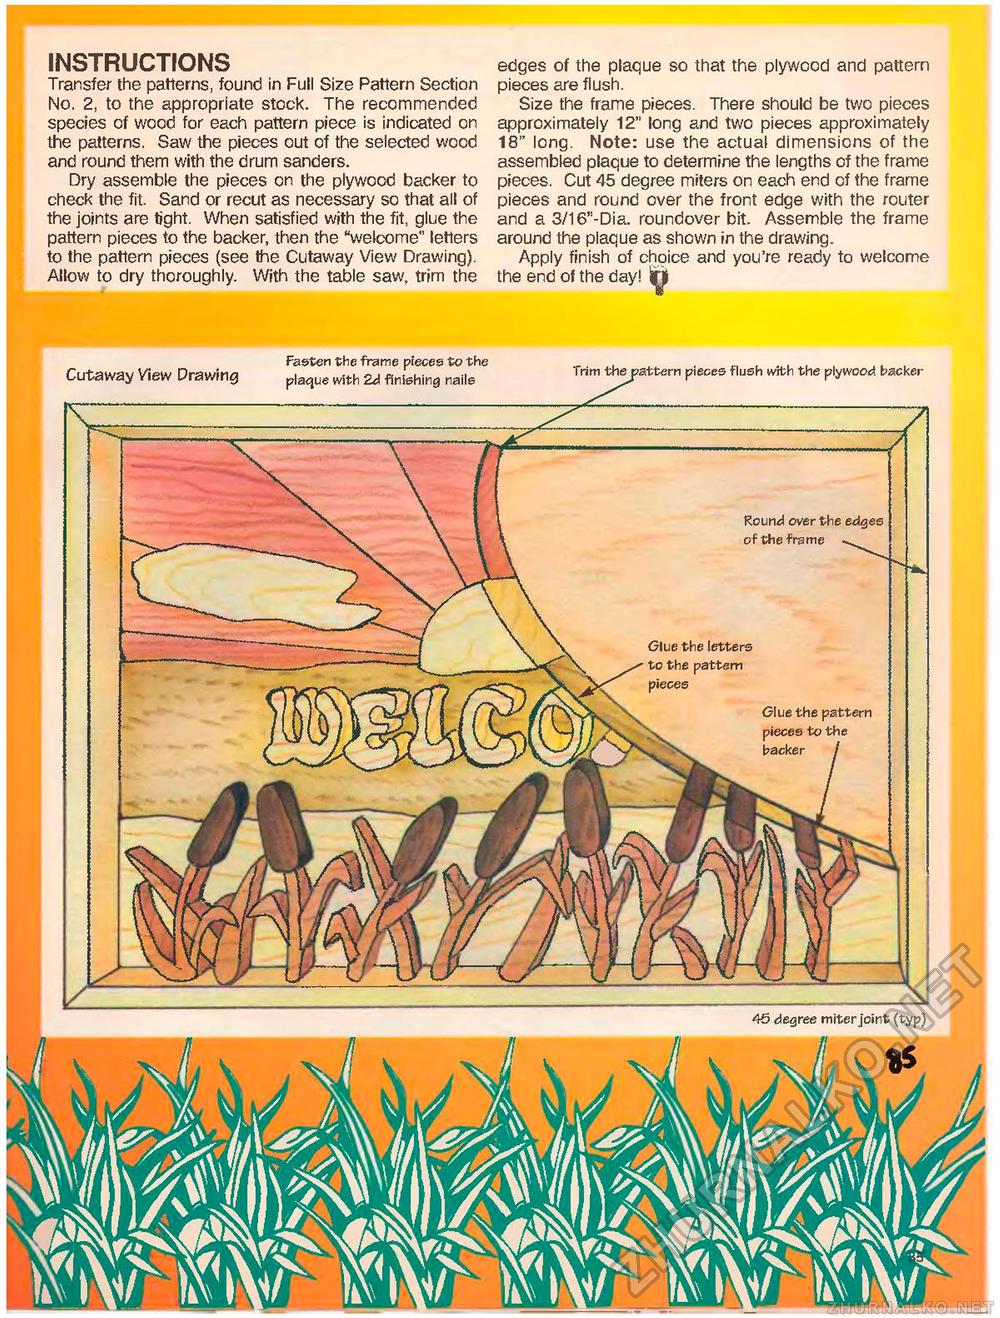
INSTRUCTIONS Transfer the patterns, found in Full Size Pattern Section No. 2, to the appropriate stock. The recommended species of wood for each pattern piece is indicated on the patterns. Saw the pieces out of the selected wood and round them with the drum sanders. Dry assemble the pieces on the plywood backer to check the fit. Sand or recut as necessary so that all of the joints are tight. When satisfied with the fit, glue the pattern pieces to the backer, then the "welcome" letters to the pattern pieces (see the Cutaway View Drawing). Allow to dry thoroughly. With the table saw, trim the edges of the plaque so that the plywood and pattern pieces are flush. Size the frame pieces. There should be two pieces approximately 12" long and two pieces approximately 18" long. Note: use the actual dimensions of the assembled plaque to determine the lengths of the frame pieces. Cut 45 degree miters on each end of the frame pieces and round over the front edge with the router and a 3/16"-Dia. roundover bit. Assemble the frame around the plaque as shown in the drawing. Apply finish of choice and you're ready to welcome the end of the day! Ijyj 46 degree miter joint (typ) Cutaway View Drawing Fasten the frame pieces to the plaque with 2d finishing nails pieces flush with the plywood backer Round over the edges of the frame Glue the letters to the pattern pieces Glue the pattern to the |


