Creative Woodworks & crafts 1998-09, страница 14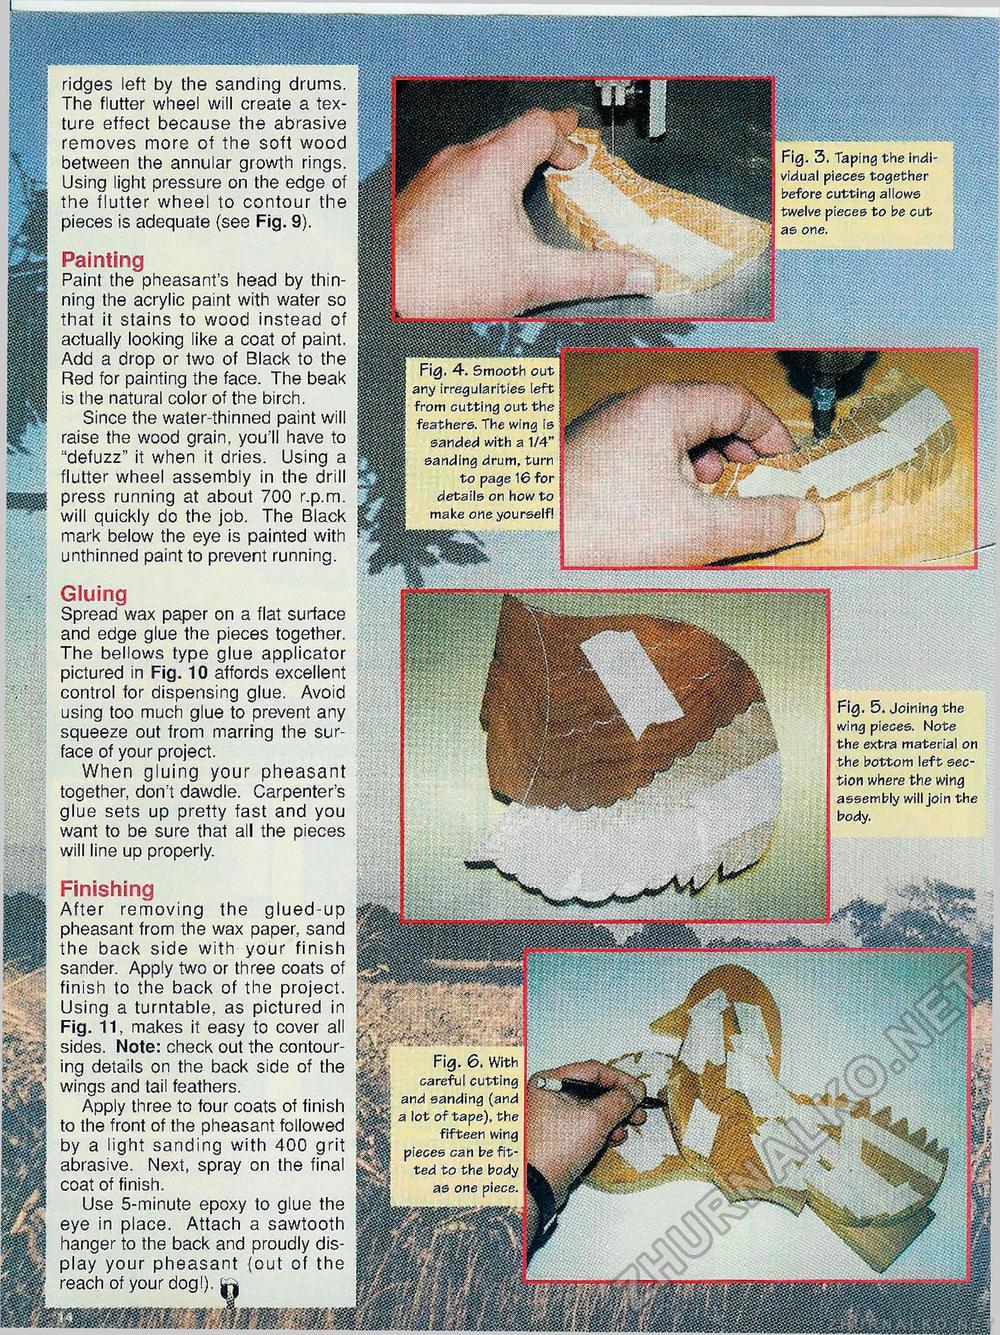
ridges left by the sanding drums. The flutter wheel will create a texture effect because the abrasive removes more of the soft wood between the annular growth rings. Using light pressure on the edge of the flutter wheel to contour the pieces is adequate (see Fig. 9). Painting Paint the pheasant's head by thinning the acrylic paint with water so that it stains to wood instead of actually looking like a coat of paint. Add a drop or two of Black to the Red for painting the face. The beak is the natural color of the birch. Since the water-thinned paint will raise the wood grain, you'll have to "defuzz" it when it dries. Using a flutter wheel assembly in the drill press running at about 700 r.p.m. will quickly do the job. The Black mark below the eye is painted with unthinned paint to prevent running. Gluing Spread wax paper on a flat surface and edge glue the pieces together. The bellows type glue applicator pictured in Fig. 10 affords excellent control for dispensing glue. Avoid using too much glue to prevent any squeeze out from marring the surface of your project. When gluing your pheasant together, don't dawdle. Carpenters glue sets up pretty fast and you want to be sure that all the pieces will line up properly. Finishing After removing the glued-up pheasant from the wax paper, sand the back side with your finish sander. Apply two or three coats of finish to the back of the project. Using a turntable, as pictured in Fig. 11, makes it easy to cover all sides. Note: check out the contouring details on the back side of the wings and tail feathers. Apply three to four coats of finish to the front of the pheasant followed by a light sanding with 400 grit abrasive. Next, spray on the final coat of finish. Use 5-minute epoxy to glue the eye in place. Attach a sawtooth hanger to the back and proudly display your pheasant (out of the reach of your dog!). Srj Fig. 3. Taping the individual pieces together before cutting allows twelve pieces to be cut as one. Fig. 4. Smooth out any irregularities left from cutting out the feathers. The wing is sanded with a 1/4" sanding drum, turn to page 16 for details on how to make one yourself! Fig. 5. Joining the wing pieces. Note the extra material on the bottom left section where the wing assembly will join the body. Fig. 6. With careful cutting and sanding (and a lot of tape), the fifteen wing pieces can be fitted to the body as one piece. |


