Creative Woodworks & crafts 1999-01, страница 40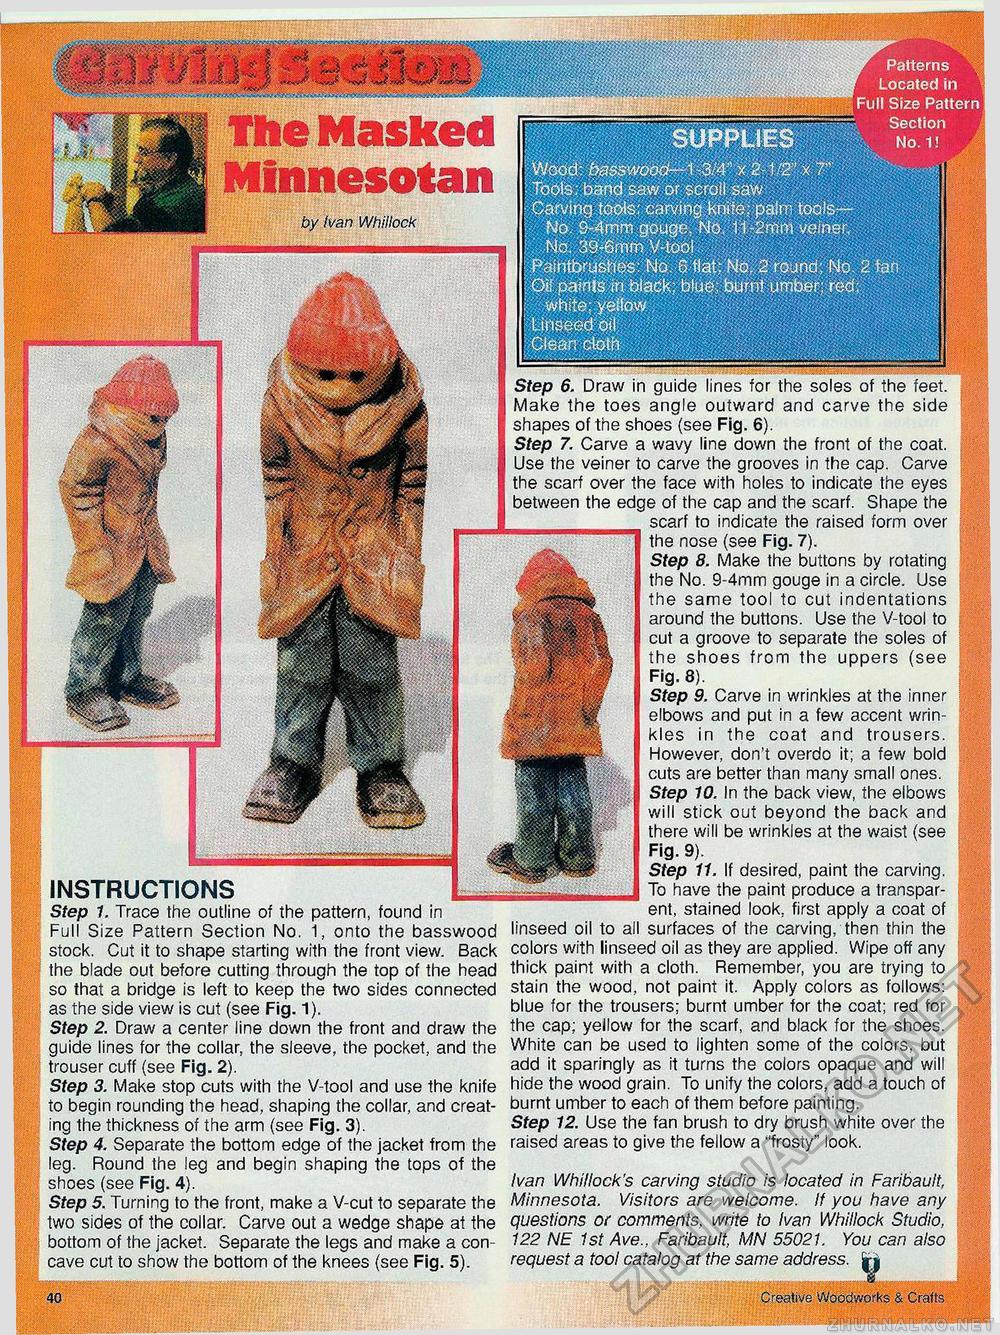
Patterns Bmmm-timm^mM L°cated in Iplli^P^jlpH^PPM^PFull Size Pattern - "supplies "STjj Wood: b$sswood~-1~m'[ x 2-1/2" x 7"' Tools; band saw or scroll saw Carving toots: carving knife: palm tools-No. 9-4mm gouge, No. 11-2mm veiner, ■.",No. 39-6mm V-tool : g Paintbrushes: No. 6 flat; No. 2 round; No. 2 fan Oil paints in black; bluO: burnt umber; red; white, yeffow Linseed otl Clean cloth t The Masked Minnesota!!by Ivan Whillock instructions Step 1. Trace the outline of the pattern, found in Full Size Pattern Section No. 1, onto the basswood stock. Cut it to shape starting with the front view. Back the blade out before cutting through the top of the head so that a bridge is left to keep the two sides connected as the side view is cut (see Fig. 1). Step 2. Draw a center line down the front and draw the guide lines for the collar, the sleeve, the pocket, and the trouser cuff (see Fig. 2). Step 3. Make stop cuts with the V-tool and use the knife to begin rounding the head, shaping the collar, and creating the thickness of the arm (see Fig. 3). Step 4. Separate the bottom edge of the jacket from the leg. Round the leg and begin shaping the tops of the shoes (see Fig. 4). Step 5. Turning to the front, make a V-cut to separate the two sides of the collar. Carve out a wedge shape at the bottom of the jacket. Separate the legs and make a con cave cut to show the bottom of the knees (see Fig. 5). 40 Step 6. Draw in guide lines for the soles of the feet. Make the toes angle outward and carve the side shapes of the shoes (see Fig. 6). Step 7. Carve a wavy line down the front of the coat. Use the veiner to carve the grooves in the cap. Carve the scarf over the face with holes to indicate the eyes between the edge of the cap and the scarf. Shape the scarf to indicate the raised form over the nose (see Fig. 7). Step 8. Make the buttons by rotating the No. 9-4mm gouge in a circle. Use the same tool to cut indentations around the buttons. Use the V-tool to cut a groove to separate the soles of the shoes from the uppers (see Fig. 8). Step 9. Carve in wrinkles at the inner elbows and put in a few accent wrinkles in the coat and trousers. However, don't overdo it; a few bold cuts are better than many small ones. Step 10. In the back view, the elbows will stick out beyond the back and there will be wrinkles at the waist (see Fig. 9). Step 11. If desired, paint the carving. To have the paint produce a transparent, stained look, first apply a coat of linseed oil to all surfaces of the carving, then thin the colors with linseed oil as they are applied. Wipe off any thick paint with a cloth. Remember, you are trying to stain the wood, not paint it. Apply colors as follows: blue for the trousers; burnt umber for the coat; red for the cap; yellow for the scarf, and black for the shoes. White can be used to lighten some of the colors, but add it sparingly as it turns the colors opaque and will hide the wood grain. To unify the colors, add a touch of burnt umber to each of them before painting. Step 12. Use the fan brush to dry brush white over the raised areas to give the fellow a "frosty" look. Ivan Whillock's carving studio is located in Faribault, Minnesota. Visitors are welcome. If you have any questions or comments, write to Ivan Whillock Studio, 122 NE 1st Ave., Faribault, MN 55021. You can also request a tool catalog at the same address. Creative Woodworks & Crafts |


